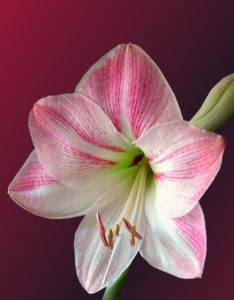
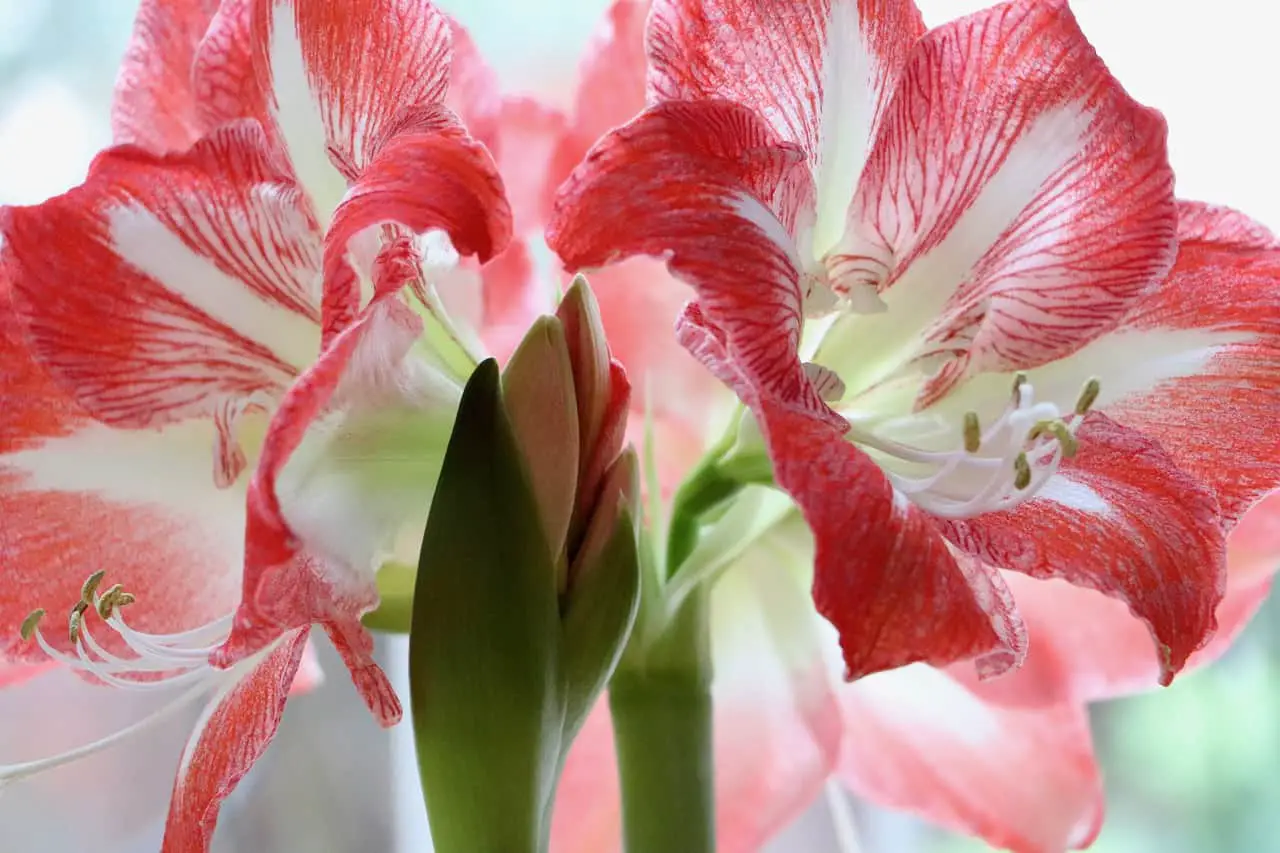
Pink flowers on the article What do you do With Amaryllis Bulbs After They Bloom?
What do you do With Amaryllis Bulbs After They Bloom?

After an amaryllis finishes blooming, remove the spent flowers, cut the stalk to within two inches of the bulb once it yellows, and keep the leaves growing in a bright, warm position.

Feed every two to three weeks through summer, allow the leaves to die back naturally in early autumn, then give the bulb six to ten weeks of cool dry dormancy before repotting to trigger the next flowering cycle.

The flowers have dropped, the stalk is going yellow, and what was a spectacular display a few weeks ago now looks like a collection of floppy green straps in a pot.

It is at this point that most people either shove the bulb in a drawer and forget about it, or throw it away entirely and buy a new one next Christmas.

Both are entirely understandable responses, but both mean missing out on something that gets better with age.

Amaryllis, or more precisely Hippeastrum in the case of the forced indoor varieties sold for the holiday season, are perennial bulbs with a remarkable capacity for longevity.

Well-managed bulbs bloom more reliably and more prolifically each year as they mature.

A bulb in its third or fourth year typically produces thicker stalks, larger flowers, and sometimes two stalks simultaneously.

The work required to get there is modest; it is mainly a matter of understanding what the bulb needs at each stage of its annual cycle and following through consistently.

This guide covers the complete post-bloom care process from the moment the last flower fades through to the next season’s display, explains the biology behind each step so you understand why it matters, and addresses every common mistake that causes bulbs to fail to rebloom.

There is also a full seasonal calendar, a troubleshooting section, a propagation guide for multiplying your bulbs, and a toxicity warning that every household with pets or young children should read.

Understanding the Amaryllis Annual Cycle

The reason most amaryllis bulbs fail to rebloom is not poor care during the post-bloom period but a failure to understand what the bulb is trying to do and when.

Amaryllis does not rest passively after flowering. It has a defined annual cycle with four distinct phases, and interrupting or compressing any one of them undermines the next.

Phase 1: Flowering

The flower stalk and blooms emerge from energy stored in the bulb during the previous growing season.

The bulb is essentially spending its reserves during this phase, which is why feeding at this point does little good.

The leaves may or may not be present during flowering depending on the variety and conditions; some produce flowers before leaves, others alongside them.

Phase 2: Leaf Growth and Bulb Rebuilding

Once flowering is complete, the leaves take over as the primary drivers of recovery.

Through photosynthesis, the leaves replenish the carbohydrate and nutrient reserves in the bulb that were depleted during flowering.

This phase lasts roughly five to six months and is the most important phase for next year’s performance.

Cutting the leaves short, moving the plant to low light, or withholding fertiliser during this period directly reduces the quality of the next flowering cycle.

Phase 3: Dormancy

As day length shortens and temperatures cool in late summer and autumn, the amaryllis naturally begins to wind down.

The leaves yellow and die back, signalling that the bulb is ready to rest. During dormancy the bulb requires no water and no light.

It simply needs a cool, dark environment for six to ten weeks to reset its flowering trigger.

Skipping dormancy is the single most common reason a well-maintained amaryllis fails to flower the following year.

Phase 4: Replanting and Emergence

After dormancy, the bulb is repotted in fresh compost and watered to signal that growing conditions have returned.

Within eight to ten weeks in most cases, a flower stalk emerges.

The timing of this phase can be controlled deliberately, which is how growers reliably produce amaryllis in flower for Christmas, Easter, or any other target date.

Tip: Why Older Bulbs Bloom Better

A common misconception is that amaryllis bulbs degrade with age and need replacing. The opposite is true.

As the bulb matures over successive years, it accumulates more photosynthetic capacity through its larger leaf mass, stores more energy reserves, and eventually develops daughter bulbs that can be separated and grown on.

A five-year-old bulb that has been well managed will reliably produce two stalks with four to six flowers each, compared to the single stalk most newly purchased bulbs produce in their first season.

Immediate Post-Bloom Care: What to Do as Soon as the Flowers Fade

The actions you take in the first week or two after flowering directly affect how well the bulb rebuilds its reserves.

Getting these steps right sets the tone for the entire growing season ahead.

Remove Spent Flowers Promptly

As each individual flower fades, remove it by pinching or cutting cleanly at the base of the individual bloom.

Do not leave faded flowers on the stalk to drop naturally.

The reason is seed production: if spent flowers are left in place, the plant may begin developing seed pods, which consume enormous amounts of energy that should be directed back into the bulb instead.

Even if you never intended to collect seed, a developing pod pulls resources away from bulb recovery for weeks.

Once all the flowers on a stalk have faded, check whether a seed pod is forming at the base of any flower.

If you see a swelling green capsule, remove it immediately with a clean cut.

Unless you are specifically attempting to produce seed for propagation purposes, seed development is a drain you want to prevent.

Managing the Flower Stalk

Leave the flower stalk in place after the blooms have been removed.

The stalk is still photosynthetically active while it remains green and continues to feed the bulb.

Only cut it once it has turned yellow or begun to collapse, at which point it is no longer contributing anything useful and is better removed to reduce the risk of fungal issues at the cut site.

When you do cut the stalk, use a clean, sharp blade and cut to within two to three centimetres of the top of the bulb.

Do not cut flush with the bulb as this can damage the basal plate. Do not leave a long stump, as dead plant material left close to the bulb can become an entry point for fungal rot.

After cutting, allow the cut surface to dry for a few hours before watering.

Dusting the cut with powdered cinnamon is optional but provides a mild antifungal effect if you have had rot issues previously.

Protecting and Encouraging the Leaves

This is the step most commonly shortchanged, and it matters more than any other part of post-bloom care.

The leaves must be kept healthy and growing for the full five to six months of the growing season because they are the mechanism by which the bulb rebuilds itself.

Move the plant to the brightest available position, ideally a south or west-facing windowsill with several hours of direct sunlight.

If you are in a region where outdoor summer temperatures are mild, moving the pot outside from May through to early September produces significantly better leaf growth and bulb recovery than keeping it indoors year-round.

Outdoors, the combination of stronger sunlight, natural rainfall, and temperature variation accelerates the bulb-rebuilding process noticeably.

Summer Care: Feeding, Watering, and Growing the Bulb On

The summer growing period is when the bulb does most of its recovery work.

Your role during this phase is straightforward: provide consistent nutrition, appropriate moisture, and maximum light, then let the plant do what it is designed to do.

Fertilising

Begin feeding approximately two weeks after the flower stalk has been cut and the leaves are actively growing.

Use a balanced liquid fertiliser with an NPK ratio in the region of 10-10-10 or similar, applied every two to three weeks throughout the growing season.

The nitrogen supports leaf growth, the phosphorus supports root development and bulb rebuilding, and the potassium supports overall cellular health and flowering potential.

Switch to a low-nitrogen, high-potassium feed such as a tomato fertiliser in July and August.

At this stage the goal shifts from building leaf mass to encouraging the bulb to store the maximum amount of carbohydrates for the next flowering cycle.

High-nitrogen feeds in late summer push the plant toward continued leaf production when it should be beginning to consolidate energy rather than expand growth.

Stop feeding entirely by early September, approximately four to six weeks before you intend to begin inducing dormancy.

Continued feeding at this point delays the natural wind-down of the leaves and can disrupt the dormancy trigger.

Watering

Water consistently throughout the growing season, allowing the top inch or two of compost to dry between waterings.

Amaryllis does not like to sit in wet compost and is susceptible to basal rot if the roots remain waterlogged for extended periods.

In summer heat, particularly if the pot is outside, this may mean watering every three to four days. In cooler indoor conditions it may be once a week.

The compost should never be bone dry for extended periods during the growing season, as this stresses the leaves and slows bulb recovery.

The goal is consistent moisture rather than the drought-tolerant treatment that applies during dormancy.

Moving Outside for Summer

Moving your amaryllis outside after the risk of frost has passed, typically from mid-May in most of the UK and the northern US, produces noticeably better results than keeping it indoors year-round.

The stronger outdoor light drives more vigorous photosynthesis, the natural rainfall helps maintain consistent moisture, and the cooler nights in late summer provide a natural signal that begins the transition toward dormancy without you needing to manage it artificially.

Acclimatise the plant gradually rather than moving it directly from a windowsill into full sun. Start with a sheltered spot in bright indirect light for a week, then move to its summer position.

Leaves that have grown in indoor light conditions are not adapted to the higher UV levels outside and can scorch if the transition is too abrupt.

Once acclimatised, a south or west-facing position with good air movement is ideal.

Use a pot with adequate drainage holes and raise it slightly off the ground on pot feet or bricks to prevent waterlogging during heavy rain.

Check regularly for slug damage during the outdoor period, as amaryllis leaves are palatable to slugs.

Tip: Repotting Into a Larger Container in Summer

If your amaryllis has been in the same pot for two or more years, summer is the best time to assess whether it needs moving up a size.

Tip the bulb from its container and check the roots. If they are circling the base of the pot or emerging from the drainage holes, step up to a pot one size larger, typically 15 to 20 centimetres in diameter.

Amaryllis performs better with slightly restricted roots, so do not jump to a very large pot.

A gap of roughly 2 to 3 centimetres between the bulb and the pot wall on all sides is the right amount of space.

Inducing Dormancy: The Step Most Gardeners Skip

Dormancy is the non-negotiable requirement for reliable reblooming, and it is the phase that is most consistently skipped or underestimated.

An amaryllis that is kept warm, watered, and in light year-round will continue to produce leaves but will rarely produce flower stalks, because the cool dry rest period is the trigger that initiates bud formation inside the bulb.

Recognising When the Bulb Is Ready for Dormancy

In late summer and early autumn, the leaves will naturally begin to yellow and soften. This is the bulb’s signal that it is ready to rest.

Do not interpret yellowing leaves at this stage as a watering or nutrient problem. Resist the urge to water more or feed the plant. The yellowing is a healthy and expected transition, not a sign of distress.

If you want to control the timing of dormancy precisely, for example to have the bulb in flower for a specific date, you can induce dormancy artificially by stopping watering and moving the bulb to a cool, dark location in late summer regardless of what the leaves are doing.

The leaves will yellow and die back in response to the dry, dark conditions within two to three weeks.

How to Store the Bulb During Dormancy

Once the leaves have yellowed, cut them back to within two to three centimetres of the bulb neck and brush away any loose or dead leaf material from the bulb surface.

Inspect the bulb for any soft, discoloured, or mushy patches that could indicate the beginnings of rot.

If you find any, cut them back to clean tissue with a sterile blade, dust with cinnamon, and allow the surface to dry before storage.

The bulb can be stored either in its pot with completely dry compost, or removed from the pot and stored bare-root.

Bare-root storage is slightly more reliable because you can monitor the bulb condition more easily and the absence of any moisture in the compost is guaranteed.

Place bare bulbs in a paper bag, a mesh bag, or an open cardboard box with some dry vermiculite or newspaper to absorb any residual moisture.

Never store in a sealed plastic bag, which traps humidity and promotes fungal rot.

Store in a cool, dark location at a temperature of 10 to 13 degrees Celsius (50 to 55 degrees Fahrenheit).

A garage, basement, or unheated spare room typically provides the right conditions.

The storage period should last a minimum of six weeks and ideally eight to ten weeks for the best flowering response.

Extending beyond twelve weeks does not generally improve results and may cause the bulb to begin losing condition.

What Happens During Dormancy

During the dormancy period the bulb is not simply resting passively.

The cool, dry conditions trigger a hormonal reset inside the bulb that initiates the development of the flower bud within the central growing point.

This process, called vernalisation in the technical sense, requires a sustained period below a certain temperature threshold to complete.

If the storage period is too warm, too short, or too moist, the hormonal trigger is not fully activated and the bulb produces leaves but no flower stalk the following season.

Warning: Do Not Store Near Ethylene-Producing Fruit

Apples, bananas, and other ripening fruits produce ethylene gas as they mature, and ethylene in significant concentrations can prevent amaryllis bulbs from flowering by disrupting the dormancy process.

Store your amaryllis bulbs well away from fruit bowls, fruit storage areas, and ripening produce.

A garage shelf or basement cupboard that does not double as a fruit store is ideal. This is a specific practical detail that most general storage guides omit.

Repotting After Dormancy: Timing, Compost, and Technique

Repotting correctly after dormancy is what converts a stored bulb back into a flowering plant.

The compost type, pot size, and planting depth all affect how quickly the bulb establishes and how well it flowers.

Timing the Repot for a Target Bloom Date

Amaryllis takes approximately eight to ten weeks from repotting to flowering in most conditions, with some variation between varieties.

To calculate your repotting date, count back eight to ten weeks from your target flower date. For Christmas flowering, repot in early to mid-October.

For Easter, repot in late January or early February and for a general late winter display, repot anytime from November onward after the dormancy period is complete.

Placing the freshly potted bulb in a slightly warmer location, around 18 to 21 degrees Celsius, for the first two to three weeks after repotting accelerates root establishment and encourages the flower stalk to emerge sooner.

Once the stalk is visible, move to your preferred display position.

Choosing the Right Compost

Amaryllis performs best in a well-draining compost that retains some moisture without becoming waterlogged.

A general-purpose peat-free multipurpose compost mixed with 20 to 25 percent perlite provides good drainage and adequate nutrient content for the first six to eight weeks.

Alternatively, a proprietary bulb compost or loam-based John Innes No. 2 compost is a reliable choice and has slightly better long-term structural stability than multipurpose compost, which breaks down more quickly with repeated watering.

Avoid using soil from the garden directly, as it compacts in containers, drains poorly, and may introduce pests or diseases.

If you want to add organic matter beyond what is in the compost, a small amount of well-rotted compost mixed in improves nutrient availability without compromising drainage.

Planting Depth and Pot Size

Plant the bulb so that approximately one-third to one-half of it sits above the compost surface.

The upper portion of the bulb, including the neck, should be exposed rather than buried.

Planting too deeply is a common mistake that delays flowering and increases the risk of neck rot by keeping the base of the leaves in contact with moist compost.

Choose a pot that allows roughly 2 to 3 centimetres of clearance between the bulb and the pot wall on all sides. Amaryllis flowers better in slightly restricted conditions than in a very large pot where the compost volume greatly exceeds the root volume. A 15 to 20 centimetre pot suits most single bulbs.

If the bulb has produced daughter bulbs that you want to keep attached for a multi-stem display, a pot 20 to 25 centimetres in diameter gives enough space for both the main bulb and its offsets.

Watering After Repotting

Water lightly after repotting to settle the compost, then wait until you see signs of active growth, either a leaf tip or a flower stalk emerging, before watering again.

Watering heavily before roots are established risks sitting the base of the bulb in moist compost with nowhere for the moisture to go, which is a common cause of basal rot in newly potted bulbs.

Once active growth appears, water more regularly, allowing the top inch of compost to dry between waterings.

The rate at which the compost dries increases as the plant develops, so what felt like appropriate restraint in the first two weeks may need to be adjusted as the leaves and stalk grow and the plant’s water demand increases.

Month-by-Month Amaryllis Care Calendar

Use this calendar as a reference for managing your bulb through the complete annual cycle.

Timing assumes a target of Christmas or early winter flowering and is given for UK and northern US conditions. Adjust by two to four weeks for warmer climates.

MonthPhaseKey Tasks
November to DecemberFloweringDisplay in bright, cool room. Remove spent flowers promptly. Do not feed.
JanuaryPost-bloom / early recoveryCut stalk once yellowed. Move to brightest available windowsill. Begin light watering.
February to MarchLeaf growthBegin feeding every 2 to 3 weeks with balanced fertiliser. Maintain consistent watering.
April to MayActive leaf growthContinue feeding. Move outside gradually after last frost. Full sun position outdoors.
June to JulyPeak growing seasonContinue balanced feed. Water regularly. Check for pests. Consider repotting if root-bound.
AugustLate seasonSwitch to high-potassium feed. Reduce nitrogen. Begin reducing watering slightly.
Early SeptemberPre-dormancyStop feeding entirely. Reduce watering further. Allow leaves to yellow naturally.
Late September to OctoberInducing dormancyBring indoors if outside. Stop watering completely. Move to cool, dark location.
October to NovemberDormancy storageStore at 10 to 13 degrees Celsius in dark. Check bulb monthly for signs of rot. No water.
Early to mid-OctoberRepottingAfter 8 to 10 weeks of dormancy, repot in fresh compost. Water lightly. Move to warmth.
NovemberRe-emergenceWatch for stalk emergence. Move to display position once stalk is 5 to 8 cm tall.

Troubleshooting: Why Your Amaryllis Is Not Reblooming

The most common complaint after following the post-bloom care process is that the bulb produces leaves but no flower stalk.

Understanding why this happens prevents the same outcome the following year.

Dormancy Period Was Too Short or Too Warm

This is the most frequent cause of leaf-only growth. If the bulb was stored for fewer than six weeks, or stored in conditions warmer than around 15 degrees Celsius, the vernalisation trigger was not fully activated.

The remedy is to extend the next dormancy period to a full eight to ten weeks in genuinely cool conditions.

A thermometer in the storage location confirms whether the temperature is appropriate.

Leaves Were Cut Back Too Early

Removing healthy green leaves before they have yellowed naturally cuts short the bulb-rebuilding phase.

A bulb that enters dormancy with insufficient reserves will either fail to flower or produce a weak, short stalk with small flowers.

Allow the leaves to complete their full growing season before cutting them back.

Insufficient Light During the Growing Season

Amaryllis kept in low-light conditions through the summer produces less effective photosynthesis and stores fewer reserves in the bulb.

A plant on a dim windowsill for six months will enter dormancy with depleted energy compared to one that spent the summer on a sunny terrace.

Moving the plant to maximum available light from the moment flowering ends is one of the most impactful single changes you can make to improve reblooming.

Overwatering During Dormancy

Any moisture reaching the bulb during dormancy can trigger premature growth, disrupting the dormancy period and producing weak, out-of-season leaf growth rather than the properly timed flower stalk.

This is particularly common when the bulb is left in its pot during dormancy and a well-meaning family member waters it.

If the bulb produces a leaf tip during dormancy, move it back to a brighter, warmer location and treat it as the new growing season rather than attempting to push it back into dormancy.

The Bulb Is Too Small

Newly purchased bulbs that are smaller than about 26 to 28 centimetres in circumference may produce only leaves in their first year after reblooming as they are not yet large enough to support flowering.

This is normal and not a failure of care. Continue the growing cycle and the bulb will typically reach flowering size in the following season with good feeding and light.

SymptomMost Likely CauseHow to ConfirmSolution
Leaves only, no flower stalkInsufficient dormancyStorage was warm or too briefExtend next dormancy to 8 to 10 weeks in cool dark conditions
Stalk emerges but no flowers openBud blast from cold draughtPlant near cold window or doorMove to stable temperature away from cold air
Stalk is very short and weakBulb reserves depletedLeaves were cut early or summer light was poorImprove light and feeding in next growing season
Flower colours are fadedInsufficient light during bloomPlant in low-light positionMove to brighter spot; avoid direct harsh sun on open flowers
Bulb is soft or mushy at baseBasal rotDark discolouration at bulb baseCut to clean tissue; dust with cinnamon; improve drainage
Leaves yellowing in summerOverwatering or root rotSoil wet; roots dark and softReduce watering; check roots; repot if damaged
Leaves yellowing in autumnNatural dormancy triggerLate summer timing; leaves agedNormal; allow to complete and begin dormancy process
No growth after repottingOverwatering before roots establishedSoil stayed wet for first 2 weeksAllow compost to dry; check bulb base for rot; resume light watering

Propagating Amaryllis: How to Multiply Your Bulbs

One of the most satisfying aspects of keeping amaryllis year after year is that the bulbs multiply over time.

Mature bulbs routinely produce daughter bulbs, also called offsets or bulblets, that can be separated and grown on into independent flowering plants.

There are also more advanced propagation methods for growers who want to produce larger numbers of plants from a single bulb.

Separating Daughter Bulbs

Daughter bulbs form at the base of the main bulb and are visible as small bulges that gradually develop their own roots and leaf shoots over one to two years.

They should be left attached to the main bulb until they are at least the size of a golf ball and ideally have developed a few of their own leaves, as separation before this point produces very small bulbs that take longer to reach flowering size.

Separate at repotting time by gently twisting the offset away from the main bulb. If the attachment is firm, use a clean, sharp blade to cut between them rather than forcing the connection.

Any cut surfaces should be dusted with cinnamon and allowed to dry for a few hours before potting.

Plant the offset in a small pot, 8 to 10 centimetres, with the same compost mix used for the main bulb, and care for it through the same annual cycle.

Expect it to reach flowering size in two to three years.

Scaling

Scaling is a more advanced propagation method that produces multiple new bulblets from a single parent bulb.

The bulb is removed from its pot and each of the outer scales is carefully separated from the bulb, ensuring that each scale retains a small section of the basal plate at its base.

The scales are then placed in barely moist vermiculite or perlite in a sealed bag and kept at around 20 to 25 degrees Celsius for eight to twelve weeks.

Small bulblets develop at the base of each scale where the basal plate section was retained. Once visible, the bulblets can be potted individually and grown on.

This method is more time-intensive than offset separation but produces a larger number of new plants from a single bulb and is particularly useful for propagating varieties that produce few natural offsets.

Growing from Seed

Amaryllis can be grown from seed, but the process is slow and the results unpredictable in terms of flower colour and form, as crosses between varieties produce variable offspring.

To collect seed, allow a seed pod to develop fully after pollination, which takes around four to six weeks.

The pod will split when ripe, revealing flat, black seeds. Sow immediately in moist compost at around 20 degrees Celsius.

Germination takes two to four weeks. Seedlings typically take three to five years to reach flowering size.

Growing from seed is most rewarding if you are interested in producing new colour variations or if you specifically want to multiply a variety that is difficult to find commercially.

For most growers, offset separation is a far more practical and faster route to additional plants.

Warning: Amaryllis Is Toxic to Cats, Dogs, and People

All parts of the amaryllis plant, including the bulb, leaves, and sap, contain lycorine and other alkaloids that are toxic to cats, dogs, and people if ingested.

In pets, symptoms of ingestion include vomiting, diarrhoea, lethargy, excessive salivation, and in severe cases tremors and low blood pressure.

The bulb contains the highest concentration of toxins. Keep plants and stored bulbs out of reach of pets and young children at all times.

Wear gloves when handling the bulb, particularly when cutting or dividing it, and wash hands thoroughly after handling any part of the plant.

Popular Amaryllis Varieties and What to Expect from Each

The variety you are growing affects how it performs through the reblooming cycle.

Some varieties produce flowers earlier after repotting, some are more vigorous reboomers, and some are better suited to outdoor summer growing than others.

The following are among the most widely available and reliable.

VarietyFlower ColourWeeks to FlowerNotes
Red LionDeep crimson red8 to 10 weeksThe classic Christmas amaryllis. Very reliable rebloomer. Large flowers.
Apple BlossomWhite with pink blush8 to 10 weeksOne of the most popular varieties. Elegant and reliable.
MinervaRed with white star8 to 10 weeksStriking bicolour. Strong stems. Very good for reblooming.
Lemon LimePale yellow-green9 to 11 weeksUnusual colour. Performs well as a rebloomer with consistent care.
CharismaSalmon pink and white8 to 10 weeksGood vigour. Often produces two stalks from mature bulbs.
Double DragonRed and white double9 to 12 weeksDouble-flowered form. Heavier heads may need support.
Papilio (Butterfly)Greenish white with red veins10 to 12 weeksSemi-evergreen in mild climates. Unusual markings. Excellent rebloomer.
Christmas GiftPure white8 to 9 weeksClean white flowers. Reliable and consistent in timing.
UK Reader Note: Growing Amaryllis Outdoors in the UK

Standard Hippeastrum varieties are not frost-hardy and cannot be left outside year-round in any part of the UK.

However, the closely related Amaryllis belladonna, the true amaryllis or belladonna lily, is hardy to around minus 5 degrees Celsius and can be grown as a permanent outdoor bulb in sheltered, well-drained positions in the south and south-west of England.

It flowers in late summer on bare stalks before the leaves appear, producing fragrant pink trumpet flowers that are quite different in character from the forced Hippeastrum sold for indoor winter display.

The RHS rates Amaryllis belladonna as H3. For all other references in this article, the plant described is Hippeastrum, which requires indoor or greenhouse management year-round in the UK.

Frequently Asked Questions

Can I keep my amaryllis bulb from year to year?

Yes, and doing so produces progressively better results over time. Amaryllis bulbs are perennial and can live for decades with appropriate care.

A well-maintained bulb improves year on year as it builds reserves and develops daughter bulbs.

The key requirements are a full growing season of bright light and regular feeding after flowering, a genuine cool dry dormancy period of six to ten weeks, and repotting in fresh compost each year.

Bulbs kept under these conditions reliably rebloom annually and grow increasingly impressive over successive seasons.

How do I get my amaryllis to bloom for Christmas?

To achieve a Christmas flowering, count back eight to ten weeks from your target date and use that as your repotting date, which puts it in early to mid-October.

The bulb should have completed its dormancy period of at least six to eight weeks in cool, dark, dry conditions before that repotting date, meaning dormancy should begin in late August or early September.

After repotting, place the bulb in a warm position of around 18 to 21 degrees Celsius to encourage rapid root and stalk development.

Once the stalk is 10 to 15 centimetres tall, move it to a cooler display position to slow the development slightly and extend the flowering period over the holiday season.

Why does my amaryllis produce leaves but no flowers?

The most common cause is an insufficient dormancy period. If the bulb was not given at least six weeks of cool, dark, dry storage, the hormonal trigger for flower bud formation was not activated and the bulb produces only vegetative growth.

The second most common cause is inadequate rebuilding during the growing season, either from insufficient light, early removal of the leaves, or lack of feeding.

Both issues compound each other: a bulb that entered dormancy with depleted reserves is less likely to flower even if the dormancy conditions are correct.

Address both the dormancy quality and the growing season quality in the same year for the best chance of reliable reblooming.

Should I cut the leaves off my amaryllis after it blooms?

No. The leaves should be kept growing and healthy for the full five to six months of the growing season after flowering.

They are the mechanism through which the bulb rebuilds the energy reserves it spent during the flowering phase.

Cutting healthy green leaves short or removing them early significantly reduces the amount of energy stored in the bulb, which directly impacts the quality and reliability of the next flowering cycle.

Only cut the leaves once they have yellowed naturally in late summer or early autumn as part of the normal transition to dormancy.

How long does it take for amaryllis to rebloom after dormancy?

Most amaryllis varieties take eight to ten weeks from repotting to produce open flowers. Some faster varieties can flower in six to seven weeks from repotting.

Slower or double-flowered varieties may take eleven to twelve weeks.

Temperature affects the speed significantly: a warmer location during the initial root-establishment phase of two to three weeks after repotting accelerates development, while a cooler position slows it.

You can use this deliberately to control the timing of the display, warming the bulb to push it forward or keeping it cooler to hold it back if the stalk is developing faster than your target date.

Can amaryllis bulbs be stored in the refrigerator?

This is a practice sometimes recommended, particularly in very warm climates where finding a naturally cool storage location is difficult.

It can work, but there are important caveats. The refrigerator must be a fruit-free zone, as ethylene from ripening fruit can prevent the bulb from flowering.

The bulb must be completely dry before refrigerator storage, as any residual moisture in a cold, enclosed environment promotes fungal rot very rapidly.

Temperatures in the refrigerator are typically cooler than the ideal 10 to 13 degrees Celsius range, so shorter storage periods of six to seven weeks are generally sufficient rather than the eight to ten weeks used at warmer cool storage temperatures.

How many times can an amaryllis bulb bloom in a year?

Under normal annual cycle management, an amaryllis bulb blooms once per year.

However, a very large, well-established bulb will sometimes produce a second stalk a few weeks after the first, which effectively extends the flowering period rather than constituting a second annual bloom.

It is possible to manipulate the cycle to produce two distinct bloom periods per year by compressing the growing and dormancy phases, but this is a specialised technique that risks exhausting the bulb if not managed carefully.

For most growers, one exceptional annual display from a well-managed bulb is a far better outcome than two mediocre ones from a bulb pushed beyond its natural rhythm.

What is the difference between amaryllis and Hippeastrum?

True amaryllis refers to Amaryllis belladonna, a South African species that produces pink, fragrant flowers in late summer on bare stalks, before the leaves emerge.

It is a different plant from the forced indoor bulbs sold as amaryllis for Christmas. Those plants are Hippeastrum, a genus from South America.

The confusion arises because Hippeastrum was historically classified within the amaryllis genus and the common name stuck.

In practical terms, if you bought a large bulb in a box for indoor winter flowering, it is almost certainly a Hippeastrum.

The care described throughout this article applies specifically to Hippeastrum. Amaryllis belladonna is hardier, grows outdoors in mild climates, and requires different management.

Key Takeaways

  1. Remove spent flowers immediately after they fade to prevent the plant from diverting energy into seed production. Leave the stalk green until it yellows, then cut to within two to three centimetres of the bulb.
  2. Protect and grow the leaves for the full five to six months after flowering. They are the mechanism by which the bulb rebuilds its energy reserves for the next season. Cutting them early reduces the quality and reliability of reblooming.
  3. Feed every two to three weeks throughout the growing season, switching from a balanced fertiliser to a high-potassium feed in July and August, then stopping entirely by early September.
  4. Move the pot outside after the risk of frost has passed for stronger light and more vigorous bulb recovery. Acclimatise gradually over one to two weeks to prevent leaf scorch.
  5. Provide a genuine dormancy period of six to ten weeks in cool, dark, dry conditions at 10 to 13 degrees Celsius. This is non-negotiable for reliable reflowering. Skipping or shortening dormancy is the primary cause of leaf-only growth the following season.
  6. Store dormant bulbs away from ripening fruit. Ethylene gas from apples and bananas disrupts the dormancy process and can prevent flowering.
  7. Repot in fresh, well-draining compost with the top third to half of the bulb above the soil surface. Water lightly after repotting and wait for visible growth before watering again.
  8. Count back eight to ten weeks from your target flower date to calculate the correct repotting date. For Christmas flowering, repot in early to mid-October after completing dormancy.
  9. Keep all parts of the plant away from pets and children. Amaryllis is toxic to cats, dogs, and people, with the bulb containing the highest concentration of harmful alkaloids.

A Bulb Worth Keeping

There is something particularly satisfying about a Christmas amaryllis that you grew yourself from a bulb that has been in your household for five or ten years.

The flowers are the same spectacular display, but the context is entirely different. You know the bulb spent the summer on a south-facing terrace.</p&gt;

You know it had its cool autumn rest in the gar

age. You know the stalk that appeared in November is the result of a continuous chain of small decisions made throughout the year.

The process is genuinely not difficult once you understand what the bulb needs at each stage.

The work involved across the full year amounts to a few minutes every week or two during the growing season and almost nothing during dormancy.

What it requires is consistency rather than effort: keeping the leaves going when you might be tempted to tidy them away, giving the bulb its cool dark rest when it needs one, and repotting at the right moment rather than when it happens to be convenient.

Follow the annual cycle outlined in this guide, and within two or three years you will have a bulb that has become genuinely reliable, potentially producing two stalks simultaneously with four to six flowers each, and a growing collection of daughter bulbs to give to friends and family.

That is a very good return on a single plant.

What to Do Next

Look at your amaryllis right now and identify which phase of the annual cycle it is in.

If the flowers have just faded, remove any developing seed pods, leave the stalk until it yellows, and move the pot to your brightest windowsill today.

If the leaves have been growing for a while, check when you last fed it and whether it has access to enough light.

If it has already yellowed and you have not yet moved it to cool storage, do that this week.

The single most impactful change most growers can make is to start the dormancy period at the right time rather than letting the bulb sit in warm, lit conditions through the autumn with no dormancy trigger.


Hi, I'm Matt,
An amateur gardener with a houseplant habit that got slightly out of hand.
I started Bean Growing to share what I've learned from a few years of trial, error, and the occasional dead plant.
I grow a mix of houseplants and outdoor shrubs in the UK but try to expand my knowledge to the US. I try to write about what actually works