
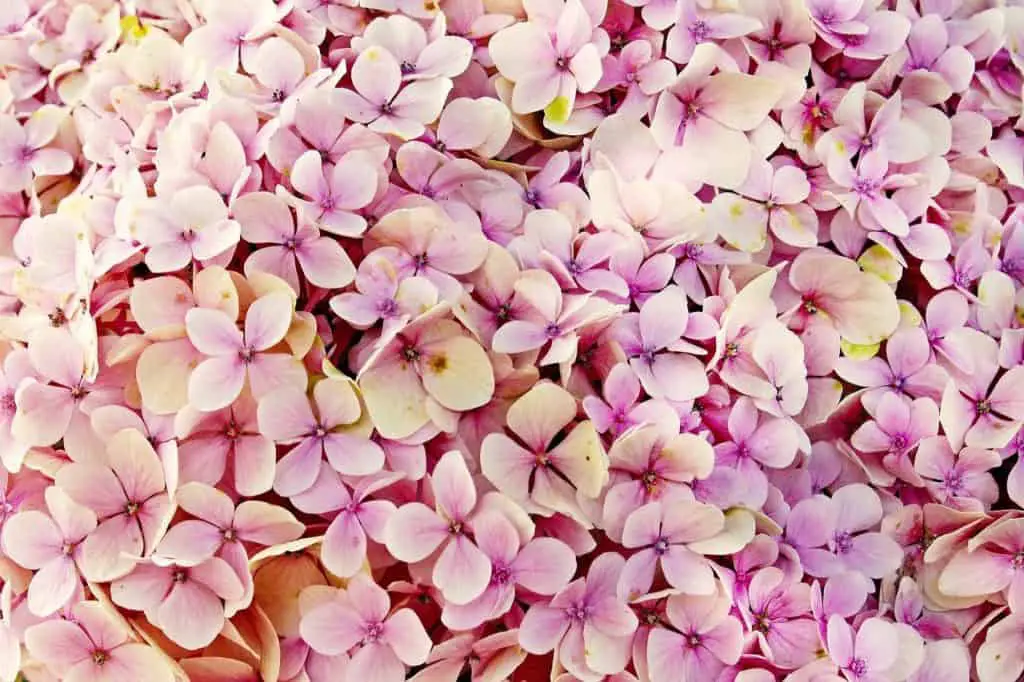
Natural fertilizers for hydrangeas include compost tea, grass clipping nitrogen tea, banana peel meal, coffee grounds, wood ash, fish emulsion, and aquarium water.
Each targets a specific plant need: nitrogen for leaf growth, phosphorus and potassium for flower production, and aluminium or iron for colour adjustment in bigleaf varieties.
The type and timing of fertiliser matters as much as the source, with most feeding carried out between March and August and stopped completely in late summer to allow stems to harden before winter.
Hydrangeas have a reputation for being demanding.
In practice, the most common problems, no flowers, wrong colour, leaves turning yellow, stems dying back in winter, each trace back to one or two specific care decisions.
Understanding why those decisions matter is more useful than a list of rules, because it allows you to adapt to your specific soil, climate, and hydrangea type rather than following generic advice that may not apply.
This guide covers the complete care requirements for all five main hydrangea types, explains the science behind colour change in bigleaf varieties, provides a full natural fertiliser guide with application methods and timings, and includes a troubleshooting table, pest guide, video resources, and eight standalone FAQ answers.
Understanding the Five Main Hydrangea Types
Not all hydrangeas are the same plant in different colours.
The five main types differ significantly in their pruning requirements, sun tolerance, cold hardiness, and fertiliser response.
Fertilising or pruning the wrong type in the wrong way is one of the most common reasons hydrangeas underperform.
| Type | Botanical Name | Flower Colour | Blooms On | Sun Preference | Hardiness |
| Bigleaf (Mophead / Lacecap) | Hydrangea macrophylla | Pink, blue, purple, white (pH-dependent) | Old wood | Morning sun, afternoon shade | USDA zones 5-9; RHS H5 |
| Panicle | Hydrangea paniculata | White aging to pink | New wood | Full sun to part shade | USDA zones 3-8; RHS H6 |
| Smooth | Hydrangea arborescens | White or pink | New wood | Part shade preferred | USDA zones 3-9; RHS H6 |
| Oakleaf | Hydrangea quercifolia | White to pinkish tan | Old wood | Part to full shade | USDA zones 5-9; RHS H5 |
| Climbing | Hydrangea anomala petiolaris | White lacecap | Old wood | Part shade to shade | USDA zones 4-8; RHS H5 |
Why this matters for fertilising: bigleaf hydrangeas are the most sensitive to soil chemistry and the type most likely to respond visibly to amendments.
Panicle and smooth hydrangeas tolerate a wide range of soil conditions and need lighter management.
Oakleaf and climbing hydrangeas prefer lower-fertility conditions and do best with modest inputs rather than regular feeding.
What Hydrangeas Need From Soil and Fertiliser
Before choosing what to feed hydrangeas, understanding what each nutrient does and why prevents the common mistake of applying a general-purpose feed when a targeted input would work better.
Nitrogen: Leaf Growth and Vigour
Nitrogen drives leafy vegetative growth and maintains the deep green colour of healthy hydrangea foliage.
A nitrogen-deficient plant has pale, yellowish leaves and slow, weak growth.
Too much nitrogen in summer produces abundant foliage but suppresses flowering, because the plant channels its resources into leaves rather than flower buds.
Nitrogen inputs are most appropriate in early spring and should be reduced or stopped entirely by late June.
Phosphorus: Roots and Flower Production
Phosphorus supports root establishment in newly planted hydrangeas and is associated with bud formation in established plants.
Deficiency in phosphorus can produce purple-red discolouration on leaf undersides and poor flowering.
Bone meal is the most accessible natural phosphorus source and is particularly useful at planting time and in early spring when buds are being set.
Potassium: Stem Strength and Disease Resistance
Potassium regulates water movement within plant cells, supports disease resistance, and develops the strong stems that hold large hydrangea flower heads upright.
A potassium-deficient plant may have floppy stems, brown leaf edges, and reduced resistance to disease.
Wood ash and banana peel are the most accessible natural potassium sources for home gardeners.
Iron: Green Foliage in Alkaline Soils
Iron deficiency shows as yellowing between the leaf veins while the veins remain green, most common in alkaline soils where iron is present but locked in an unavailable form.
Lowering soil pH, rather than adding more iron, is usually the most effective fix as it makes existing iron accessible.
Aluminium: The Colour-Change Mineral
This is the nutrient most gardeners are unaware of, yet it explains the colour-change behaviour that makes bigleaf hydrangeas so distinctive. Blue and purple pigments in bigleaf hydrangea flowers are produced when the plant has access to aluminium ions in the soil.
Aluminium availability is controlled by pH: in acidic soil below pH 6, aluminium is freely available and flowers are blue to purple.
In alkaline soil above pH 7, aluminium is locked unavailable and flowers are pink.
Neutral soil produces lavender or mixed tones.
White-flowering bigleaf varieties do not respond to aluminium and maintain white flowers regardless of soil pH.
| Watch: The Science Behind Hydrangea Colour Change This video covers how pH and aluminium work together to change hydrangea flower colour, with real garden demonstrations: How to Change the Color of Your Hydrangea Flowers The Scoop on Hydrangea Magic – HOW TO Turn Them Blue, Pink and Beyond: |
Natural Fertilizers for Hydrangeas: How Each One Works and How to Apply It
1. Compost and Compost Tea
Well-rotted garden compost is the most broadly beneficial natural amendment available.
It improves soil drainage in clay, improves moisture retention in sandy soils, provides a gentle balanced slow-release nutrient source, and supports the microbial activity that makes nutrients available to roots.
Apply as a 5 to 8 centimetre mulch layer around the base of the plant in spring, keeping it clear of the main stems.
Compost tea delivers these benefits in liquid form.
Fill a bucket two-thirds with well-rotted compost or aged manure, top with water, and steep for twenty-four to forty-eight hours, stirring daily.
Strain through muslin, dilute the liquid until it looks like weak tea, and apply directly to the root zone.
This provides immediately available soluble nutrients that complement the slower release of a surface compost mulch.
2. Grass Clipping Nitrogen Tea
Fresh grass clippings are high in nitrogen as young, actively growing plant tissue.
Fill a bucket two-thirds with fresh clippings, top with water, and steep for three to five days, stirring once daily.
The liquid turns murky green-brown as nitrogen is released.
Strain, dilute two parts water to one part liquid, and apply to the root zone.
Do not apply undiluted as it can be too concentrated for fine roots.
Use in early to mid-spring for the initial growth flush.
Avoid applying after late June, as this pushes nitrogen-driven leaf growth at the time when you want the plant directing energy toward flowers.
3. Banana Peel Meal
Banana peels provide potassium, with smaller amounts of phosphorus and trace minerals.
To prepare: dry several peels in an oven at 90 degrees Celsius or in direct sun until brittle, then grind or crush to a coarse powder.
Sprinkle around the base of the plant extending to the drip line and water in.
The material breaks down in the soil over several weeks, releasing potassium gradually.
Alternatively, cut fresh banana peels into small pieces and bury 5 to 8 centimetres deep in the root zone.
Apply banana peel meal in May and June to support bud development and strong stem formation.
4. Coffee Grounds
Coffee grounds lower soil pH over time, provide nitrogen as they decompose, and support soil microbial activity.
This makes them directly useful for bigleaf hydrangeas in alkaline soils where you want to encourage blue flowers.
In soils that are already acidic, or for hydrangeas you want to keep pink, coffee grounds are counterproductive.
Apply as a thin layer of no more than 1 centimetre mixed into the top inch of soil.
Do not apply in thick layers, which creates a crust that repels water.
For a liquid application, steep two to three tablespoons of used grounds in four litres of water for twenty-four hours, strain, and apply directly to the root zone.
| Tip: Coffee Grounds and pH Change Are Gradual A small amount of coffee grounds applied regularly through the season may lower soil pH by 0.5 to 1 unit over a full growing season in light soils. For meaningful colour change in bigleaf hydrangeas, combine coffee grounds with aluminium sulfate watered in monthly. Coffee grounds alone will not produce dramatic colour change within a single season. |
5. Wood Ash
Wood ash from a wood-burning stove is a natural source of potassium and calcium that also raises soil pH.
It is the correct amendment when the soil is acidic and you want to shift bigleaf hydrangea flowers toward pink, or when potassium is deficient and raising pH is acceptable.
Never apply wood ash to already-neutral or alkaline soil, and never apply if you want to maintain or shift toward blue flowers.
Apply sparingly at around 50 to 100 grams per square metre in early spring, watered in well, and keep it away from the main stems.
6. Fish Emulsion
Fish emulsion is a balanced, fast-acting natural fertiliser with moderate levels of nitrogen, phosphorus, and potassium.
It is particularly useful for newly planted hydrangeas and for recovering plants, providing a quickly available nutrient boost without the burn risk of concentrated synthetic feeds.
Dilute one to two tablespoons per four litres of water and apply to the root zone every three to four weeks from March through July.
7. Aquarium Water
Freshwater aquarium water contains dissolved organic matter, fish waste nitrates, beneficial bacteria, and trace minerals in a dilute, immediately available form.
Apply directly to the root zone during regular aquarium water changes rather than discarding it.
The benefit is modest but consistent, providing a gentle ongoing nutrient supplement with no risk of over-application.
Do not use saltwater aquarium water, which would damage the plant.
8. Epsom Salts: The Nuanced Answer
Epsom salts (magnesium sulfate) are genuinely useful when a hydrangea has a confirmed magnesium deficiency, which shows as yellowing between the leaf veins while the veins themselves remain green.
In that specific situation, dissolving one tablespoon in four litres of water and applying monthly during the growing season can restore normal leaf colour.
In plants without a deficiency, Epsom salts provide no benefit and should not be applied routinely.
Applying Epsom salts to an already-stressed plant can compound the stress rather than relieve it, so identify the specific deficiency before using them.
How to Change Hydrangea Flower Colour Naturally
This section applies only to bigleaf hydrangeas (Hydrangea macrophylla). Panicle, smooth, oakleaf, and climbing hydrangeas do not change colour with soil chemistry.
Shifting from Pink to Blue
Lower soil pH below 6.0 and make aluminium available to the plant.
Apply sulphur-based soil acidifier gradually over one to two seasons.
Supplement with natural acidifying mulches including pine needle mulch and oak leaf compost.
For direct aluminium input, aluminium sulfate dissolved according to package instructions and watered around the root zone monthly from early spring provides the most reliable colour shift.
Most gardeners see a noticeable change within one to two full growing seasons.
Shifting from Blue to Pink
Raise soil pH above 7.0 by adding garden lime (calcium carbonate) or wood ash in autumn.
Apply in stages rather than a single heavy dose and test pH regularly.
Avoid any aluminium-containing amendments.
If aluminium sulfate has been previously applied, allow one to two seasons for the pH elevation to render the residual aluminium unavailable.
Maintaining White Flowers
White-flowering bigleaf varieties are genetically fixed and will not change colour regardless of soil pH adjustments.
All other hydrangea types, panicle, oakleaf, smooth, and climbing, retain their characteristic colours regardless of soil chemistry.
| Target Colour | pH Target | Natural Amendments | Chemical Option | Timeline |
| Blue or purple | Below 6.0 | Coffee grounds, pine needle mulch, oak leaf compost, sulphur | Aluminium sulfate | 1 to 2 seasons |
| Pink or red | Above 7.0 | Wood ash, garden lime, dolomite | Calcium carbonate | 1 season in responsive soil |
| Lavender or mixed | 6.0 to 6.5 | Balanced compost, moderate acidifying inputs | None specific | Variable |
| White | Not applicable | Not applicable | Not applicable | Genetically fixed; not changeable |
| Watch: Changing Hydrangea Colour Step by Step These videos show the soil testing and amendment process with real garden results: Easy Ways to Change Hydrangea Colors (Southern Living): How to Prune All Hydrangea Varieties (Northlawn Flower Farm): |
When and How Often to Fertilise Hydrangeas
Timing is as important as the type of fertiliser.
Applying nitrogen too late in the season is one of the most damaging things you can do to a bigleaf hydrangea.
| Period | Growth Stage | Fertiliser Action | Best Natural Source |
| March to April | Emerging from dormancy; first leaf growth | Balanced input; support initial growth | Compost mulch, fish emulsion, grass clipping tea |
| May to June | Bud development; stem strengthening | Shift to lower nitrogen, higher potassium | Banana peel meal, compost tea |
| June to late July | Peak flowering | High-potassium only; no additional nitrogen | Banana peel meal at reduced rate, diluted compost tea |
| Early August | Flowering ends; hardening begins | Final very light application if any | Compost mulch top-up only |
| Late August onward | Pre-dormancy hardening | Stop all feeding completely | Nothing |
| September to February | Dormancy | No feeding whatsoever | Nothing; compost mulch for root insulation only |
| Warning: Late-Season Feeding Causes Winter Die-Back Applying nitrogen fertiliser after late July is one of the most common causes of bigleaf hydrangea failure in cold climates. Late nitrogen stimulates soft new growth that cannot harden before the first frosts. This frost-damaged growth often takes the following season’s flower buds with it, resulting in a healthy-looking plant in spring with no flowers in summer. Stop all feeding by early August without exception. |
Planting, Watering, and General Care
Choosing the Right Position
Hydrangeas perform best in morning sun with afternoon shade in most climates.
The morning sun provides the light energy needed for photosynthesis and flower production, while afternoon shade prevents heat stress on the flowers and foliage.
In the UK and northern US states where summer temperatures are more moderate, full sun is often acceptable for most types.
Panicle hydrangeas are the most sun-tolerant of the group and may actually prefer full sun in cooler climates.
Oakleaf and climbing hydrangeas are the most shade-tolerant and genuinely prefer positions that receive little or no direct summer sun.
Soil Preparation
Hydrangeas prefer moisture-retentive but well-draining soil rich in organic matter.
Before planting, dig to 45 centimetres and incorporate a generous quantity of well-rotted compost or leaf mould.
Do not add fertiliser to the planting hole as concentrated nutrients in direct contact with new roots can cause burn.
Plant at the same depth as the nursery container, with the crown at soil level.
Watering
Water consistently through the growing season, applying approximately 2.5 centimetres per week during dry periods at the base of the plant rather than overhead.
A 5 to 8 centimetre mulch layer of bark or leaf mould around the root zone retains moisture, moderates soil temperature, and suppresses weeds.
Refresh the mulch each spring.
The afternoon wilt trap: hydrangea leaves wilt dramatically during hot afternoons even when soil moisture is adequate, as transpiration temporarily exceeds the root system’s replenishment rate.
Do not water in response to afternoon wilt.
Check the soil in the morning instead.
A plant that has fully recovered by morning is not underwatered.
Pruning by Hydrangea Type
Bigleaf hydrangeas (H. macrophylla): these bloom on old wood, meaning the flower buds for next year’s display are formed on the current season’s stems before dormancy.
Prune only lightly after flowering in late summer, removing dead or damaged stems at the base.
Never hard prune in winter or early spring, which removes all the flower buds.
In cold climates, protect the stems over winter rather than cutting them back.
Panicle and smooth hydrangeas (H. paniculata and H. arborescens): these bloom on new wood and can be pruned hard in late winter or early spring without affecting that season’s flowering.
A harder prune produces fewer but larger flower heads.
A lighter prune produces more numerous, smaller flowers.
Oakleaf and climbing hydrangeas: these need minimal pruning.
Remove only dead, damaged, or crossing growth immediately after flowering.
| Watch: How to Prune Each Hydrangea Type Correctly These videos demonstrate pruning technique for different hydrangea types, including how to tell old wood from new wood: The Easy Guide to Pruning Hydrangeas: How to Prune Hydrangea paniculata (RHS): How and When to Prune Hydrangeas (Garden Ninja) |
Winter Protection
Panicle and smooth hydrangeas need no winter protection in USDA zones 4 and above or throughout most of the UK.
For bigleaf hydrangeas in exposed positions, allow the plant to go dormant naturally and do not cut back in autumn.
Mound the base with 15 to 20 centimetres of straw or bark for root insulation.
For exposed stems, create a loose cylinder of wire mesh or snow fencing filled with straw around the plant.
Remove the protection in spring once hard frost risk has passed, typically from late March in most UK regions.
| UK Reader Note: Hardiness Ratings and Best Varieties Most bigleaf hydrangeas are rated H5 by the RHS, hardy to around minus 15 degrees Celsius. Panicle and smooth hydrangeas are rated H6 to H7 and effectively fully hardy across all of the UK. RHS Award of Garden Merit varieties that combine reliable flowering with good cold tolerance include Hydrangea paniculata Limelight, Hydrangea arborescens Annabelle, and Hydrangea macrophylla Endless Summer. Endless Summer is a repeat-blooming bigleaf type that produces some flowers on new wood, reducing the impact of winter bud loss in colder regions. |
Common Problems and Troubleshooting
| Symptom | Most Likely Cause | How to Confirm | Fix |
| No flowers on bigleaf hydrangea | Flower buds killed by frost or pruned in winter | Hard prune done in winter; exposed site | Protect stems in winter; never prune bigleaf types in winter or spring |
| No flowers on panicle or smooth hydrangea | Insufficient sun or pruned in summer | Shaded site; not hard-pruned in late winter | Move to sunnier spot; hard prune in late winter next year |
| Flowers pink but want blue | Soil pH too high; aluminium unavailable | Soil test shows pH above 6.5 | Apply soil acidifier and aluminium sulfate monthly |
| Flowers blue but want pink | Soil pH too low | Soil test shows pH below 6.0 | Apply garden lime or wood ash; raise pH above 7.0 |
| Yellowing between leaf veins | Iron or magnesium deficiency in alkaline soil | Veins remain green; rest of leaf yellows | Lower pH to make iron available; Epsom salts if magnesium deficient |
| Uniform yellowing of whole leaves | Overwatering or nitrogen deficiency | Soil consistently wet or no recent feeding | Improve drainage; apply nitrogen tea or fish emulsion |
| Brown scorched leaf edges | Too much sun, overfeeding, or underwatering | Afternoon sun; heavy feeding history | Afternoon shade; flush soil; increase watering |
| Floppy stems under flower heads | Excess nitrogen; insufficient potassium | Rich feeding history; heavy heads | Apply banana peel meal; reduce nitrogen inputs |
| White powdery coating on leaves | Powdery mildew | Coating on leaf surface in warm, humid conditions | Improve airflow; baking soda solution (1 tsp per litre) weekly |
| Irregular holes in leaves; slime trails | Slugs or snails | Trails visible in morning; damage worse at ground level | Eggshell barrier; copper tape; iron phosphate pellets |
| Stems die back each winter; no flowers | Frost destroying flower buds on bigleaf hydrangea | Exposed site; no winter stem protection | Protect stems with straw cylinder; consider repeat-blooming varieties |
Pests That Affect Hydrangeas
Vine Weevil
Vine weevil is the most damaging hydrangea pest in UK and cooler US gardens, particularly for container-grown plants.
Adult beetles create distinctive C-shaped notches in leaf edges in summer, which is unsightly but not seriously harmful.
The real damage comes from the white C-shaped grubs that feed on roots underground through autumn and winter.
A hydrangea that suddenly collapses despite adequate watering should be investigated for vine weevil grub damage by tipping it from its container.
The most effective biological control is a nematode drench applied to the soil in late summer, when grubs are young and most susceptible.
Nematodes (Steinernema kraussei species) are available from garden retailers and are watered into the soil where they parasitise the grubs.
Aphids
Aphids cluster on new growth and buds in spring, draining sap and encouraging sooty mould.
A strong jet of water dislodges most colonies and repeating every two to three days keeps populations low.
Encouraging natural predators, ladybirds, hoverflies, and lacewings, provides sustainable long-term control.
Avoid broad-spectrum insecticides that kill beneficial insects alongside the aphids.
Slugs and Snails
Slugs and snails cause irregular holes and ragged leaf edges, most active at night and in damp conditions.
Crushed eggshells, copper tape, and coarse grit around the base create physical barriers.
Iron phosphate slug pellets are considered safe for wildlife and pets.
Hand-picking on damp evenings by torchlight is effective for smaller infestations.
| Watch: Controlling Vine Weevil Organically Vine weevil grubs can kill container hydrangeas before symptoms appear above ground. These videos show how to identify the problem and apply nematode treatment: Vine Weevil Control Without Pesticides Nematodes for Vine Weevil (Pros and Cons) How to Apply Beneficial Nematodes to Control Garden Pests |
Frequently Asked Questions
When should I fertilise hydrangeas?
Feed from March through to late July at most.
Use a balanced input or compost mulch in early spring to support the initial growth flush.
Shift toward lower-nitrogen, higher-potassium inputs from May onward as buds develop.
Stop all feeding completely by early August without exception.
Late nitrogen stimulates soft new growth that cannot harden before winter frosts, leading to die-back that destroys next year’s flower buds on bigleaf varieties.
Why are my hydrangeas not flowering?
For bigleaf hydrangeas, the answer is almost always that the flower buds were destroyed over winter by frost, or removed by pruning in winter or early spring.
Bigleaf hydrangeas form their flower buds on the current season’s stems before dormancy, so any pruning or frost damage that removes those stems eliminates next year’s flowers.
For panicle and smooth hydrangeas, insufficient sun is the more common cause as they need at least five to six hours of direct sun to flower reliably.
Overfeeding with nitrogen at any stage also suppresses flowering across all types by pushing the plant toward leafy growth.
How do I make my hydrangeas produce larger flowers?
For panicle and smooth hydrangeas, a harder prune in late winter concentrates the plant’s resources into fewer but larger flower heads.
Consistent moisture during bud development and a potassium-rich feed in May and June supports both flower size and stem strength.
For bigleaf hydrangeas, protecting the stems over winter so more buds survive to become flowers produces a fuller display.
Ensuring the plant is not competing with weeds for moisture and nutrients in the root zone also makes a measurable difference.
Can I use coffee grounds directly on hydrangeas?
Yes, in moderation and with an understanding of what they do.
Coffee grounds lower soil pH gradually and provide nitrogen as they decompose, making them useful for bigleaf hydrangeas in alkaline soil where you want to support blue flower colour.
In already-acidic soil or for hydrangeas you want to keep pink, they are counterproductive.
Apply as a thin layer of no more than 1 centimetre mixed into the top inch of soil, or use as a liquid feed steeped in water for twenty-four hours and diluted before applying.
Avoid thick surface layers of grounds, which form a crust that repels water.
Are Epsom salts good for hydrangeas?
Epsom salts are genuinely useful specifically when a hydrangea has a magnesium deficiency, which shows as yellowing between the leaf veins while the veins themselves stay green.
In that situation, one tablespoon dissolved in four litres of water applied monthly can resolve the deficiency.
For plants without this specific deficiency, Epsom salts provide no documented benefit.
They are not a general-purpose tonic, and applying them to an already-stressed plant can add to the stress rather than relieve it.
How do I protect hydrangeas over winter?
Panicle, smooth, and climbing hydrangeas need no special protection in USDA zones 4 and above or throughout most of the UK.
For bigleaf hydrangeas in exposed positions or zones 5 and 6, the priority is protecting the stems that carry next year’s flower buds.
Do not cut the stems back in autumn.
Mound the root zone with 15 to 20 centimetres of straw or bark, and optionally surround the stems with a wire mesh cylinder loosely filled with straw.
Remove the protection in spring once hard frost risk has passed, typically from late March in most of the UK.
What is the best natural fertiliser for hydrangeas?
There is no single best answer because the optimal input depends on the plant’s current needs, the time of season, and your soil type.
As a practical starting point: apply well-rotted compost as a mulch in spring for broad-spectrum benefit across the whole season.
Add grass clipping tea in April for accessible nitrogen during the growth flush.
Use banana peel meal in May and June for potassium during bud development.
Apply coffee grounds only if the soil is alkaline and blue flower colour on bigleaf types is the goal.
Use fish emulsion for a fast-acting balanced boost to newly planted or recovering plants.
Can I grow hydrangeas in containers?
Yes, and several varieties are specifically bred for containers.
Choose a container at least 45 centimetres in diameter with good drainage holes.
Use a moisture-retentive but free-draining compost and water more frequently than in-ground plants, as containers dry out faster.
Feed monthly from March through July as nutrients leach from container compost more rapidly than from open ground.
Repot every two to three years as compost structure breaks down.
Compact varieties including the Cityline series, Let’s Dance series, and the panicle variety Little Lime are among the most reliable for container cultivation.
Key Takeaways
- Different hydrangea types need completely different pruning approaches. Bigleaf hydrangeas bloom on old wood and must never be pruned in winter or spring. Panicle and smooth hydrangeas bloom on new wood and benefit from a hard prune in late winter.
- Stop all feeding by early August. Late nitrogen causes soft new growth that cannot harden before frost, destroying next year’s flower buds on bigleaf varieties.
- Blue to purple flower colour in bigleaf hydrangeas requires acidic soil below pH 6.0 and available aluminium. Pink colour requires alkaline soil above pH 7.0. Other hydrangea types do not respond to pH in this way.
- Compost and compost tea are the most broadly beneficial natural amendments, improving soil structure, providing balanced nutrition, and supporting the soil biology that makes other nutrients accessible.
- Coffee grounds lower soil pH and provide nitrogen. They are appropriate for bigleaf hydrangeas in alkaline soil where blue colour is the goal. In acidic soil or for pink-flowering varieties, they are counterproductive.
- The afternoon wilt that hydrangea leaves show on hot days does not always indicate a need for more water. Check soil moisture in the morning before acting.
- Vine weevil grubs can kill container hydrangeas before above-ground symptoms appear. Apply nematode drench in late summer as a preventive biological control.
- For bigleaf hydrangeas in cold climates, winter stem protection with a straw-filled wire cylinder prevents frost from destroying the flower buds that carry the following summer’s display.
Getting the Most from Your Hydrangeas
The common thread running through every aspect of hydrangea care is that the plant responds visibly and predictably to what you give it.
Feed it nitrogen at the wrong time and it grows leaves instead of flowers.
Leave the stems of a bigleaf variety unprotected in a cold winter and it goes into summer with nothing to show.
Raise the pH around a blue-flowered specimen and it turns pink within a season or two.
The feedback loop is clear, which is what makes hydrangeas genuinely interesting to manage rather than frustrating.
The natural fertiliser approach works with that predictability rather than against it.
Compost tea in spring, banana peel in May, a clean stop in August: each input has a purpose and a reason.
Once you understand the why behind each step, the care routine becomes intuitive rather than a checklist to follow.
Get the pruning right for the type you are growing, protect bigleaf varieties through winter if your climate requires it, and use natural amendments at the right stage of the season.
The result is a plant that improves year on year as it matures, with increasingly impressive flower displays that justify every decision made along the way.
| What to Do Next If you are starting from scratch with a new hydrangea, identify the type before doing anything else, as the type determines every major care decision from pruning timing to fertiliser response. If you have an existing plant that is not flowering, check whether it is a bigleaf type that was pruned in winter or spring, as this is the most common reason for a healthy but flowerless hydrangea. If colour change on a bigleaf variety is the goal, test the soil pH before applying any amendments to know your starting point and choose the right inputs for the direction you want to move. |
Hi, I'm Matt,
An amateur gardener with a houseplant habit that got slightly out of hand.
I started Bean Growing to share what I've learned from a few years of trial, error, and the occasional dead plant.
I grow a mix of houseplants and outdoor shrubs in the UK but try to expand my knowledge to the US. I try to write about what actually works