
To propagate a Hindu Rope plant (Hoya compacta), take a 4–6 inch stem cutting with at least 2–3 nodes, sterilise your shears with isopropyl alcohol, and place the cutting in water or moist perlite in bright, indirect light at 65–85°F. Roots form in 2–4 weeks in water and 4–8 weeks in soil. Never use a leaf alone, a node is essential.
Learning how to propagate a Hindu Rope plant is easy and rewarding, even for beginners.
With the right cutting technique, proper moisture, and patience, you can successfully grow new Hoya compacta plants at home expanding your indoor garden naturally and affordably.
What Is a Hindu Rope Plant? (Quick Overview)
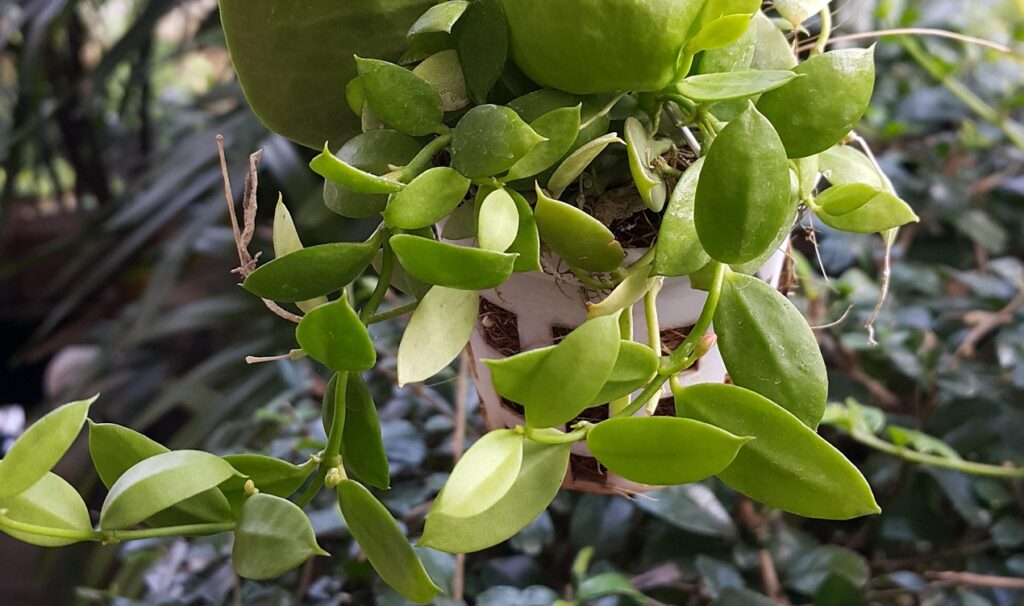
The Hindu Rope plant (Hoya compacta) is a slow-growing, trailing houseplant prized for its thick, twisted, rope-like leaves.
A cultivar of Hoya carnosa, it is native to southern India and thrives in hanging baskets thanks to its cascading vines. It is considered beginner-friendly once established, semi-succulent in nature, and capable of living for decades.
Propagation is one of the safest ways to multiply Hoyas without harming the parent plant and understanding the basics makes the process reliable every time.
| Pet & child safety: Hoya compacta is non-toxic to cats, dogs, and humans according to the ASPCA. However, the milky latex sap released when stems are cut can mildly irritate skin. People with latex sensitivities should wear gloves when taking cuttings. |
Why Propagate a Hindu Rope Plant?
There are several compelling reasons to propagate your Hoya compacta:
- Grow new plants for free
- Rejuvenate an older or leggy plant
- Share cuttings with friends or family
- Save a plant if the mother vine becomes damaged
- Create fuller pots by replanting rooted cuttings
Propagation also deepens your understanding of your plant’s growth cycle, making you a more confident plant parent overall.
Best Time to Propagate a Hindu Rope
The ideal time to propagate a Hindu Rope plant is spring and summer, when the plant is actively growing. During this window, cuttings root faster, rot risk is lower, and new growth appears more quickly.
Propagation can work in fall or winter but often requires extra warmth and humidity and takes considerably longer.
The plant can tolerate temperatures down to 50°F (10°C) without damage, but growth stalls below 60°F (15°C) and anything colder than 50°F risks cold damage to developing roots.
What You’ll Need Before You Start
| Item | Why It Matters |
| Clean pruning shears | Prevents infection and stem damage |
| 70% isopropyl alcohol | Sterilises shears before and after each cut |
| Healthy parent plant | Strong vines root more successfully |
| Small container | Controls moisture during rooting |
| Water or potting medium | Supports root development |
| Bright, indirect light source | Encourages growth without stress |
| Latex gloves (optional) | Recommended for those with latex sensitivity |
How to Choose the Right Stem Cutting
A successful propagation always starts with the right cutting. Look for:
- A healthy vine with no yellowing or mushy areas
- At least 2–3 leaf nodes the small bumps where leaves meet the stem, and where roots will grow
- Firm, mature stems not brand-new, soft growth
- A cutting 4–6 inches long the ideal balance of stored energy and moisture control
| Critical: A Hindu Rope leaf alone will not grow into a new plant. You must include at least one node, or roots will never form. This is the single most common beginner mistake. |
Avoid Cutting Flower Spurs (Peduncles)
Hoya compacta produces flower clusters from small, leafless stem structures called peduncles (or spurs).
These look like short, knobbly protrusions on the vine distinct from the main growing stem.
Never take a cutting that removes a peduncle from the mother plant: new flowers grow from the same spur repeatedly year after year, and once removed, the spur will not regenerate.
When selecting your cutting, always choose a vine section well away from any visible spurs.
Water Propagation vs Soil Propagation: Which Is Best?
| Method | Best For | Key Advantage |
| Water propagation | Beginners who want visual cues | Easy root monitoring |
| Soil propagation | Those with experience or fast growth goals | Strong, soil-acclimated roots |
Both methods are reliable. Choose based on your comfort level and environment.
Step-by-Step: How to Propagate a Hindu Rope Plant
Step 1: Choose a Healthy Stem
Select a vine from a healthy parent plant. Look for firm, plump leaves, no yellowing or brown spots, and at least 2–3 nodes per cutting.
Always sterilise your shears with 70% isopropyl alcohol before cutting this single step prevents most infections.
Step 2: Make the Cut
Cut just below a node. Keep your cutting 4–6 inches long with at least two nodes. Remove the lower leaves near the cut end to prevent rot only nodes, not leaves, should be in contact with water or soil.
| Latex sap warning: When you cut a Hindu Rope stem, it will bleed a sticky, milky-white latex sap this is completely normal. Wash your hands immediately after handling the cutting. People with latex allergies should wear gloves. |
| Callousing tip (soil propagation only): Set the cutting aside in a warm, dry spot for 1–2 hours before planting. This allows the cut end to form a light protective seal, significantly reducing rot risk. Water propagation does not require callousing. |
Step 3: Prepare for Rooting
Water propagation: Place the cutting in a glass of room-temperature water with nodes submerged (not leaves). Keep in bright, indirect light. Change water every 5–7 days to prevent bacterial buildup.
| Amber glass tip: For best results, use a dark or amber glass rather than a clear one. Roots naturally develop better in darkness mimicking the soil environment and a dark vessel significantly slows algae growth, keeping the water cleaner between changes. If you only have clear glass, wrap the lower half with foil or place it inside a paper bag, leaving the top open so light still reaches the leaves. |
Soil propagation: Plant nodes 1 inch deep in a well-draining mix of perlite, orchid bark, and peat moss. Keep soil lightly moist and cover with a plastic bag or propagation dome to maintain humidity.
Step 4: Provide the Right Conditions
- Light: Bright, indirect sunlight a north- or east-facing window is ideal. Avoid direct midday sun.
- Temperature: 65–85°F (18–29°C). Cold drafts are the enemy of root development.
- Humidity: 60–80% ideal, especially for soil propagation.
- Monitoring: Check weekly for signs of rot (black or mushy stems).
Step 5: Transplant and Care for Rooted Cuttings
For water-propagated cuttings, once roots reach 1–2 inches long, transplant into a well-draining soil mix. For soil-propagated cuttings, leave in the propagation medium until roots are well-branched and firm.
Avoid fertilising immediately after transplanting. New roots are tender and can be burned by fertiliser salts wait until you see clear signs of new leaf growth before feeding.
How Long Do Hindu Rope Cuttings Take to Root?
| Method | Rooting Time | Notes |
| Water propagation | 2–4 weeks | Roots visible but delicate; transfer carefully to soil |
| Soil propagation | 4–8 weeks | Roots stronger and immediately soil-acclimated |
| Layering / air layering | 4–8 weeks | Near-zero failure rate; vine fed by parent throughout |
| Division | 6–10 weeks | Works for older, root-bound plants |
Factors that affect rooting speed: node count per cutting, temperature, humidity levels, light quality, and the health of the cutting.
Signs your cutting is rooting successfully: tiny white root tips emerging from nodes, firm and vibrant leaves, and a green, plump stem with no mushy areas.
| If roots take longer than 8 weeks: Check for overwatering, low humidity, or insufficient light. Adjust one factor at a time. If the stem is still firm and green, the cutting is still viable patience is genuinely the most important variable with Hoya compacta. |
Best Potting Mixes for Rooting Hindu Rope Plants
Hoya compacta grows naturally as an epiphyte, meaning it prefers airflow around its roots rather than heavy, compacted soil.
The right propagation medium balances moisture retention, excellent drainage, and oxygen availability. Most propagation failures come from using a medium that stays too wet.
Top Media Options
Perlite Exceptional drainage, prevents root rot, encourages fast root formation. Pre-moisten before use. Best for high-humidity environments.
Sphagnum moss Holds moisture while allowing airflow. Ideal for humidity-loving Hoyas. Do not compress it packed sphagnum causes rot.
LECA (Lightweight Expanded Clay Aggregate) Excellent aeration, reusable, low fungal risk. Best for gardeners comfortable with active moisture monitoring.
Beginner-Friendly Mix Recipes
| Mix | Ingredients | Best For |
| Basic Starter Mix | 50% potting soil, 30% perlite, 20% orchid bark | Easy transition from propagation to grow |
| Airy Epiphyte Mix | 40% orchid bark, 40% perlite, 20% coco coir | Long-term Hoya health |
| Moss-Based Medium | Loose sphagnum moss + perlite | High-humidity rooting |
Avoid heavy garden soil or any mix that stays soggy, compacts easily, or lacks airflow these conditions suffocate developing roots and lead to stem rot.
Alternative Propagation Methods: Layering, Air Layering & Division
While stem cuttings are the most common approach, these alternatives offer excellent success rates particularly if you want to minimise risk to the parent plant.
Ground Layering
Ground layering encourages a vine to root while still attached to the parent plant. The vine continues receiving nutrients throughout, which is why failure is rare.
- Identify a healthy vine with multiple nodes
- Place a node on top of moist soil in a nearby pot
- Lightly cover the node with soil or sphagnum moss
- Secure with a bent paperclip or plant pin
- Maintain light moisture and high humidity
Roots typically form in 6–10 weeks. Once rooted, sever the vine and pot it separately.
Air Layering (Best for Long or Rigid Vines)
Air layering is ideal when a vine is too long or rigid to redirect into a nearby pot. It delivers the same near-zero-failure advantage as ground layering, but works entirely above soil.
- Wrap a golf-ball-sized amount of damp sphagnum moss around a node on an active vine while it is still attached to the parent plant
- Secure tightly with plastic wrap and twist ties, sealing both ends to hold moisture in
- Wait 4–8 weeks until roots are clearly visible through the plastic wrap
- Cut the vine just below the rooted section and pot it up in a well-draining mix
| Why air layering works so well: Because the vine receives continuous nutrients and water from the parent throughout the process, the cutting is never under stress. This makes air layering particularly valuable for propagating expensive variegated varieties, where failure is costly. |
Division
Division separates naturally rooted sections of an older, root-bound plant. It is best reserved for mature plants where multiple stems grow from separate root clusters, or where roots are visible at the soil surface or drainage holes.
- Remove the plant from its pot
- Loosen soil around roots gently never yank or force
- Separate root clusters by hand where possible (avoid cutting unless necessary)
- Repot each section in fresh, well-draining soil
| Method | Difficulty | Success Rate |
| Ground layering | Easy | Very High |
| Air layering | Easy–Medium | Very High |
| Division | Moderate | High |
Note on Variegated Hindu Rope Propagation
The variegated Hindu Rope (Hoya carnosa ‘Compacta Variegata’) is a popular collector’s plant that commands a premium price making successful propagation even more worthwhile. The process follows the same steps, but with two key differences.
First, variegated cuttings root more slowly and are more sensitive to stress. Err on the side of slightly shorter humidity dome sessions and very precise moisture control they are less forgiving of overwatering than the standard green form.
Second, variegation is not always genetically stable. There is no guarantee a cutting will replicate the exact variegation pattern of the parent some sections may revert toward solid green. Select cuttings from stems showing the strongest, most consistent variegation. Air layering is particularly recommended for variegated varieties, as the vine stays fully supported by the parent plant throughout the rooting process.
How to Speed Up Propagation Safely: Rooting Hormone, Humidity & Heat
Rooting Hormone
Not required, but it can meaningfully improve success rates particularly for beginners or slower-rooting cuttings.
Dip only the cut node end into the hormone, tap off any excess, and plant immediately. Applying too much can burn tissue and delay rooting rather than accelerate it.
Humidity
Keep humidity at 60–80% to prevent cuttings from drying out before roots develop.
Use a clear plastic bag or humidity dome, position cuttings near a humidifier, or group plants together. Always allow some airflow to prevent mould and fungal issues.
Heat
Warm temperatures stimulate root cell growth. Safe options include placing cuttings near a bright window (avoid direct sun) or using a seedling heat mat on a low setting. Keep cuttings away from cold drafts and air conditioning vents.
| Factor | Ideal Range | Why It Helps |
| Temperature | 65–85°F (18–29°C) | Stimulates root cell development |
| Humidity | 60–80% | Prevents cutting dehydration before roots form |
| Light | Bright, indirect | Supports energy without stress or scorching |
| Airflow | Gentle | Prevents rot and fungal issues |
Common Propagation Problems and How to Fix Them
Stem Rot (Mushy or Black Cuttings)
Causes: Overwatering, poor drainage, lack of airflow, dirty tools.
Fix: Remove affected portions immediately. Allow the healthy section to dry for a few hours, then replant in pure perlite with better air circulation. Slight dryness is always safer than excess moisture when propagating Hoya compacta.
Cuttings Won’t Root
Causes: No nodes included, low temperatures, insufficient light, old or weak cuttings.
Fix: Ensure at least two nodes per cutting, increase warmth and humidity, move to brighter indirect light, and use fresh stem material.
Leaves Shrivelling or Drooping
The cutting is losing moisture faster than it can absorb it. Increase humidity, reduce light intensity, avoid direct sun, and check water or medium moisture levels.
Pests During Propagation
Common culprits: mealybugs, spider mites, and aphids. Signs include sticky residue, white cotton-like clumps, or fine webbing.
Isolate affected cuttings immediately, wipe with alcohol-soaked cotton swabs, and improve airflow and cleanliness.
| Problem | Likely Cause | Solution |
| Mushy or black stems | Too wet / poor drainage | Switch to perlite, reduce watering, improve airflow |
| No roots after 6+ weeks | Low warmth or light | Add heat mat, move to brighter indirect light |
| Wrinkled or drooping leaves | Low humidity | Add humidity dome, check moisture levels |
| Pests | Poor sanitation | Isolate, clean with alcohol, improve airflow |
When and How to Pot Rooted Hoya Cuttings
When Are Cuttings Ready?
Your cutting is ready to pot when: roots are 1–2 inches long (water propagation); roots are well-branched and firm (soil or moss propagation); the cutting resists a gentle tug; and leaves remain plump and healthy.
Potting too early is one of the most common beginner mistakes and can stall growth or cause root damage.
Choosing the Right Pot
Hoya compacta prefers being slightly root-bound. Use a small pot (3–4 inches for single cuttings) with drainage holes. Avoid oversized pots they hold excess moisture and dramatically increase root rot risk.
Best Soil Mix for Newly Rooted Cuttings
A beginner-friendly ratio: 50% potting soil, 30% perlite, 20% orchid bark. Avoid compacting the mix roots need air as much as moisture.
| Ingredient | Purpose |
| Potting soil | Provides base nutrients |
| Perlite | Improves drainage and prevents compaction |
| Orchid bark | Adds airflow and physical structure |
| Coco coir or peat (opt) | Retains light moisture between watering |
Potting Step-by-Step
- Add soil mix to the pot do not pack it down
- Create a small hole for the roots using a pencil or chopstick
- Gently place the cutting without bending or compressing the roots
- Fill around the roots and press soil lightly to eliminate air pockets
- Water lightly to settle the soil and start contact between roots and medium
Never bury leaves only the stem and roots should be below the soil line.
Aftercare for the First 2–4 Weeks
- Keep soil lightly moist, not wet
- Provide bright, indirect light
- Avoid fertilising: new roots are tender and can be burned by fertiliser salts
- Maintain moderate humidity
Signs of a smooth transition: leaves remain firm, no yellowing or dropping, and new growth appears within several weeks.
Key Success Factors Never Skip These
- Bright, indirect light the single most important condition
- Warm temperatures (65–85°F / 18–29°C) cold drafts stall root growth
- Light, consistent moisture never soggy at any stage
- Good airflow reduces rot and fungal problems
- Patience slow growth is normal and expected for this species
Frequently Asked Questions
Can you propagate a Hindu Rope plant from a single leaf?
No. A leaf without a node will develop roots but will never grow into a new plant. You must include at least one node the small bump where the leaf meets the stem for a cutting to produce a new vine.
Why is my Hindu Rope cutting turning black?
Blackening stems almost always indicate stem rot caused by excess moisture or poor airflow. Remove the affected section immediately, allow the healthy portion to dry for a few hours, and replant in pure perlite with better air circulation.
How long does it take a Hindu Rope cutting to root?
In water, expect visible roots in 2–4 weeks. In soil or perlite, rooting typically takes 4–8 weeks. Full establishment including new leaf growth can take several months this is completely normal for a slow-growing semi-succulent.
When will a propagated Hindu Rope plant bloom?
Propagated plants typically need 2–3 years of growth before their first bloom.
Flowering is encouraged by keeping the plant slightly root-bound, providing very bright indirect light, and never removing the flower spurs (peduncles) from the vine.
Is it better to propagate a Hindu Rope in water or soil?
Water is better for beginners because roots are visible and easy to monitor. Soil produces stronger, more resilient roots with less transplant shock. If starting with water, transfer to soil once roots are 1–2 inches long.
Is the Hindu Rope plant toxic to pets?
No. Hoya compacta is non-toxic to cats, dogs, and humans. The latex sap released when stems are cut can mildly irritate skin, so gloves are recommended for those with latex sensitivities.
What is the white milky sap when I cut my Hoya?
This is completely normal latex sap all Hoya plants produce it when cut. Wash your hands after handling. For soil propagation, allow the cut end to dry for 1–2 hours (callousing) before planting to reduce rot risk.
Final Thoughts
Propagating a Hoya compacta (Hindu Rope plant) is a deeply rewarding experience when you understand what the plant needs and follow proven techniques.
Whether you choose water propagation, soil media, ground layering, air layering, or division, success comes down to three things: patience, clean technique, and the right environment.
This plant’s slow growth and semi-succulent nature mean it won’t always follow a rapid schedule and that is part of its charm.
Give your cuttings warmth, bright indirect light, and excellent drainage, and you will often see new roots within a few weeks.
Observe closely, adjust one variable at a time, and remember: even experienced growers lose cuttings. Every root you encourage and every new leaf that unfurls is a step toward true plant-parent mastery.
What’s next after propagation: Once your cutting is established and growing, your next goal is encouraging that first bloom.
Hindu Rope plants flower most reliably when slightly root-bound, receiving 4+ hours of bright indirect light daily, and grown in a stable warm environment.
Flower spurs the small knobbly protrusions from the vine will appear naturally once the plant matures. Never remove them, as they rebloom from the same structure year after year.