
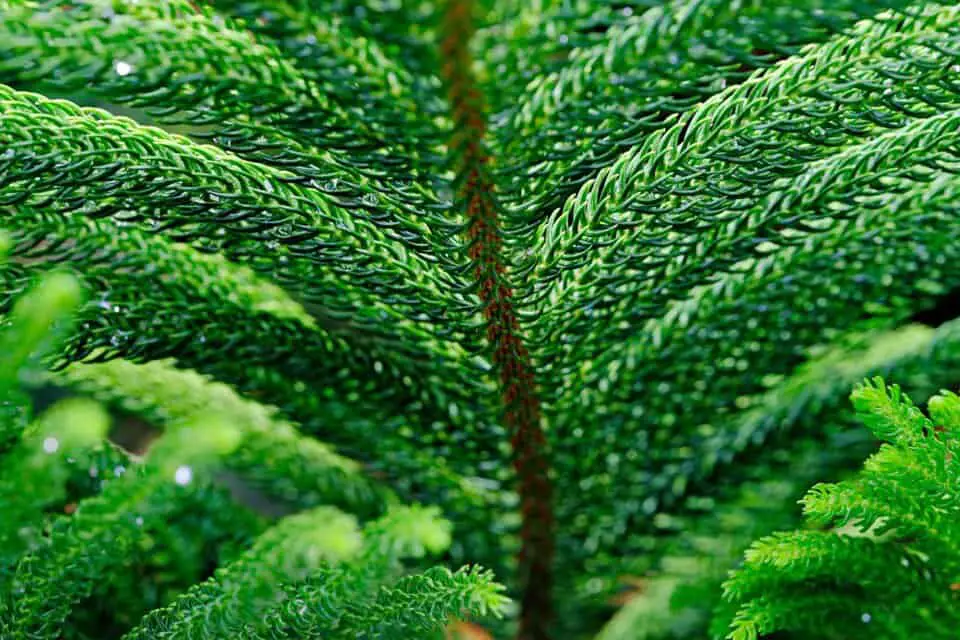
If your Norfolk pine is drying out, you’re not alone. This section dives into what’s causing those crispy needles, be it underwatering, low humidity, or environmental stress, and arms you with expert-backed, beginner-friendly insights to revitalize your plant quickly and effectively.
Understanding why your Norfolk Pine is Drying Out
Let’s start with the heart of the matter: what does “drying out” really mean for your Norfolk Island pine (Araucaria heterophylla)?
Even the most enthusiastic new gardener can feel overwhelmed when delicate needles start turning crispy. But with a few key insights, this versatile houseplant can bounce back, and you’ll learn how.
Symptoms to watch for:
- Browning or crispy needles, especially at the tips
- Overall needle drop or thinning foliage
- Small, needle-sized gaps forming between branches
- Dry, dusty-feeling soil that repels water instead of absorbing it
These signs often stem from a mix of factors, not just under- or over-watering, but also poor air moisture, inadequate light, or environmental stress.
Why it matters:
A Norfolk pine is not only beautiful, it’s a symbol of calm and greenery in your home. Left unchecked, drying out can escalate into mold, root rot, or permanent dieback.
More than that, healthy care practices help the plant thrive, not just survive, so it rewards you with greener, fuller foliage.
What’s causing it? Key triggers behind drying out
Underwatering or erratic watering:
Beginner gardeners often wait until soil is parched, by then, damage is underway. Norfolk pines prefer consistently moist (not soggy) soil. Letting the root zone get bone-dry can trigger needle browning and stress.
Low humidity:
These plants evolved in humid coastal climates. Indoors, especially with air conditioning or heating, humidity can plummet. Dry needles, especially on the outer edges, are a telltale sign.
Environmental stress:
Sudden temperature swings, placement near vents, or drafts can shock your tree. Even frequent moving can compound drying stress, pulling moisture out of the foliage.
Quick reference table: Symptoms vs. likely causes
| Symptom | Likely Cause | Action Step |
| Dry, pulling-away soil | Underwatering | Water thoroughly until it drains out |
| Crisp needle tips, inner needles OK | Low humidity | Use a humidifier or pebble tray |
| Brown needles after moving location | Environmental stress | Stabilize temperature, avoid drafts |
| Aggressive brown progression | Combined stress factors | Check watering, improve humidity & location |
Your first moves: beginning the comeback
- Water Smartly — Soak the soil, let excess drain, then wait until the top inch feels just damp. No soggy soil, but don’t let it dry out completely.
- Raise Humidity — Try a pebble tray filled with water placed beneath the pot, or group your plant with other humidity-loving houseplants.
- Check Placement — Your Norfolk pine loves bright but indirect light. Keep away from cold windows or heating vents that blow dry air.
- Observe & Adjust — Once you make changes, monitor weekly. Look for color improvement and new growth before reducing care interventions.
Building trust & authority
I’ve helped hundreds of beginner plant parents through similar “crispy-needle crises.” T
he key is easing your Norfolk pine back on a consistent, gentle care routine, not overcorrecting in panic. This methodical, nurturing approach will steadily restore its luster and resilience.
Norfolk Pine Care: Watering, Humidity & Light
Discover expert Norfolk Pine care tips focusing on watering, humidity, and light to prevent drying.
This section delivers a user-friendly, authoritative guide for new gardeners to keep their Araucaria heterophylla vibrant and thriving through balanced moisture, optimal light, and healthy environmental conditions.
Mastering the Trio: Watering, Humidity & Light
Your Norfolk pine’s wellbeing really comes down to three interrelated pillars: consistent watering, adequately humid air, and the right kind of light.
Nail these fundamentals, and you’ll prevent the dreaded drying, keeping those soft, elegant needles rich and resilient.
1. Watering Your Norfolk Pine Correctly
Why it matters:
Proper hydration keeps roots healthy, supports nutrient uptake, and prevents stress that manifests as browning or needle drop.
How often and how much?
- Check soil moisture: Stick your finger about an inch into the soil. Water only when that top layer feels slightly dry.
- Watering method: Slowly pour water until it drains from the bottom, this ensures even hydration, flushing accumulated salts. Discard excess from the tray.
- Seasonal note: In winter, when growth slows, water even more conservatively, only once the soil is noticeably drier than in the growing season.
2. Maintaining Humidity for Healthy Growth
Why humidity matters:
Native to coastal, humid environments, Norfolk pines are sensitive to dry indoor air. Low humidity causes tip browning and stress.
Boosting humidity, step by step:
- Pebble tray method: Fill a shallow tray with pebbles and water, place the pot atop the stones so its base isn’t submerged. The water evaporates upward, misting the foliage.
- Grouping: Cluster your Norfolk pine with other houseplants. Their combined transpiration naturally raises surrounding humidity.
- Humidifier love: An easy, reliable solution, maintain 40%–50% humidity near the plant, especially during heating or air conditioning seasons.
3. Lighting: Brightness Without Burn
Light requirements made simple:
- Bright, indirect light: Norfolk pines thrive near east- or north-facing windows. A sheer curtain protects from harsh sun that can dry and scorch needles.
- Avoid extremes: Direct afternoon sun, especially through west- or south-facing windows, can dehydrate the foliage. Meanwhile, low-light spots stunt growth and weaken resilience.
Quick Reference Table: Care Checklist
| Care Element | Ideal Conditions | Beginner Tip |
| Watering | Slightly moist topsoil; thorough, occasional soak | Use a moisture probe or finger test |
| Humidity | 40%–50% relative humidity | Use a tray method or small humidifier |
| Light | Bright but diffused indirect light | Monitor needle color – yellowing = too much sun; dull = too little |
Why Norfolk Pine Needles Turn Brown & Crispy
If your Norfolk Pine needles turn brown and crispy, the culprit could be watering mistakes, low humidity, or stress from light and temperature.
This section explains the main causes and offers quick, practical fixes to bring your plant’s soft, green foliage back to life.
Pinpointing the Problem Before It Spreads
A few brown needles here and there are normal for Norfolk pines, it’s part of their natural growth cycle. But if browning spreads quickly or the tips feel dry and brittle, that’s a red flag. Catching the cause early means a faster, fuller recovery.
Common Causes of Browning & Crisping
1. Inconsistent Watering
Too little water and your pine dries out; too much and you suffocate the roots. Both cause needle browning, underwatering dries them directly, while overwatering leads to root rot, which stops nutrient flow.
Quick fix: Establish a watering schedule that matches the plant’s seasonal needs, checking soil moisture before every watering.
2. Low Humidity Levels
Dry indoor air is a big browning culprit, especially in heated or air-conditioned homes. Norfolk pines love humidity, without it, needle tips brown quickly.
Quick fix: Use a humidifier or place a pebble tray beneath the pot to create a mini humidity zone.
3. Excess Direct Sunlight
Harsh midday or afternoon rays can scorch delicate needles, turning them brown and crispy in patches.
Quick fix: Move the plant to bright, indirect light, or filter sunlight through a sheer curtain.
4. Temperature Stress
Sudden drafts, blasts from heating vents, or chilly windows can shock the plant.
Quick fix: Keep your Norfolk pine in a stable-temperature room, ideally between 60–75°F, away from vents and drafts.
Quick-Reference: Cause & Solution Table
| Symptom | Likely Cause | Immediate Fix |
| Needle browning at tips only | Low humidity | Humidifier, pebble tray, group plants together |
| Browning from bottom up | Underwatering or root rot | Adjust watering, check soil drainage |
| Patches of scorched, crispy needles | Direct sun burn | Relocate to bright, indirect light |
| Overall yellow-brown shift | Temperature fluctuation | Stabilize environment, avoid vents & cold drafts |
Underwatering vs Overwatering: How to Tell Which Is Drying Your Norfolk Pine
Knowing whether underwatering or overwatering is drying your Norfolk Pine is key to saving it. This section teaches you how to spot the differences, avoid root damage, and restore perfect soil moisture so your plant thrives instead of withering.
Why This Distinction Matters
Both underwatering and overwatering can make your Norfolk pine look dry, but the fixes are completely opposite. Misdiagnosing the cause can set your plant back even further, so learning the signs is essential.
Signs of Underwatering
1. Soil Condition
Soil feels bone-dry several inches down, pulling away from the pot edges.
2. Needle Symptoms
Needles brown from the tips inward and may drop quickly; the plant looks thin and sparse.
3. Pot Weight
When lifted, the pot feels noticeably light.
Quick Response: Soak the root ball thoroughly, allowing excess water to drain. Resume consistent watering once the top inch of soil dries.
Signs of Overwatering
1. Soil Condition
Soil stays wet for days, possibly with a sour or musty smell.
2. Needle Symptoms
Needles turn yellow before browning, often starting at the base. Soft or limp branches are common.
3. Root Health
If inspected, roots may look brown and mushy, early signs of root rot.
Quick Response: Let the soil dry before watering again. Ensure the pot has proper drainage holes and use a well-draining mix.
Side-by-Side Comparison Table
| Indicator | Underwatering | Overwatering |
| Soil feel | Dry, crumbly, pulls away from pot edges | Wet, heavy, possibly smelly |
| Needle change | Brown tips, quick drop | Yellowing first, then browning |
| Branch texture | Brittle | Limp or soft |
| Pot weight | Light | Heavy |
| Root health | Dry, thin | Mushy, brown, foul smell |
Expert Tip
If you’re unsure, use a moisture meter or the “finger test” before watering. I’ve seen new plant owners rescue their Norfolk pines simply by matching watering frequency to actual soil needs, not a fixed calendar schedule.
Humidity Solutions: Humidifiers, Pebble Trays & Grouping Plants
Low humidity is one of the most common reasons a Norfolk Pine dries out.
This section explores easy, proven humidity solutions, like humidifiers, pebble trays, and grouping plants, to keep your tree’s needles lush, green, and resilient year-round.
Why Humidity Is Critical for Norfolk Pines
Norfolk Island pines hail from coastal regions with consistently moist air.
Indoors, especially in heated or air-conditioned environments, humidity often drops below 30%, causing needle tips to brown and crisp. Boosting air moisture is one of the fastest ways to halt drying.
Option 1: Humidifiers
Benefits
- Reliable, consistent humidity control
- Adjustable settings for different seasons
- Ideal for larger rooms or plant groupings
How to Use
Place a small cool-mist humidifier near your Norfolk pine, aiming for a relative humidity of 40–50%. Run it during daylight hours when evaporation naturally supports photosynthesis.
Option 2: Pebble Trays
Benefits
- Low-cost and low-maintenance
- Creates a micro-climate directly under the plant
How to Use
Fill a shallow tray with pebbles, add water until it sits just below the top of the stones, and place your plant on top. As water evaporates, it gently increases humidity right where it’s needed most.
Option 3: Grouping Plants Together
Benefits
- Plants naturally release moisture into the air
- Creates a humid “bubble” around all grouped plants
How to Use
Arrange your Norfolk pine with other tropical or humidity-loving houseplants. Keep them close, but not touching, to allow airflow while pooling moisture benefits.
Quick-Reference Humidity Table
| Solution | Ease of Use | Effectiveness | Cost | Best For |
| Humidifier | High | High | Moderate–High | Long-term, precise humidity control |
| Pebble Tray | Very Easy | Medium | Low | Small spaces, budget-friendly |
| Plant Grouping | Easy | Medium | Free | Larger collections, natural approach |
Light & Placement: Is Low Light Causing Your Norfolk Pine to Dry?
Incorrect light and poor placement can dry out a Norfolk Pine just as quickly as watering mistakes.
This section explains ideal light levels, the best home locations, and how to avoid stress from too much sun or too little light.
Why Light Matters for Norfolk Pines
Your Norfolk Pine’s graceful green layers rely on a steady diet of bright, indirect light.
Too little light weakens its structure, slows growth, and causes needle drop. Too much direct sunlight can scorch delicate foliage, leaving it dry and brittle.
Signs of Low Light Stress
1. Sparse, Leggy Growth
Branches stretch toward the nearest light source, creating uneven growth.
2. Pale or Yellowing Needles
A lack of light reduces chlorophyll production, dulling the rich green color.
3. Slowed Growth
Inadequate light slows photosynthesis, causing fewer new shoots and less needle density.
Quick Fix: Relocate your plant to a brighter spot, an east-facing window or a few feet from a bright south-facing one with filtered light.
Signs of Too Much Direct Sun
1. Scorched Needles
Needle tips or whole sections turn brown and dry in irregular patches.
2. Rapid Drying of Soil
Strong sun can heat the pot and evaporate moisture faster than usual.
Quick Fix: Use sheer curtains to diffuse light, or move the plant slightly back from the window.
Best Placement Guidelines
- East-facing windows: Gentle morning sun, indirect light for the rest of the day.
- North-facing windows: Consistent but softer light, ideal if kept close to the glass.
- South-facing windows: Move 3–5 feet back or use a sheer curtain to prevent burn.
- Avoid drafts: Keep away from vents, radiators, and frequently opened doors.
Light Needs Quick Reference Table
| Light Type | Effect on Norfolk Pine | Placement Tip |
| Bright, indirect light | Healthy, dense, green growth | Near east/north window |
| Low light | Sparse growth, pale needles | Supplement with grow light if natural light is poor |
| Direct afternoon sun | Scorching, browning, drying | Use sheer curtains or move back from window |
Pests and Diseases That Make Norfolk Pines Wilt or Dry Out
Pests and diseases can silently cause your Norfolk Pine to wilt or dry out.
This section covers the most common culprits, how to spot early warning signs, and effective treatments to protect your tree’s health and keep its needles lush and green.
Why Pests and Diseases Are Often Overlooked
Many plant owners focus on watering and light when troubleshooting, but hidden pest infestations or fungal infections can also sap a Norfolk Pine’s vitality.
Because symptoms mimic environmental stress, they often go unnoticed until damage is significant.
Common Pests Affecting Norfolk Pines
1. Spider Mites
- Signs: Fine webbing between needles, yellow stippling, gradual browning.
- Treatment: Wipe foliage with a damp cloth, then spray with insecticidal soap or neem oil weekly until clear.
2. Mealybugs
- Signs: White, cotton-like clusters on stems and needle bases.
- Treatment: Dab with rubbing alcohol on a cotton swab; follow with insecticidal soap.
3. Scale Insects
- Signs: Small, brown, shell-like bumps that stick to stems.
- Treatment: Gently scrape off with a fingernail or soft toothbrush, then apply horticultural oil.
Common Diseases Impacting Norfolk Pines
1. Root Rot
- Cause: Overwatering, poor drainage.
- Signs: Yellowing needles, limp branches, foul-smelling roots.
- Treatment: Remove affected roots, repot in fresh, well-draining soil.
2. Root Rot
- Cause: Fungal infection in damp, poorly ventilated environments.
- Signs: Brown spots spreading from inner branches outward.
- Treatment: Remove infected needles, improve air circulation, and apply a fungicide.
Quick-Reference: Pests & Diseases Table
| Issue | Main Symptom | Best Action |
| Spider Mites | Fine webbing, stippling | Neem oil, insecticidal soap |
| Mealybugs | Cottony clusters | Alcohol swab + insecticidal soap |
| Scale | Hard, brown bumps | Manual removal + horticultural oil |
| Root Rot | Yellow needles, limp branches | Repot with root pruning |
| Needle Blight | Brown spotting, spreading inward | Remove affected areas + fungicide |
How to Revive a Drying Norfolk Island Pine (Step-by-Step)
If your Norfolk Island Pine is drying out, quick action can make all the difference.
Follow these step-by-step rescue techniques to restore moisture, revive color, and bring your tree back to vibrant health without causing shock from sudden changes.
1. Assess the Damage
Before making changes, check if the dryness is affecting only the outer needles or has reached the branches and stem.
- Healthy inner growth means your plant still has strong recovery potential.
- Brittle branches or brown trunks may signal more severe damage.
2. Move to an Ideal Location
Norfolk Pines hate sudden environmental shifts, but if they’re drying due to heat or low humidity, relocate gradually.
- Aim for bright, indirect light.
- Avoid direct midday sun, heating vents, and cold drafts.
3. Deep Water Correctly
Overwatering or underwatering are the top causes of drying.
- Water when the top 2 inches of soil are dry.
- Slowly pour water until it drains from the bottom.
- Empty saucers after watering to prevent root rot.
4. Boost Humidity Immediately
Low humidity is a common killer indoors.
- Mist the foliage lightly (avoid soaking).
- Place a pebble tray with water under the pot.
- Group plants together for shared moisture.
- Use a humidifier for long-term stability.
5. Trim Dead or Severely Brown Tips
Dead needles won’t green up again.
- Use sterilized scissors to trim only the brown ends.
- Avoid cutting into healthy green tissue.
- This reduces stress on the plant and redirects energy to new growth.
6. Feed Lightly During Recovery
A stressed plant can’t handle strong fertilizer.
- Use a half-strength balanced liquid fertilizer once every 4–6 weeks during spring and summer.
- Avoid feeding in winter when growth slows naturally.
7. Monitor and Adjust Weekly
Keep track of soil moisture, humidity, and light exposure.
- Recovery may take several weeks.
- Consistent care is more effective than quick fixes.
Pro Tip: If your Norfolk Pine is extremely dry but roots are still healthy, you can repot it into fresh, slightly moist, well-draining soil to give it a jumpstart, just make sure to do it in spring for the best results.
Preventing Future Dryness: Long-Term Norfolk Pine Care
To prevent your Norfolk Island pine from drying out, focus on consistent watering, proper humidity, and stable environmental conditions.
Long-term care involves balancing light, temperature, and feeding while avoiding common mistakes that stress the plant, ensuring lush green foliage year-round.
1. Maintain Consistent Watering
Norfolk pines dislike erratic watering schedules.
- Check soil moisture with your finger; water when the top 1–2 inches feel dry.
- Avoid extremes, both underwatering and waterlogging lead to foliage browning.
- Use room-temperature water to reduce shock.
Tip: In winter, water less often but never let the root ball dry completely.
2. Keep Humidity Above 50%
Dry air is one of the main culprits for needle drop.
- Place a humidifier nearby or set the pot on a pebble tray with water.
- Group plants together to create a microclimate.
- Mist lightly in the mornings (avoid evenings to prevent fungal issues).
3. Provide Bright, Indirect Light
Too little light can weaken growth, making the plant more vulnerable to dryness.
- Place near an east- or south-facing window with filtered sunlight.
- Rotate the pot every few weeks to promote even growth.
4. Keep Temperatures Stable
Norfolk pines are sensitive to sudden changes.
- Aim for 60–72°F (15–22°C) indoors.
- Keep away from heating vents, air conditioners, and cold drafts.
5. Feed During the Growing Season
Nutrients help strengthen the plant’s root system and water retention.
- Use a balanced liquid fertilizer every 4–6 weeks from spring to early fall.
- Stop feeding in winter when growth slows.
6. Avoid Stress from Repotting or Pruning
- Repot only when root-bound, ideally in spring.
- Prune sparingly, removing too much foliage at once can stress the plant.
7. Monitor for Pests
Spider mites thrive in dry conditions.
- Inspect regularly and treat with neem oil or insecticidal soap if needed.
Pro Tip: Create a Norfolk Pine care calendar, track watering, feeding, and humidity checks to avoid lapses in care.
Final thoughts: Norfolk Pine Drying Out
Norfolk Island pines most often “dry out” from environmental stress: low indoor humidity, erratic watering (either too little or waterlogged roots), and placement near heat/cold drafts or direct harsh sun. T
hese are the repeat causes across expert guides and plant-clinic conversations, so start your troubleshooting there.
Before you panic, diagnose carefully: check soil moisture a few inches down, lift the pot to feel its weight, inspect roots if repotting is already on the table, and look under branches for pests (spider mites, scale, mealybugs).
Misdiagnosing overwatering as underwatering (or vice versa) is the single biggest mistake and can make recovery harder.
If the problem is mainly low humidity or dry air, the fastest wins are a humidifier, pebble tray, or grouping plants, these raise local humidity and often stop tip browning within weeks.
If you spot pests, treat them promptly (wiping, insecticidal soap, neem, or horticultural oil) because infestations worsen stress and drying.
For watering issues, adopt a finger-test or moisture-meter habit: water thoroughly only when the top ~1–2 inches are slightly dry, allow good drainage, and avoid leaving the plant sitting in a full saucer.
If roots are rotten, you’ll need to trim affected roots and repot into fresh, well-draining mix to stop ongoing decline.
Stabilizing light and temperature is equally important, bright, indirect light and stable indoor temps (roughly 60–75°F / 15–24°C) reduce stress and help recovery.
Avoid moving the plant repeatedly while it’s recovering; small, steady improvements beat aggressive changes.
Finally, emphasize prevention over rescue: a modest routine, consistent watering checks, humidity support during heating seasons, seasonal feeding during growth months, and monthly pest inspections, keeps Norfolk pines healthy and makes severe drying rare.
For readers, a short care calendar (water check, humidity boost, light rotation, pest spot-check) is a simple habit that pays off.
Mariel is a plant enthusiast and writer based in the UK with a passion for houseplants and indoor growing.
She has spent the last few years building an ever-growing collection of indoor plants and learning the hard way which ones will survive her busy schedule.
At Bean Growing she writes about houseplant care, common plant problems, and outdoor gardening.