
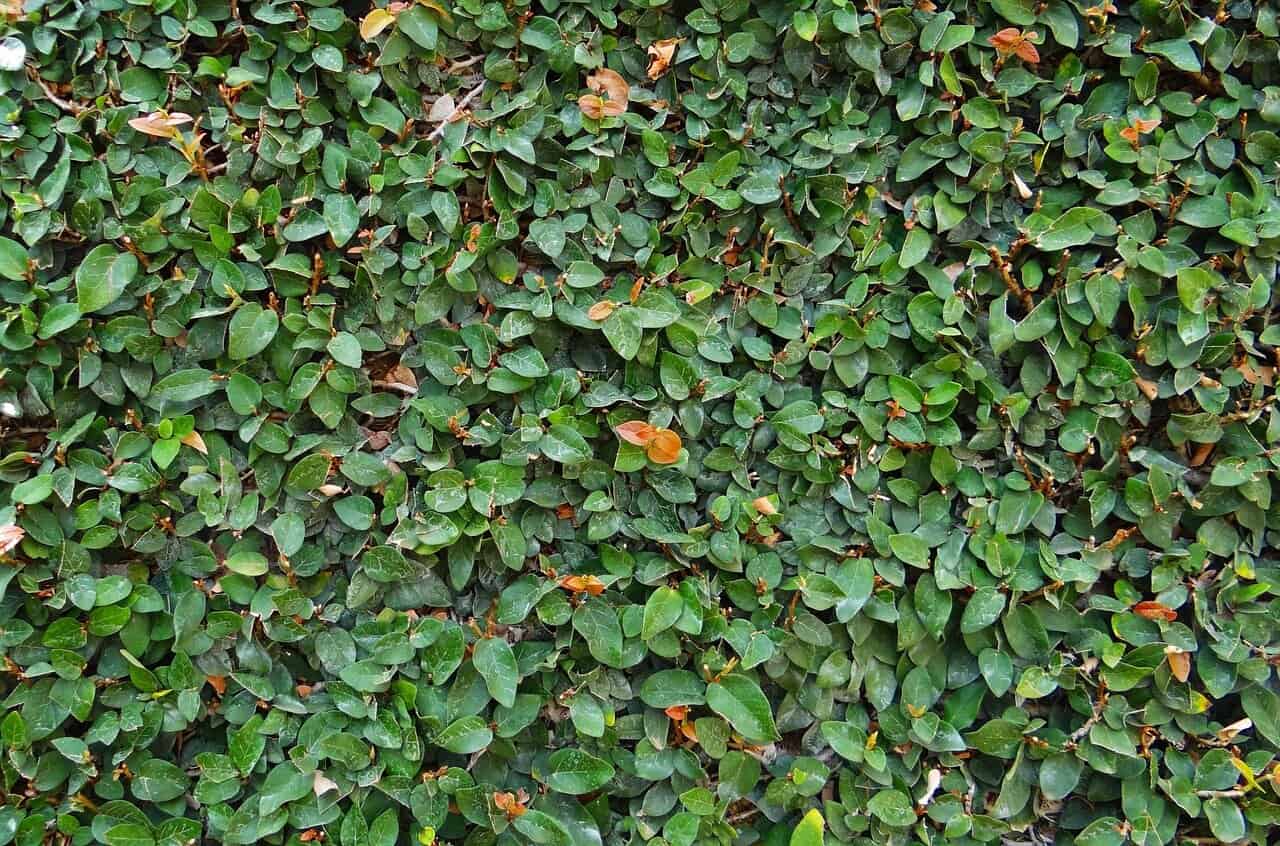
Creeping fig (Ficus pumila) is an evergreen self-clinging vine that attaches to walls via tiny aerial roots.
Plant it 12 inches from the base of a brick, concrete, or stucco wall in USDA Zones 8–11, provide consistent moisture, and prune 2–3 times per year to prevent structural damage.
Never plant it on wood siding, its moisture retention causes rot.
There’s a reason creeping fig shows up on the walls of old Southern estates, chic restaurant patios, and Instagram-worthy garden walls from California to Georgia.
When it works, it genuinely transforms a plain wall into something that looks like it belongs on the streets of Paris.
But growing creeping fig successfully means understanding both its incredible strengths and its very real limitations, and most beginner guides leave out half the story.
This guide is different. It covers every stage of the process: choosing the right surface, planting correctly, training young vines, watering and feeding for maximum growth, pruning to stay in control, and troubleshooting the problems that catch most growers off guard.
Whether you’re starting from scratch or rescuing an underperforming plant, you’ll find specific, actionable answers here.
What Is Creeping Fig (Ficus pumila)?
Creeping fig is a woody, evergreen vine native to East Asia, specifically China, Japan, Vietnam, and surrounding regions.
Its botanical name, Ficus pumila, literally means ‘dwarf fig,’ which is slightly misleading given that an established plant can cover hundreds of square feet of wall space within a few years.
The plant climbs using adhesive aerial rootlets along its stems.
These rootlets secrete a sticky substance that bonds to rough surfaces like brick, concrete, and stucco without any mechanical support.
This is the key thing to understand upfront: creeping fig doesn’t wrap or twine. It glues itself to the surface, which is both its greatest feature and its most important limitation.
Young plants produce small, delicate, heart-shaped leaves about ½–1 inch wide.
Once mature (typically after 3–5 years on a surface), the plant enters what botanists call its ‘adult’ growth phase, producing larger, leathery leaves up to 4 inches wide and eventually developing small inedible figs.
This transition is irreversible, mature growth looks and behaves quite differently from juvenile growth.
| Quick Plant Profile Botanical name: Ficus pumila Family: Moraceae USDA Hardiness: Zones 8–11 Growth rate: Fast (up to 6 ft per year in ideal conditions) Light: Partial shade to full sun (partial preferred) Water: Moderate, consistent Mature spread: 15–30+ ft |
Why Grow Creeping Fig? Benefits and Honest Trade-offs
Creeping fig earns its popularity for good reasons, but it also comes with trade-offs that many beginner guides gloss over. Here’s an honest look at both sides.
What Makes It Worth Growing
Aesthetic impact is the obvious draw. A mature creeping fig wall has a density and richness that almost no other vine can match.
The small juvenile leaves create an intricate, mosaic-like texture that softens hard architectural surfaces in a way that looks natural, not planted.
It also serves as a genuine temperature buffer. University of Georgia Extension research found that green walls can reduce surface temperatures on sun-exposed masonry by 10–15°F in summer, which translates to lower cooling loads for buildings in hot climates like the Southeast and Southwest.
For privacy screening, creeping fig trained on a fence or trellis provides dense year-round coverage in Zones 8–11 without going dormant in winter, which is a key advantage over deciduous alternatives like Virginia creeper.
The Trade-offs You Need to Know
| Structural Warning Creeping fig’s adhesive rootlets are extremely difficult to remove once attached. They leave behind dark staining and residue on masonry that often requires pressure washing or sandblasting. On painted surfaces, they penetrate the paint layer and can cause it to peel en masse. On wood siding, the vine’s moisture retention significantly accelerates rot. These are not theoretical risks, they are predictable outcomes on inappropriate surfaces. |
Growth speed that’s appealing in year one becomes a management challenge by year three.
Without pruning 2–3 times per year, creeping fig will grow into roof overhangs, gutters, window frames, and utility equipment. It is not a ‘plant and forget’ vine.
In Zones 9–11, particularly Florida, Louisiana, and coastal California, creeping fig has naturalised in some areas and can spread aggressively beyond its intended location.
Always check your local invasive species lists before planting.
Is Creeping Fig Right for Your Climate? Zone-by-Zone Guide
Understanding your USDA hardiness zone before planting saves significant effort.
Creeping fig is frost-sensitive, and what works beautifully in Atlanta can fail completely in Nashville after a hard winter.
| USDA Zone | States/Regions | Performance | Key Consideration |
| Zone 8 | Pacific NW, Pacific Coast inland, Georgia piedmont, N. Texas | Good with winter protection in zone 8a | May die back in hard freezes; usually rebounds from roots |
| Zone 9 | Central California, Gulf Coast, N. Florida, Central Texas | Excellent year-round performer | Minimal winter dieback; grows aggressively, prune regularly |
| Zone 10 | S. Florida, S. Texas, coastal Southern California | Thrives, may be invasive | Check local invasive lists; monitor spread carefully |
| Zone 11 | Hawaii, Puerto Rico, S. tip of Florida | Evergreen and vigorous | Potential invasive concern; restrict to contained areas |
| Zones 6–7 | Most of the Southeast, Mid-Atlantic, Pacific NW | Not reliably hardy outdoors | Use as annual or grow indoors in containers |
| Zone 8 Tip In Zone 8a (minimum temps around 10–15°F), plant creeping fig on a south- or west-facing wall, which acts as a heat sink and protects roots from the worst cold snaps. Mulch the root zone with 3 inches of pine straw before the first frost to improve cold hardiness significantly. |
What You Need to Grow Creeping Fig on a Wall
Before you plant, gather everything you need. Improvising mid-project, especially when it comes to support structures on walls, wastes time and risks damaging surfaces.
| Item | Specification / Notes |
| Creeping fig plant(s) | 4-inch or 1-gallon nursery pot; look for healthy green foliage with no yellowing or root-bound appearance |
| Well-draining potting or garden soil | pH 6.0–7.0; amend with compost if planting in ground with heavy clay |
| Organic compost | Mix 20–30% into native soil at planting to improve drainage and nutrition |
| Mulch (pine straw or wood chips) | 2–3 inch layer to retain moisture and regulate soil temperature |
| Soft garden ties or Velcro plant tape | Critical for training young vines; avoid wire which cuts stems |
| Sharp, clean pruning shears | Clean with 10% bleach solution before and after use to prevent disease transfer |
| Balanced liquid fertilizer (10-10-10) | Diluted to half strength; used during growing season only |
| Trellis or wire grid (if surface is smooth) | Rust-resistant powder-coated steel or treated wood; mount 1 inch off wall for airflow |
| Masonry screws and anchors | For mounting trellis supports to brick, block, or concrete walls |
| Watering can or drip irrigation setup | Slow, deep watering is far more effective than frequent shallow watering |
| Gloves | Ficus pumila sap can irritate skin in sensitive individuals, always wear gloves when pruning |
Choosing the Right Wall Surface: The Most Important Decision
Surface selection determines whether your creeping fig thrives, damages your property, or both.
This decision needs to be made before you plant, not after the vine is established, removing adhered creeping fig from the wrong surface is genuinely difficult and often destructive.
| Wall Surface | Suitability | Why | Special Considerations |
| Brick (unpainted) | Excellent | Porous mortar and surface texture give aerial rootlets strong grip; vine grows confidently without support | Inspect mortar condition first, rootlets can enlarge existing cracks over decades |
| Concrete / poured concrete block | Excellent | Similar grip to brick; very durable | Slightly slower to attach than brick due to smoother finish on some concrete types |
| Stucco (textured) | Very Good | Rough texture supports adhesion; very common in Southwest and Florida | Smooth-finish stucco is less ideal; use trellis on smooth stucco |
| Natural stone (rough) | Good | Provides grip; aesthetically beautiful combination | May need temporary ties on very smooth or sealed stone |
| Painted masonry | Poor – Avoid | Rootlets penetrate paint and cause mass peeling when plant is removed or grows | If you must use painted wall, install trellis standing 2+ inches off surface |
| Wood siding / fence boards | Poor – Avoid | Vine traps moisture against wood, accelerating rot and warping | Use trellis or separate planting area; never let vine contact wood directly |
| Vinyl siding | Poor – Avoid | Rootlets cannot penetrate but create moisture traps; staining is hard to remove | Container-and-trellis approach only |
| EIFS / synthetic stucco | Very Poor – Avoid | Rootlets can penetrate the surface coating and damage the insulation layer beneath | Serious structural repair risk; do not plant directly against EIFS |
| Warning: Mortar Joints While creeping fig rarely damages structurally sound brick, it will exploit weak or crumbling mortar. Inspect masonry carefully before planting. Any mortar that can be scraped out with a key or finger needs to be repointed before the vine is established. Once roots penetrate mortar joints, their removal becomes a masonry repair project. |
Three Ways to Grow Creeping Fig on a Wall
There isn’t one single ‘correct’ method. The right approach depends on your wall surface, climate, and how much control you want over the plant’s spread.
| Method | Best For | Pros | Cons |
| Direct adhesion to bare masonry | Brick, concrete, rough stucco walls in Zones 9–11 | Most natural look; no hardware; very strong attachment once established; fastest coverage | Permanent, near impossible to remove cleanly; vine will damage painted or smooth surfaces; not reversible |
| Trellis or wire grid mounted off wall | Any wall surface; painted masonry; areas where removal may be needed | Protects wall surface; can be removed; easier to manage spread; works on smooth surfaces | Hardware visible initially; requires installation; slightly slower establishment |
| Container planting with freestanding trellis | Renters; indoor walls; patios; courtyard settings; Zones 6–7 (overwinter indoors) | Fully portable; no wall damage whatsoever; can bring indoors in winter | Requires more frequent watering and fertilizing; container limits ultimate size; needs stable base |
| Indoor Growing Note Creeping fig is one of the most popular indoor wall plants because juvenile leaves stay small in lower light. For indoor use, choose the container-plus-trellis method and place the plant near a bright window. Indoor plants do not go through the juvenile-to-adult growth transition as quickly, which keeps the more attractive small-leaf appearance for longer. |
Step-by-Step Guide to Planting and Training Creeping Fig
Step 1: Plan Your Planting Area
Decide where each plant will go and mark the spots with garden stakes. Space plants 2–3 feet apart along the base of the wall.
Plants spaced too close will compete and you’ll get uneven coverage; too far apart and you’ll wait years for the wall to fill in.
Dig the planting hole 12–18 inches away from the wall’s base, not directly against it.
Walls deflect rainfall, and a plant crowded against masonry in summer heat is prone to drought stress and root overheating. The vine will grow horizontally toward the wall on its own.
| Pro Tip: Soil Test First Take a soil sample to your county Cooperative Extension office before planting. They’ll test pH and nutrient levels for around $15–20. Creeping fig is forgiving, but starting with pH-corrected, nutrient-adequate soil eliminates the most common cause of slow establishment in new plantings. |
Step 2: Prepare Soil and Wall Surface
For in-ground planting: loosen the soil in a 2-foot radius around each hole to a depth of 12 inches. Mix in one part compost to three parts native soil.
This improves drainage in clay soils (preventing root rot) and improves water retention in sandy soils (reducing drought stress).
For the wall surface: brush off loose debris, cobwebs, and any flaking material.
If mounting a trellis, install it now, before planting, so you’re not maneuvering hardware around young plants.
Mount trellis supports at least 1 inch off the wall surface to allow airflow, which reduces fungal pressure.
| Warning: Check for Utilities Before drilling into any masonry wall, use a stud finder with live-wire detection or contact a licensed electrician to confirm there are no embedded electrical conduits, plumbing, or gas lines in the wall. Drilling into a live conduit is a serious safety hazard. |
Step 3: Plant at the Correct Depth
Remove the plant from its nursery container and gently loosen any circling roots. Plant at the same depth as the root ball, the point where the stem meets the roots should be at or just above soil level.
Planting too deep buries the crown and promotes crown rot, which is one of the most common causes of new planting failures.
Firm the soil around the root ball to remove air pockets, then water thoroughly, a slow, sustained soak rather than a quick pour.
The goal is to wet the soil to a depth of at least 8 inches to encourage roots to grow downward rather than staying near the surface.
Step 4: Apply Mulch
Apply a 2–3 inch layer of pine straw or wood chip mulch in a circle at least 18 inches in diameter around each plant.
Keep mulch 2 inches away from the stem to prevent crown rot. Mulch serves three functions: it retains soil moisture (reducing watering frequency by 30–50% in summer), regulates soil temperature, and suppresses weed competition during establishment.
Step 5: Train Young Vines Toward the Wall
Young creeping fig doesn’t immediately know which direction to grow. For the first few weeks, use soft garden ties or Velcro plant tape to gently guide stems toward the wall.
Create a ‘roadmap’ by placing ties every 6 inches along the direction you want growth to travel.
| Training Tip Slightly dampen the wall surface when initially pressing young stems against it. Creeping fig’s aerial rootlets bond to moist surfaces faster than dry ones, this simple step can cut the establishment period by 2–3 weeks. Use a spray bottle to mist the wall before pressing stems against it. |
Step 6: Water Through Establishment
For the first 4–6 weeks after planting, water every 2–3 days (or whenever the top inch of soil feels dry).
Newly planted vines have a small root system that can’t draw on deep soil moisture reserves yet. Consistent moisture during this period is the single most important factor in establishment success.
After 6–8 weeks, taper watering to once per week in summer and every 10–14 days in cooler months. The goal is consistently moist (not wet) soil at a depth of 4–6 inches.
Step 7: Begin Light Pruning in Year 1
Don’t wait until the plant is large to start shaping it. In year one, use pruning shears to pinch back any stems that are growing away from the wall rather than toward it, and any that are heading in directions you don’t want coverage.
This early directional pruning takes just minutes and prevents major correction work later.
| Sap Warning Ficus pumila produces a milky white latex sap when cut, which can cause contact dermatitis in sensitive individuals and is mildly toxic if ingested. Always wear gloves when pruning. Keep children and pets away from freshly cut stems and clippings. The sap is not toxic in the same category as poisonous plants, but it is a known skin irritant. |
Watering Creeping Fig: A Practical Schedule
Creeping fig’s water needs vary significantly by season, planting location, and local climate.
The most common watering mistake among new growers isn’t underwatering, it’s inconsistent watering that swings between too wet and too dry, which stresses the plant and triggers leaf drop.
| Growing Situation | Watering Frequency | Method | Key Sign of Correct Watering |
| In-ground, outdoor, Zone 9–11 | Once per week in summer; every 10–14 days in fall/winter | Deep, slow soak at base | Soil moist at 4–6 inch depth; no standing water |
| In-ground, Zone 8 (hot, dry summer) | Twice per week in peak summer heat | Drip irrigation or slow soak | Mulch stays moist to the touch between waterings |
| Container, outdoor | Every 2–3 days in summer; reduce significantly in winter | Water until it flows from drainage holes | Container feels heavy after watering; lighter when it’s time to water again |
| Indoor, potted | When top 1–2 inches of soil are dry | Water thoroughly, empty saucer after 30 min | Leaves firm and upright; not drooping or yellowing |
| Watering Efficiency Tip Drip irrigation systems are by far the most effective way to water in-ground creeping fig in hot climates. A simple soaker hose running along the planting area, connected to a timer, eliminates watering inconsistency, the number one cause of establishment failure. Basic soaker hose setups cost $30–50 and can be set and essentially forgotten during the growing season. |
Fertilizing for Maximum Wall Coverage
Creeping fig is not a heavy feeder, but it benefits from supplemental nutrition during the growing season, particularly in the first 2–3 years when you’re trying to establish wall coverage.
Over-fertilizing is a common mistake that causes excessive soft, sappy growth that’s weak, susceptible to pest damage, and poorly adhered to the wall surface.
| Fertilizer Type | Application Rate | Timing | Why Use It |
| Balanced liquid fertilizer (10-10-10 or 20-20-20) | Half the label rate | Every 4–6 weeks, March through September | Provides all three primary nutrients for balanced growth; half-strength prevents salt buildup |
| Slow-release granular (e.g., Osmocote 14-14-14) | Per label for container size or planting area | Once in early spring, once in early summer | Consistent low-level feeding; less management; ideal for in-ground plantings |
| Organic compost top-dressing | 1 inch layer around root zone | Spring, before mulching | Improves soil microbiology; slow-release nutrition; improves drainage |
| Liquid kelp or fish emulsion | Per label dilution | Every 6–8 weeks as supplemental feed | Provides trace minerals and growth hormones that standard NPK fertilizers miss |
| Fertilizer Warning Never apply fertilizer to dry soil or immediately after drought stress. Concentrated fertilizer salts applied to dry roots cause fertilizer burn, which appears as brown leaf edges within a few days. Always water thoroughly before fertilizing, and always fertilize in the early morning or evening, never in midday summer heat. |
Pruning and Shaping: How to Stay in Control
Pruning is the discipline that separates a beautiful creeping fig wall from a maintenance nightmare.
The vine’s fast growth rate, up to 6 feet per year in ideal conditions, means that skipping pruning even for one season can result in significant overgrowth into unwanted areas.
The good news is that creeping fig responds exceptionally well to pruning and bounces back quickly after even aggressive cutting.
When to Prune
Primary pruning: late spring (May in most US zones) after the main flush of spring growth. This is when the plant has maximum energy reserves and heals cut ends fastest.
Secondary pruning: late summer (August) to catch summer extension growth before fall. In warm zones (9–11), a light third pruning in October is often needed.
Avoid heavy pruning in November through February. Cold temperatures slow the plant’s ability to heal cut ends, and pruning stimulates new tender growth that can be damaged by frost.
What to Remove
In order of priority:
(1) Any growth reaching windows, gutters, roof overhangs, or utility equipment. These cause the most damage if left.
(2) Stems growing backward or away from the wall.
(3) Growth that has exceeded the boundary of the wall you want covered.
(4) Dead or visibly diseased sections.
(5) Excess density in heavily covered areas, removing 20–30% of growth in very thick sections improves airflow and reduces fungal pressure.
| The Boundary Line Method Mark the exact borders you want the vine to stay within using landscape paint or chalk before each pruning session. Then work systematically along each border, cutting back to that line. This takes the guesswork out of pruning decisions and gives you a clean, intentional result every time, rather than the uneven look that comes from eyeballing it. |
Pruning Tools and Technique
For small stems (under ¼ inch): sharp hand pruning shears.
Medium branches (¼–½ inch): bypass lopper
For stems the vine has built up over years (½ inch or thicker): a narrow-blade pruning saw or reciprocating saw.
Always cut at a 45-degree angle just above a leaf node, not into dead wood between nodes. Cutting into leafless dead wood creates an entry point for disease.
Clean pruning shears with a 10% bleach solution (1 part bleach, 9 parts water) between plants if pruning multiple species on the same day.
Growth Timeline: What to Expect Year by Year
Setting realistic expectations prevents discouragement during the slow early phase and prevents you from being caught off guard when growth accelerates.
| Stage | Timeframe | What You’ll See | Key Management Action |
| Establishment | Weeks 1–8 | Little to no visible growth; plant is developing root system; some leaf drop is normal | Keep soil consistently moist; protect from direct afternoon sun in Zone 9–11 |
| First attachment | Months 2–4 | Stems begin pressing against wall; aerial rootlets visibly form; some stems gluing on | Assist with soft ties where stems aren’t naturally attaching |
| Active vertical spread | Months 4–12 | Visible upward and sideways growth; may extend 1–3 feet up the wall by end of first year | Begin light directional pruning; remove any misdirected growth |
| Rapid coverage | Years 2–3 | Growth rate increases dramatically; wall section may be 50–80% covered | Begin full pruning schedule 2–3x per year; establish boundaries |
| Mature coverage | Years 3–5 | Dense full coverage; plant enters adult growth phase with larger leaves | Ongoing annual maintenance; monitor for structural impact |
| Managing Expectations If your creeping fig seems ‘stuck’ in months 2–4 with no visible wall coverage, don’t panic. The plant is almost certainly investing energy in root development rather than above-ground spread. A plant that establishes a strong root system in year one will outperform a plant that rushes to cover wall space before it has adequate root support. Trust the process and maintain consistent watering. |
Pests and Diseases: Identification, Treatment, and Prevention
Creeping fig is genuinely pest-resistant compared to most ornamental plants, but it’s not immune. The three most common pest problems are all manageable with early identification.
Aphids
Small soft-bodied insects, usually green or black, that cluster on new growth and the undersides of leaves.
They feed by piercing leaf tissue and extracting sap, causing leaves to curl, yellow, and become sticky from their honeydew secretions.
Treatment: A strong blast of water from a garden hose removes most aphid colonies immediately.
For persistent infestations, spray with insecticidal soap (1 tablespoon per quart of water) or diluted neem oil every 5–7 days until clear. Insecticidal soap works by disrupting the insects’ cell membranes on contact, it has no residual effect, so thorough coverage during application is essential.
Scale Insects
Brown, grey, or white bumps that appear fixed to stems and leaf undersides.
Scale insects are armored, they protect themselves under a hard shell, making them resistant to sprays that hit only the outside of the shell.
They feed continuously on plant sap and excrete honeydew that supports sooty mould growth.
Treatment: Horticultural oil (also called dormant oil or summer oil) is the most effective treatment because it smothers scale under their shells.
Apply when temperatures are between 40–90°F and avoid application in direct sunlight to prevent phytotoxicity.
A toothbrush dipped in rubbing alcohol can remove individual colonies on accessible stems.
Mealybugs
White, cottony masses, usually found where leaves attach to stems and in dense growth areas.
More common on indoor plants or in humid conditions. They’re closely related to scale but lack the hard shell, making them easier to treat.
Treatment: Wipe accessible colonies with a cotton ball soaked in 70% isopropyl alcohol.
For larger infestations, neem oil spray applied every 7 days for 3–4 cycles is effective. Indoors, yellow sticky traps help monitor population levels.
| Pesticide Warning Never apply pesticide sprays to creeping fig in temperatures above 90°F or in direct midday sun. Heat combined with oil-based sprays can burn foliage badly enough to defoliate the entire plant. Always spray in the early morning or evening when temperatures are moderate. |
Root Rot (Phytophthora)
The most serious disease risk for creeping fig. Caused by water mould pathogens (Phytophthora and Pythium species) that thrive in waterlogged, poorly drained soil.
Symptoms include sudden wilting despite adequate watering, yellowing that starts at the base of the plant, and a distinctive foul smell from the soil around roots.
Prevention is far more effective than treatment: always plant in well-draining soil, never let containers sit in standing water, and never water on a fixed schedule without checking soil moisture first.
If root rot is detected, remove affected soil, trim back visibly black or mushy roots to healthy tissue, treat remaining roots with a copper fungicide drench, and replant in fresh well-draining mix.
How to Propagate Creeping Fig: Free Plants from Cuttings
Propagating creeping fig is straightforward, highly successful, and a cost-effective way to expand coverage or share plants.
Both soil and water methods work well, but soil propagation generally produces stronger root systems.
Taking Cuttings
Take cuttings in late spring or early summer when the plant is in active growth and has maximum energy for rooting.
Select healthy stem sections 4–6 inches long with at least two leaf nodes and no signs of pest damage or disease.
Use sharp, clean pruning shears to make a clean cut just below a node (the point where a leaf attaches to the stem).
Remove the lower leaves, leaving 2–3 leaves at the tip. Large leaves can be cut in half to reduce water loss while roots develop.
Dipping the cut end in powdered rooting hormone (IBA at 0.3%) is optional but increases rooting success rates from roughly 60% to over 85% based on typical cutting propagation data.
Soil Propagation (Recommended)
- Fill a 3–4 inch pot with a 50/50 mix of perlite and peat-free potting compost. This mix drains quickly (preventing rot) while retaining enough moisture for root development.
- Make a small hole with a pencil, insert the cutting, and firm the mix around it so it stands upright.
- Water lightly and cover with a clear plastic bag or humidity dome to maintain 80%+ humidity around the cutting.
- Place in bright indirect light at 65–75°F. Avoid direct sun, which will overheat the cutting and cause it to wilt before rooting.
- Check after 3–4 weeks by gently tugging, resistance means roots have formed.
- Once rooted, gradually open the humidity cover over 5–7 days to acclimate to lower humidity before removing completely.
| Propagation Tip If propagating multiple cuttings, label each pot with the date. This helps you track which cuttings are taking longer to root (a sign of unhealthy parent material) versus which are establishing quickly. Cuttings taken from actively growing stem tips root faster than cuttings taken from older, woodier sections. |
Troubleshooting: Solving the Most Common Creeping Fig Problems
Problem 1: Leaves Turning Yellow
Yellow leaves are the most common complaint from creeping fig growers and can have several distinct causes. Correctly diagnosing the cause avoids treating the wrong problem.
Yellowing that starts on lower leaves and progresses upward typically indicates overwatering or root rot.
Yellowing on new growth with older leaves staying green usually indicates iron or nitrogen deficiency.
Uniform yellowing across the entire plant often indicates sudden temperature change (e.g., placing an outdoor plant indoors, or a frost event) or root constriction in a container-bound plant.
Solution: Check soil drainage first, if the soil is soggy, withhold water and improve drainage before anything else.
If drainage is fine, apply a balanced fertilizer at half strength. If the plant has been in the same container for 2+ years, pot up to the next size.
Problem 2: Leaves Dropping Suddenly
Sudden, dramatic leaf drop, where many leaves fall in a short period, is almost always a response to stress rather than disease.
The most common triggers are: being moved from outdoors to indoors (or vice versa), sudden cold drafts, a sharp change in light levels, or allowing the plant to completely dry out followed by heavy watering.
Solution: Stabilize the plant’s environment. Avoid moving it if possible. If it must be moved indoors for winter, do so gradually, start by bringing it in at night and leaving it out during the day for 1–2 weeks to acclimate.
Most plants that drop leaves due to environmental change will push out new growth within 4–6 weeks once conditions stabilize.
Problem 3: The Vine Won’t Stick to the Wall
If young vines aren’t adhering to the wall after 4–6 weeks, there are usually two reasons: the surface is too smooth, or the stems aren’t being held in contact long enough for rootlets to bond.
Solution: On smooth surfaces, lightly scoring the wall with 80-grit sandpaper to create micro-texture can dramatically improve adhesion.
Alternatively, fit a trellis. On any surface, misting the wall with water before pressing stems against it helps the rootlet adhesive compound make better initial contact.
Use more ties than you think you need in the early weeks, one tie every 3–4 inches along growing stems, not every 6–12 inches.
Problem 4: Slow or Sparse Growth
A creeping fig that makes very little progress after the first 12 months is usually being held back by one of three limiting factors: insufficient light, root restriction (container-bound plants), or deficient soil nutrition.
Solution: Assess light levels first, creeping fig in deep shade (under 2 hours of indirect light per day) grows at a fraction of its potential rate.
If light is adequate, do a soil test. If neither light nor nutrition explains the slow growth, check whether the root system is constricted by checking if roots are circling the bottom of the container or compacting in heavy soil.
| Problem | Most Likely Cause | Confirm By | Solution |
| Yellow leaves | Overwatering / poor drainage | Check soil: soggy below surface? | Improve drainage; reduce watering frequency; check for root rot |
| Sudden leaf drop | Environmental stress | Did anything change recently? (moved, cold snap, drought) | Stabilize environment; avoid moving plant; maintain consistent moisture |
| Won’t stick to wall | Smooth surface / insufficient contact | Can you see rootlets forming but not bonding? | Score wall surface; use more ties; mist wall before pressing stems |
| Slow/sparse growth | Low light or nutrient deficiency | Measure light levels; do soil test | Relocate for more light; fertilize; repot if root-bound |
| Brown leaf tips | Low humidity or underwatering | Is soil dry? Is the air dry? | Mist plant; increase watering; use humidity tray for indoor plants |
| White powdery coating on leaves | Powdery mildew (fungal) | White coating that wipes off? | Improve airflow; apply sulfur-based fungicide; remove affected leaves |
| Mushy stems near base | Crown or root rot | Smell soil, foul odor? Stem mushy at soil line? | Remove from soil; trim rotten tissue; treat with copper fungicide; replant in fresh mix |
Advanced Methods and Alternatives
Using Creeping Fig Indoors as a Living Wall
Indoor living walls using creeping fig have become increasingly popular in commercial settings (lobbies, restaurants) and in residential spaces.
The key difference from outdoor walls is that indoor plants require supplemental lighting (LED grow lights set 12–14 hours per day if natural light is insufficient), more frequent watering due to dry indoor air, and a wall-mounted irrigation system for large installations.
For single-wall indoor applications, a container fitted with a sturdy wire grid placed against a blank wall works beautifully.
The plant fills in more slowly indoors (expect 50% coverage in 2–3 years rather than 1–2 years), but retains the attractive small juvenile leaf form much longer because lower light delays the juvenile-to-adult transition.
Combining Creeping Fig with Other Climbers
In Zones 9–11, pairing creeping fig with star jasmine (Trachelospermum jasminoides) on the same wall creates a visually interesting combination, the jasmine adds fragrant flowering interest in spring while the creeping fig provides year-round density.
Plant the two species in alternating groups of 3–4, spaced 3 feet apart, and train them to share the wall space as they grow.
The Juvenile-to-Adult Transition: What to Expect
One aspect of creeping fig that most guides don’t cover adequately is the significant change that occurs when the plant reaches maturity (typically 3–7 years on a surface).
The small, delicate juvenile leaves are replaced by larger, leathery adult leaves that look almost like a different species.
The adult growth also produces fruiting branches that extend outward from the wall, giving the plant a three-dimensional bushy appearance.
Many growers find the juvenile form more attractive than the adult.
To maintain juvenile characteristics longer: prune aggressively, which keeps the plant in a vegetative non-flowering state; provide slightly less direct sun than ideal; and avoid over-fertilizing with high-nitrogen fertilizers, which accelerates the transition.
None of these will prevent the eventual transition, but they can delay it by 1–3 years.
| Managing Adult Growth Once creeping fig enters adult growth phase, the outward-extending fruiting branches need regular removal or they will push the plant several inches away from the wall and catch wind, eventually straining adhesion. Cut these back to the main stem 2–3 times per year during your regular pruning sessions. |
Frequently Asked Questions
Does creeping fig damage brick walls?
On structurally sound brick with intact mortar, creeping fig poses minimal damage risk during the vine’s lifetime.
The aerial rootlets adhere to the surface without physically penetrating sound mortar.
The damage risk comes at removal: when you pull established creeping fig off brick, the adhesive residue and occasional torn surface layer often require significant cleaning and sometimes repointing of mortar.
If the mortar is already weakened or crumbling, the rootlets will exploit those existing weaknesses, accelerating deterioration.
The safest approach is to inspect masonry condition thoroughly before planting and repoint any weak joints.
How fast does creeping fig grow on a wall?
In USDA Zones 9–11 with adequate water and full sun to partial shade, established creeping fig can extend 3–6 feet per year.
In Zone 8 or in partial shade, growth rate is typically 1–3 feet per year. The first year of growth is almost always the slowest because the plant is investing primarily in root development.
Don’t judge growth rate until the vine has been in the ground for at least 18 months, the dramatic acceleration usually comes in years 2 and 3.
Is creeping fig invasive?
Creeping fig is classified as invasive or a ‘documented escapee’ in parts of Florida, Georgia, and Hawaii, where winter temperatures are not cold enough to keep it in check.
In these areas, it has naturalised along roadsides, in forested areas, and in disturbed habitats.
Before planting in Zone 9b or warmer, check your state’s invasive species list and consider whether native alternatives better suit your climate.
In Zone 8, frost keeps it reliably controlled. Where it is grown, planting it against a solid boundary (wall, driveway) on all sides limits escape potential significantly.
Can creeping fig grow in full shade?
Creeping fig tolerates more shade than almost any other wall-covering vine, which is part of what makes it so useful for north-facing and shaded courtyard walls.
However, ‘tolerates’ and ‘thrives’ are different things. In deep shade (less than 2 hours of indirect light daily), growth will be very slow, the plant will be sparse, and it will be more susceptible to fungal problems due to poor air circulation and slow drying of foliage.
Aim for at least 3–4 hours of indirect light, or 1–2 hours of direct morning sun, for healthy long-term performance.
Why is my creeping fig not sticking to the wall?
Young creeping fig takes 4–8 weeks to develop the adhesive rootlets needed to self-attach. If after 8 weeks stems are not adhering, the most common causes are: the wall surface is too smooth (painted masonry, vinyl, or sealed surfaces), the stems are not being held close enough to the surface, or the surface is too dry.
Use soft ties to press stems firmly against the surface, mist the wall with water before pressing stems against it, and consider lightly roughening smooth surfaces with sandpaper.
A trellis is the most reliable solution for consistently smooth surfaces.
How do I remove creeping fig from a wall?
Removing established creeping fig from a wall is a significant project that most growers underestimate.
The process is: cut the vine at the base to stop water and nutrient supply to the above-ground portion.
Wait 2–3 weeks for the plant material to die and dry out, dry material is much easier to remove than living, flexible vines.
Use stiff brushes, scrapers, and a pressure washer to remove adhesive residue. For walls where adhesive residue has bonded deeply (especially porous brick and stucco), a masonry cleaner or diluted muriatic acid solution may be needed, applied by a professional.
Expect the cleaning process to take several full days of work for a well-established vine.
Can I grow creeping fig on a wooden fence?
You can, but it’s not recommended without a physical barrier between the vine and the wood.
Creeping fig holds moisture against surfaces, and wood exposed to constant moisture will rot significantly faster than if left unplanted.
If you want the look of creeping fig on a wooden fence, mount a powder-coated metal wire grid or hardware cloth 2+ inches off the fence surface and grow the vine on the grid, not against the wood directly.
This provides the visual effect while protecting the fence structure.
Is creeping fig toxic to pets or children?
Creeping fig (Ficus pumila) is classified as mildly toxic by the ASPCA for dogs and cats, causing symptoms including mouth irritation, excessive drooling, and vomiting if consumed in quantity.
The milky sap can cause contact dermatitis in both humans and animals. For households with pets that chew plants, grow creeping fig at height out of reach or use alternative plants.
For children, the main risk is handling cut stems, always supervise children around the plant and keep fresh cuttings out of reach.
Key Success Factors: Your Creeping Fig Checklist
- Choose the right wall surface before you plant. Brick, concrete, and rough stucco are ideal. Never plant directly against painted surfaces, wood, vinyl siding, or EIFS without a standoff trellis.
- Confirm your USDA zone is 8–11, or commit to growing in containers for overwintering in colder zones.
- Plant 12–18 inches from the wall base, not pressed against it, to prevent water deflection and root overheating issues.
- Use well-draining soil amended with compost. Poor drainage is the number one cause of root rot, which is the most serious health risk for this plant.
- Water consistently during the first 8 weeks. Establishment failure is almost always a watering problem, not a soil or light problem.
- Train young stems with soft ties every 3–4 inches for the first growing season. Early directional guidance prevents years of corrective pruning.
- Prune 2–3 times per year minimum. Mark your calendar. Do not skip pruning seasons, a single skipped year can mean overgrowth into gutters, windows, or roof overhangs.
- Fertilize at half strength every 4–6 weeks during the growing season only. Stop all fertilizing November through February.
- Monitor for scale and aphids monthly during the growing season. Early intervention prevents infestations from becoming severe.
- Accept and plan for the juvenile-to-adult growth transition at year 3–5. If the large-leaf adult form doesn’t suit your aesthetic, increase pruning frequency to delay and manage the transition.
Final Thoughts
Creeping fig is one of the most rewarding wall plants you can grow, when the right plant meets the right surface.
Its ability to transform a blank masonry wall into a lush vertical garden within 2–3 years is genuinely impressive, and its tolerance for shade makes it useful in situations where other vines simply won’t perform.
The growers who struggle with creeping fig almost always have one of two issues: they planted it on the wrong surface and are dealing with the consequences, or they underestimated the maintenance commitment and let it get out of control.
Both problems are entirely avoidable with the knowledge in this guide.
With the right surface, consistent early care, and a regular pruning routine, creeping fig will reward you with a wall covering that looks increasingly beautiful with every passing year.
| What’s Next Now that you understand how to grow and manage creeping fig, your next step is to assess your specific wall and climate. Grab a soil test kit or contact your county Extension office, measure your wall’s light exposure throughout the day, and confirm your USDA zone at planting.usda.gov. Then start with just 3–5 plants along one wall section, master this before scaling up. Once your first wall is established, propagating your own cuttings to expand coverage costs nothing and is deeply satisfying. |
Hi, I'm Matt,
An amateur gardener with a houseplant habit that got slightly out of hand.
I started Bean Growing to share what I've learned from a few years of trial, error, and the occasional dead plant.
I grow a mix of houseplants and outdoor shrubs in the UK but try to expand my knowledge to the US. I try to write about what actually works