
Some links in the post are affiliate links and I get a commission from purchases made through some links found in the post.
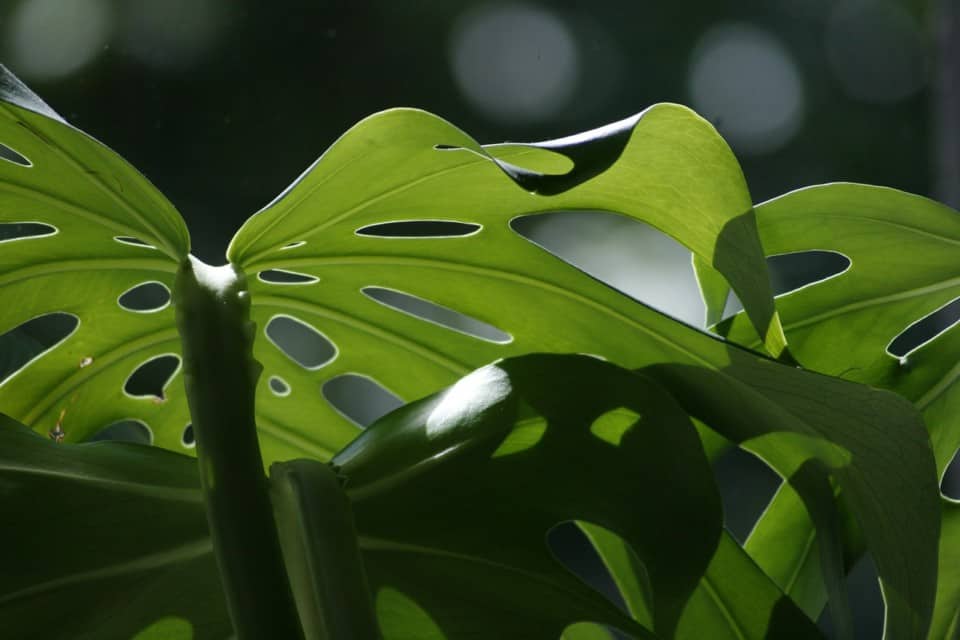
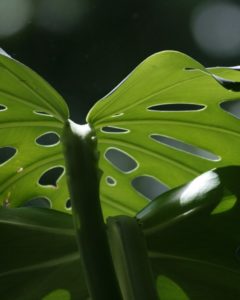
The Monstera has become quite commonplace in many homes. The reason behind it? – its beautiful broad foliage that boasts fenestrations.
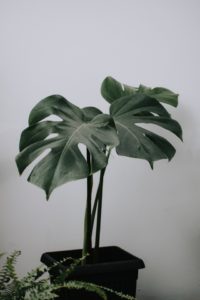
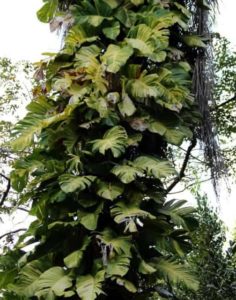
It features a climbing mechanism to scale walls or the supporting poles provided. Thus, the overall aesthetic captures the eye and is quite unlike what you would see in most houseplants.
Moreover, a monstera is relatively easy to care for, enabling most people to grow it, including beginners! We will look into how you can care for this evergreen plant to continue enjoying this aesthetic appeal.
What is a Monstera?
 Before you can offer any plant the care it needs, you must understand its origins.
You see, when you move a plant indoors, you change the conditions to which it is accustomed. And if you cannot replicate them, the plant suffers, and you end up having an unhealthy plant.
The case is the same with the Monstera, a climbing evergreen plant.
So, let’s start by discussing its nativity – this plant thrives in the rainforests of Central America. And in the wild, it grows several feet tall, producing aerial roots that enable it to survive under the canopies.
When it’s grown enough and has access to critical nutrients, its glossy leaves start showing splits (the fenestrations).
Of course, you cannot expect to replicate this growth rate indoors – it would be impossible to create a canopy and allow the plant to grow several meters high.
What you can do is try and be as close to its native conditions as possible. For example, it thrives in hardiness zones 10 to 12.
And as for the canopy-like conditions, please read below to understand what you must provide for your plant:
Is A Monstera Easy to Care for?
Of all the houseplants you can kill, the Monstera should be one of the harder ones.
Taking care of the Monstera comes down to two main factors – watering and light. If you can hack these, you should have an easy time caring for the plant. Also, remember to:
- Feed the plant,
- Regulate its temperatures – it thrives in normal house temperatures,
- Monitor the humidity levels,
- Repot the Monstera every two years,
- Use a good potting mix (one suitable for aroids) and
- Prune the Monstera to curb its vertical growth and enhance a bushy growth.
How Much Water Does a Monstera Need?
Monsteras are aroids and thus need a lot of water to support the production of broad, glossy leaves.
However, you should not give the plant more water than it needs. It’s all about balance. So, before you water the plant, ensure that it actually needs the water. How?
1) By poking a finger into the soil at least two inches deep: This simple method allows you to feel how moist or dry the soil is.
If you can feel moisture, the plant can go a few more days without water. But if it feels dry, you need to water the plant.
2) By using a stick in the soil: It’s much like checking if a cake is well-baked. You poke a stick into the soil two inches deep.
If it comes out clean, the soil needs water as it is dry. But if it comes out with soil stuck on it, the plant has enough water. For some people, this might be easier than feeling the soil.
3) By using a moisture meter: Are you ever overwatering or underwatering your plants? Investing in a moisture gauge is a good idea.
It’s straightforward – it tells you if the soil is dry or wet – a reading of 3 implies dryness. And you can water or not water the soil accordingly.
How Much Water Should You Give the Monstera?
Another critical question is how much water your plant needs at a time. The rule here is to water the soil (not the plant) using a slow stream of water until water runs out of the drainage holes.
Once this happens, allow the excess water to drain, then empty the drainage tray. While some plants do well when you soak their soil, that’s unnecessary when watering the Monstera.
However, when dealing with underwatered plants, that can help revive the plant. But since the plant is doing okay, just give it enough water, and allow the excess to drain. That’s it.
Also, some factors affect just how often you water the plant. These include:
- Season: Your plant will need more water in the summer and spring. But during dormant months like winter, you can reduce the watering to every few weeks. Again, you must check the soil to gauge what’s best.
- Soil: Chunky soils often need more water. Also, you must ensure the soil is well-draining to prevent waterlogging.
- Pot: Porous pots lose water to the environment, thus necessitating more watering than other pots.
- Airflow: Plants near fans and vents often need more water. Please note that proximity to such extremities can adversely affect the plant.
- Humidity: If your home has high humidity levels, you will likely water the Monstera less.
Signs of Overwatering
While the Monstera appreciates a lot of water, too much water can kill it. So, watch out for signs like:
- Yellowing on the leaves,
- Mold on the soil surface,
- Soggy stems, and
- Dark brown spots on the leaves.
Signs of Underwatering
Seeing as the Monstera loves water, it does not take too well to being underwatered. And it shows this by exhibiting the following signs:
- Yellowing on the leaves accompanied by brown spots,
- Crisping of the leaves,
- Drooping, and
- Cracking soil or soil pulling away from the pot edges.
And here’s another tip – it’s always better to underwater your Monstera than to overwater it. Reviving a drooping plant is easier than saving one affected by root rot. So, when in doubt, don’t water the plant.
How Much Light Does a Monstera Need?
 Did you know that watering and light are directly related? Plants that receive too much light dry up fast and need watering frequently. And the vice versa also holds. Again, we go back to its native origin – the Monstera grows under canopies.
Thus, it does not receive direct sunlight and instead thrives on filtered light. That means that even if you don’t provide it with direct light, it can survive.
In general, a Monstera will do well in 4 to 5 hours of light. But which light is best for your plant? Let’s discuss the options:
Direct Bright Light
Most plants appreciate being in direct contact with the sun’s rays, but the Monstera does not. In the wild, it grows among the jungle cover and climbs other trees to reach the light.
So, it mainly gets filtered light. If you expose it to bright and direct light, it will burn, and the leaves will turn brown and shed.
Indirect Bright Light
Your Monstera does best in this kind of light as it replicates the filtered light it receives under canopies.
To achieve such light, place the plant near a window, ensuring that the light never hits the plant. How can you be sure? Well, check if your plant casts a shadow.
If it does, that means it’s receiving direct light and blocking it from reaching other parts of the house.
Move the plant away from the window or use sheers to protect it. We recommend placing the plant by an east-facing or south-facing window.
Low Light
Some houses don’t get enough light. While the Monstera can still do well in such conditions, it will probably not grow big or fenestrate.
To deal with this, you can invest in LED lights or strategically place mirrors around the space.
Is Your Monstera Plant Getting Enough Light?
The Monstera, while not very demanding when it comes to light, will not do well when it does not have enough light. So, even when providing the plant with at least 4 hours of bright indirect light, look out for:
Lack of Fenestrations
A Monstera at least three years old should have started splitting. If it has not and everything else checks out, the light might be the issue. We have an article on why are my monstera leaves not splitting.
Wet Soil
How long does your Monstera take to dry out between waterings? As we earlier mentioned, lighting and watering are highly related.
So, if your plant takes a while to use up water, it’s not getting enough light. Keep in mind that the Monstera does not like waterlogged soil.
Discolored Leaves
Changes in leaf color usually indicate that all is not well. Ideally, the Monstera leaves should be green and glossy. So, if they start showing signs of browning or yellowing, the plant needs more light.
It could be that the plant is getting too much or too little water (as mentioned earlier). But start by assessing the light first.
Stunted Growth
Adequate lighting is a crucial component of vibrant plant growth. And if your Monstera is falling behind schedule, you can look into how much light it receives. That could be the culprit.
The takeaway here – don’t shade the Monstera and don’t leave it in the full glare of the sun either. Balance the extremities, and the plant will do well.
What Soil Does a Monstera Need?
We often talk about the need to use well-draining and nutrient-rich potting soil. But what does this entail, and how can you ensure you give the same to your plant? Let’s start with the importance of a potting mix. It provides:
- A medium in which your plant can grow,
- An avenue for good gas exchange, ensuring that there are adequate air packets,
- Adequate water retention to allow for the absorption of nutrients,
- Proper drainage to allow the excess water to move through the soil,
- Nutrients, and
- Temperature regulation.
Characteristics of a Good Potting Mix

These are all essential factors to the growth of your Monstera. So, for the Monstera, your potting mix should boast the following:
- A slightly acidic pH – anything between 5.5 and 6.5 will work great.
- Coco Coir – this material comes from coconut husks and features a rough texture that increases aeration.
- Sphagnum Peat Moss – its fine particles allow it to hold on to nutrients and water while paving the way for good aeration.
- Perlite – its non-porous nature makes it ideal for encouraging adequate drainage and aeration.
- Pine Bark Fines – these pieces can withstand pressure without compacting, thus ensuring the soil has enough air packets.
Making a Potting Mix
Now, how do you put all these components together? Easy! All you need is:
- 1 part perlite,
- 1 part coco coir/ sphagnum peat moss, and
- 4 parts pine bark fines.
That’s it! But if you can’t find the ingredients or prefer to get a store-bought mix, you can always get an aroid mix from the nursery.
Is Your Potting Mix Ideal for Your Monstera?
Monsteras react poorly to potting mixes that don’t allot them the factors we earlier discussed. And they show this in the form of:
1) Yellowing Leaves: If you notice yellowing, that’s a sign that the plant does not get enough air or water from the soil mix.
For example, a potting mix that does not have adequate air pockets will drown the plant, causing root rot.
2) Browning on the Leaves: When a plant starts drowning, it cries out for help by developing brown spots on the leaves.
And if you don’t deal with them immediately, they start spreading, signaling that the damage is worsening.
Please note that even if you water infrequently, your plant can still suffer root rot. A poor choice of potting mix can prevent adequate water drainage, thus drowning the plant roots and wreaking havoc.
What Temperature and Humidity Do Monsteras Like?
Do you remember when we stated that replicating a plant’s natural habitat is essential? Well, that holds quite firmly when it comes to temperature and humidity.
With the Monsteras accustomed to tropical climates, you have no choice but to offer them the most suitable growing conditions. So, what do they need?
Ideal Temperature for a Monstera
The Monstera requires a temperature range between 68°F and 86°F. If the house is colder than this, you start noticing signs of slowed growth.
And if the temperatures hit 50°F and below, the plant could die! So, regulating the temperature is non-negotiable.
How can you tell that the temperatures are off?
Signs Your Home is Too Cold
Keep an eye on a plant that has
- Stopped growing – that’s a sign that the plant may have suffered shock owing to cold temperatures,
- Black or yellow leaves,
- Wilted,
- A loose root ball, or
- Drooping leaves.
That shows that the temperatures are below ideal, and the plant could lose the fight and die.
Signs Your Home is Too Hot
What happens when you give the plant more heat than it needs? It starts to:
- Develop brown and dry spots on the leaves, or
- Droop because it’s losing water at a fast rate.
If you notice such signs, you need to alter the temperatures.
Dealing with Temperature Issues
To know if you have a temperature issue, use a thermometer around the Monstera. Then, all you need to do to amend the temperature is to invest in a cooling or heating system.
For example, if your home is too hot, you can bring in a fan or air conditioning system. That can lower the temperature and allow your plant to thrive in suitable conditions.
Ideal Humidity for a Monstera
Monsteras grow in canopies shaded by other plants in the tropics. So, it’s only natural that they would favor humidity in the range of 60% to 80%.
That’s relatively high but manageable, as you will later see. The plant can still withstand ranges between 40% and 60%. But if you go below 40%, the plant could dry out and die.
Is Your Home Too Dry?
When the Monstera does not get enough humidity (at least 40%), it:
- Starts to dry out fast between waterings,
- Develops browning on the leaves, and
- Exhibits crispiness on the leaves.
Is Your Home Too Humid?
 You might wonder if there is such a thing as too much humidity. But there is! As much as the Monstera loves high humidity, it has a limit. So, if you give it too much moisture, it shows signs like:
- Mold on the leaves or soil,
- Root rot,
- Soggy stems,
- Closely growing leaves that appear damp, and
- Drooping and yellowing of the leaves.
It owes to the excess humidity getting in the way of transpiration, thus forcing the plant to retain the moisture in its leaves.
Fixing Humidity Issues
It’s hard to gauge the humidity in your home without using tools. We recommend investing in a hygrometer and measuring the moisture around the Monstera. If it falls short of the 40% minimum, you can amend it by:
- Using a humidifier,
- Misting the plant regularly,
- Placing the pot on a tray filled with pebbles and some water,
- Adding more plants to the home, or
- Leaving the kitchen and bathroom doors open.
Ensure that you amend the humidity per season. For example, the humidity can be too low in the summer in dry areas. In this case, you would need to increase the misting or find other ways to raise the current levels.
How to Position the Monstera
The Monstera should not be near air vents, windows, or heating vents. These are all avenues where it could be exposed to drafts that could disrupt the ideal temperature and humidity settings.
For more information we have an article on can a monstera live outside.
What Fertilizer Does a Monstera need?
The Monstera grows several feet tall (up to 3 meters indoors) when in the right conditions.
And given its prolific growth, you must fertilize it regularly to ensure it gets the nutrients it needs to grow this fast. Let’s start with the fertilizer options and how you can use them:
Synthetic Fertilizer
Did you know that synthetic fertilizers boast the same nutrients as their organic counterparts?
However, they have a reputation for harming plants and are often shunned in favor of natural options. You can use these fertilizers if you:
- Want fast results and the maximum growth possible for the Monstera,
- Are okay with following instructions to the letter to avoid harming the plant, and
- Need an efficient solution because your potting mix lacks nutrients.
How Do You Use This Fertilizer?
With synthetic options, the only way forward is to follow what the manufacturer states.
Use that exact amount in the precise way the manufacturer recommends. And when using it for the first time, start with a smaller amount.
Organic Fertilizer
Organic fertilizer has become common owing to the adverse impact of synthetic options. You can opt for it if you:
- Do not want to damage your plants (have a bad history with synthetic options),
- Want to enrich the microbiome system in the soil, and
- Can keep up with small amounts regularly.
How Often Should You Feed the Monstera?
The Monstera only needs inputs during active growth. Of course, the number of times you use fertilizer will depend on the type you use.
For example, when using strong options, you can only do so once every few weeks. But with organic types, even once a week is okay. However, that’s not all you should consider. You must look into:
- The kind of potting mix: Mixes that do not feature soil often need more fertilization compared to their soil-based counterparts,
- The season: The plant will be dormant during winter and will not need extra inputs. But during spring and summer, it will be in active growth and will need the extra help,
- The light source: If your plant relies on natural light, its input needs will change in the colder months. But plants growing under grow lights will not face such a challenge. Thus, you will remain consistent with the feeding.
Again, always consider the choice of fertilizer. A synthetic option will have clear stipulations on how often you should use it. And even with organic fertilizers, you should not use too much. Even they have a limit.
Are you Overfeeding Your Monstera?
Giving the Monstera too much fertilizer paves the way for root damage. You can tell that it has had more than enough when:
- Its leaves start wilting,
- You notice a white crust forming on the soil surface,
- Its leaves start yellowing then browning, or
- Its growth stops, yet you have fed it.
Such signs point to root damage which could kill the plant if not fixed. In such a case, you must rinse out the soil by running water through it until it drains from the bottom.
Do so for at least ten minutes, then leave the soil to dry out before watering it again. Once you resume watering and feeding, remember to go slow with the fertilizer.
Does Your Plant Need More Fertilizer?
It’s easy to tell when your plant needs a bit more TLC. The signs include:
- Stunted growth, and
- Pale new growth with discoloration.
Did you know? You can combine both types of fertilizer. But when doing so, you must use smaller amounts of each fertilizer to avoid overpowering the plant. When in doubt, stick to one option until you get the hang of things.
How Do You Propagate a Monstera?
Are you ready to bring another Monstera to life? You have two options – you can do so by seed or by cutting. Let’s look into how you can be successful in both cases:
Propagating your Monstera Via Cuttings
 You must always use a cutting with a node to propagate a Monstera. Without this, your efforts will be futile. Nodes are the ridges around the plant stem from which the stalks grow.
Every leaf has a node. And a plant can have more than one node, e.g., when the resultant leaf falls off the plant. Remember this – you must use a cutting with a node.
Propagating a cutting follows distinct stages:
The Fresh Cutting
At this point, you have a fresh cutting straight from the parent plant. Some of these cuttings may have aerial roots. However, these cannot nourish the plant.
You must propagate the cutting to allow it to form soil roots. The cutting has already started dying at this stage because photosynthesis is not taking place.
That’s why you need to create a medium in which it can thrive, as we will later see.
The Rooted Cutting
Once you propagate the fresh cutting in a suitable medium, it will develop soil roots. They start off as a single white root from the stem or aerial roots.
This root then develops feeder roots on its side to absorb more nutrients from the medium.
The Established Cutting
The rooted cutting is not ready to be potted. Doing so would only set it back. So, you must wait until its roots are several inches long.
At this point, you can transplant it to the final medium. Is this when it becomes established? Not quite – you can only deem the cutting as established once it adapts to the new medium and starts growing in it.
Keep in mind that some roots die during the transplanting process. So, it’s a delicate task. To avoid killing the plant, do not disturb the roots much when moving them to the other medium.
The New Plant
You know that the propagation was successful once the Monstera starts producing new leaves. At this point, all you need to do is to ensure your monstera gets the care it needs, as we discussed earlier.
The Propagation Process of Your Monstera Via Cuttings
Now that you understand the critical stages of cuttings, let’s get into how you can root yours.
1) Select the right time: When is the best time to propagate your Monstera? The answer is when the plant is actively growing. In some cases, that can be in the spring and summer.
But if your plant still grows in the winter, you can still propagate it. Please note that cold weather can slow the rooting process.
2) Make a cutting: Not all cuttings are the same. So, you must choose between:
3) A top cutting: If you want a cutting that grows fast, this would be it,
4) A mid cutting: This option takes a bit longer to grow because the cutting starts over in leaf size and maturity, and
5) A stem cutting: This cutting does not have any leaves, which sets back photosynthesis. It takes a while to yield results from this option.
6) Select a suitable cutting size: Generally, you should work with an average of two to three leaves per cutting, which translates to two to three nodes.
It allows you more room for error so that if you lose a node, you still have one that can grow into a plant. And the high number of leaves allows the plant to make enough food to keep it going.
7) Make the cut: Get a clean, sharp knife or shears for this to ensure you make a good cut.
You should always cut off more than you need to account for any damage owing to root rot. Also, when cutting, find the axillary bud above the node and include it in the cutting.
8) Treat the cut: The cutting will turn color once exposed to the elements, which is a normal part of the process.
Just add rooting hormone to it to encourage the cutting to root faster. It also helps you prevent root rot.
9) Choose a propagation method: When choosing a propagation method, consider what your cutting needs.
Also, keep in mind that while moisture is good for your plant, it can also pave the way for root rot. So, you must keep the cut ends of the stem dry but not too dry that it dies. It’s a balance. What are your options?
10) Air Layering: Under this method, you grow out the plant’s aerial roots into soil roots.
Thus, you cut the node when it has already rooted, allowing you to propagate it immediately. However, this does not work for top cuttings that do not have aerial roots.
11) Water propagation: This standard method is relatively easy to hack. All you do is fill a jar with water, pop the cutting inside, and change the water every few days.
It’s best to keep the stem out of the water to avoid root rot. The downside to this method is that the plant can lack oxygen because they rely on what’s dissolved in the water.
11) Soil propagation: You can plant your cuttings straight in the soil, doing away with the need to transplant. However, regulating moisture in such a setting is quite a challenge.
12) Moss propagation: Sphagnum moss is not just a vital component in potting soil. It also serves as a suitable medium for cutting propagation.
Its high water retention makes it great for increasing the humidity around the cutting. Like with soil, maintaining the proper moisture levels with this method can be tricky.
13) Perlite propagation: This highly absorbent material also allows air to flow within it, giving the cutting a suitable growing medium.
Maintaining good moisture levels with this material is easy, and so is preventing fungal infections. Unfortunately, it’s hard to check on the roots as they develop.
14) Care for the cutting: Your cutting will not need any nutrients until it develops roots. After all, it cannot absorb the nutrients without roots.
How long do you need to wait before the cutting develops a new leaf? It depends on the cutting.
Top cuttings should take about 1.5 months, mid cuttings should take twice as much, and stem cuttings can take up to 4 months. Use these statistics to estimate the waiting time.
The Propagation Process of Your Monstera Via Seeds
 Did you know that mature Monsteras produce seeds? You can thus choose to start from scratch by propagating seeds in suitable mediums.
You can get the seeds online or from a local nursery. However, please note that seeded propagation takes more time and is more challenging to execute than cuttings.
Also, you cannot grow Variegated Monstera from seed. To develop that mutation, the plant must come from a cutting and not a seed.
How do you grow a Monstera from seed?
1) Source seeds: You can get some from a flowering Monstera or buy some from the local store or nursery.
Time is of the essence because they don’t have long shelf lives. So, plant the seeds as soon as you get them.
2) Soak the seeds: Place the seeds in lukewarm water for 12 hours. They will swell a bit as they absorb the water. Then move them straight to a bit of soil in a small container.
You should not use much soil as you do not want to drown the seeds. Just keep the soil moist enough, ensuring it drains well. Place the container in a warm room in bright indirect light.
3) Care for the seeds: Ensure the soil is moist and allow it to dry out between watering. If you have trouble with this, please refer to the watering guidelines in this piece.
It should be about two to three weeks until you see the seedling. You can then follow the earlier stipulated care practices to ensure the seedling establishes before repotting it!
What method seems easier to you?
How to Repot a Monstera
To successfully grow any plant indoors, you must consider that you will need to repot it at some point.
And that’s the reality of growing the Monstera, a plant whose growth rate is quite impeccable. So, you will probably repot every two years or thereabout.
Why do you need to repot the Monstera? – for three key reasons:
1) To give it room to grow: A rootbound plant cannot grow right, which would only get in the way of its vertical growth.
Besides, when the roots are squeezed in relation to the potting mix, they don’t absorb enough nutrients to support the plant.
2) To ensure the soil does not compact: You want to ensure that the soil has enough air pockets and enough room for the roots. Else, it compacts and does not allow water to drain as needed.
3) To provide the plant with fresh nutrients: You should change the potting mix each time you repot the Monstera. And this gives it a fresh batch of nutrients that propel its growth.
Moreover, repotting is key to preventing root infections. Of course, you cannot just wait two years and decide it’s time to repot. Instead, you should watch out for clear signs that it’s time to make a move. Which are they?
- Protruding Roots: Ideally, the roots should remain in the pot. But when they have outgrown it, they start poking out the drainage holes. That’s a sure sign the plant needs a bigger space.
- Slowed Growth: Monsteras are known for their fast growth. So, if your plant has been growing fast and suddenly seems stunted, it could be root-bound. Now might be the time to change its home.
Do all Monsteras require repotting? Generally, younger plants need it more because of their fast growth.
But when the plant is mature and has achieved a diameter of eight inches, you can stop repotting it. Instead, you can dress it with fresh potting soil, and it should be good.
How to Repot a Monstera
Have you noticed the key signs? If yes, here’s what you should do:
1) Consider the timing: You don’t want to repot the Monstera during dormant months. Doing so will set it back because it will not have the growth spurt necessary to withstand transplanting.
So, choose early spring instead to help your plant recover in time for the changing seasons. But if you cannot wait till early spring, repot when you can to avoid killing it.
2) Find a bigger pot than the current one: Monsteras mostly grow upwards more than outwards. So, do not focus on the width as much as the depth.
The more it grows, the deeper the pot should be to hold the plant and its supporting pole. However, you don’t want to go with a pot that’s too big.
Doing so only creates a situation where the pot holds more water than the plant can use. And that can cause root rot coupled with other diseases. So, find a bigger and deeper pot, and ensure it has enough drainage.
3) Get a good potting mix from a nursery: Regular mix should be good enough. Ensure it’s well-draining and has a good mix of nutrients.
Fill the pot with the potting mix to a quarter of its level. Then stick the supporting pole in the soil (if your plant does not need one, you can skip this point).
4) Coax the Monstera out of the current pot: Small plants are easy to get out of pots. But with bigger ones, you might need an extra pair of hands.
Turn the pot on its side and jiggle it a bit to loosen the soil. Then hold the plant as it comes out of the pot (do not pull it). If it has a pole, ensure you secure it too as you hold onto the plant.
5) Plant the Monstera in the new pot: Start by staking the pole in the soil (if applicable), then allow the plant to rest on the soil. Add more potting soil and lightly pat it down, ensuring that you leave two inches of space at the top.
6) Water the plant: Ensure the water comes out through the drain holes. You can now leave the pot in the spot previously occupied by the old pot.
Your work here is done!
You may also like: How Many Monsteras in One Pot.
How to Prune a Monstera
Plant lovers sometimes forget to prune their plants. But with the Monstera, such oversight can cost you. Why?
- Aesthetic Reasons: The Monstera is prized for its beauty. How could anyone not gaze upon its fenestrations and fall in love? But to keep it this aesthetically pleasing, you must prune the plant.
- Growth Control: Did you know that the Monstera can grow as tall as ten feet? If you don’t regularly prune the plant, it could take over the house. Pruning allows you to curb its vertical growth and instead foster its bushiness.
How Do You Prune the Monstera?
 1) Choose a good time: Like with repotting, you must consider the season when pruning the plant. You want to do it in summer and spring when the plant is actively growing.
That way, it can heal easily. But you can as well do it in late winter, just before the active growing months begin.
While the timing is somewhat flexible, avoid doing it when the weather is extreme – the plant might not heal and could even die.
2) Gather your supplies: You will need a knife (or an equivalent), isopropyl alcohol, and a pair of gloves.
Use the alcohol to sanitize the knife or scissors or whatever tool you will use on the plant. That will ensure you do not transfer any germs to the plant.
Then wear gloves. The Monstera contains substances that are toxic to pets and humans. You will want to keep yourself safe. You can even go the extra mile and wear goggles just to be sure.
3) Find the nodes: Now is the time to identify the nodes on the plant – these are the sections from which new leaves, roots, and stems sprout.
They are lighter in hue and are placed higher than the other stem parts. They may feature one leaf or multiple leaves at a time.
4) Get rid of diseased, dried, and yellow leaves: Your plant’s leaves tell you a lot about its health. So, assess their physical attributes and gauge if the plant needs extra attention.
For example, soft spots on leaves indicate decay. Remove all the leaves you feel should not be on the plant by cutting them at the stem’s base.
5) Prune the stems: Are there weak stems on the plant? How about tangled branches? You can get rid of these to pave the way for stronger growth.
Cut below the node, or at the point the branch meets the main stem. Ensure you get flat cuts to avoid injuring the plant.
6) Trim the roots: Have you noticed any roots poking out of the container? Cut them using the disinfected knife and purpose to repot the plant as earlier discussed.
Your plant is now ready for the next season. All you need to do is dispose of the cuttings in the compost or add them to the garbage.
Keep in mind that the cuttings are toxic and should be kept away from humans and pets.
If you are enjoying the article, check out our article on a pothos vs a monstera.
What Are the Common Monstera Pests?
Pest infestations can wreak havoc on your Monstera. One minute, you have a healthy, thriving plant that’s the envy of many. And the next?
Well, the plant stops growing, develops yellowing on its leaves, droops, and dies. Is there any way you can identify Monstera pests before they kill your plant? Let’s look into the most common pests and what you can do about them:
Scales on a Monstera
Unfortunately, scales do not look like insects. Moreover, the adults don’t move. Instead, they attach themselves to the plant and lay hundreds of eggs that develop into more scales.
And that makes it easy to miss them if you have no idea what they look like. But it also makes them dangerous because they exist in hundreds in most cases.
How to Identify Scales on a Monstera
Scales come in two forms: hard and soft. The hard ones feature a hard covering over their bodies. They thus exist under this armor, feeding on the plant all the while. And they do not secrete any honeydew.
On the other hand, the soft ones are flat to spherical, produce honeydew, and feature a waxy film on their bodies. These scales attach to leaves, stems, and branches.
Mechanism of Scales
Scales lay eggs that hatch in two to three weeks. The young feed on the stems, leaves, and branches by piercing them, thus injuring them.
And this exposes the plant parts to infections. They then transform into adults and develop coverings on their bodies. Eventually, they lay more eggs which hatch into more scales.
Signs of Infestation of Scales on a Monstera
Seeing as scales are hard to find, you can watch out for the vital warning signs, which include:
- Yellowing on the leaves,
- General wilting,
- Leaf drop,
- Change in leaf color,
- Stunted growth, and
- Yellow spots on the plant.
If you notice such signs, you should inspect the stems, leaf joints, and young parts of the leaves. Scales particularly like these plant parts.
Treatment of Scales on a Monstera
You should treat the scale infestation by:
- Isolating the infected plants,
- Pruning the affected parts (if only one section has scales),
- Scraping them off the plant,
- Rubbing them with rubbing alcohol (it dissolves their shells and kills them),
- Using horticultural soap on the affected plants.
It’s also essential to remain vigilant and check the plant after treatment. Even two scales can wreak havoc on the plant by laying more eggs.
Fungal Gnats on a Monstera
Do you want to know the interesting thing about fungal gnats? They do not live on the plant like other pests. Instead, they live on the fungus found on damp soil.
As they lay and hatch eggs, the larvae feed on the plant roots, causing root damage. It’s also important to note that these gnats can carry disease-causing fungi that can kill the plant.
How to Identify Fungal Gnats on a Monstera
The adults feature a blackish-grey hue with long legs and clear wings. On the other hand, the larvae have shiny black heads with clear bodies.
Mechanism of Fungal Gnats on a Monstera
Fungal gnats reproduce pretty fast, laying an average of 300 eggs at a time. The larvae emerge from the eggs in about 4 to six days.
And within 4 weeks, the adult cycle is complete. Thus, the gnats can damage the Monstera within no time.
Signs of Infestation of Fungal Gnats on a Monstera
How can you tell that you have a fungal gnat problem? Well, the signs present as:
- General plant wilting,
- Stunted growth,
- Yellowing on the leaves, and
- Damage to the young plant parts.
Have you noticed any of these signs? Fungal gnats are pretty easy to make out on the soil surface. You can even catch them flying away from the pot when you water the soil.
Treatment of Fungal Gnats for Your Monstera
How do you deal with fungal gnats?
- Adopt a suitable watering schedule that allows the soil to dry out between watering,
- Watering from the bottom instead of the top,
- Using sticky traps,
- Pouring a mix of apple cider vinegar and dish soap into a trap for the gnats, or
- Using an insecticide (it does not affect larvae).
Spider Mites on Your Monstera
Spider mites are highly mobile and can thus spread easily from one plant to another. Thanks to their web-spinning and reliance on breezes, they cover vast distances fast.
They also use humans and pets for transit by attaching to fur and clothes. So, if you find one mite, you must act quickly to prevent its spread to other plants.
Identification of Spider Mites on a Monstera
Unfortunately, spider mites are so small that it’s almost impossible to see them with the eyes.
That’s why it’s better to look for them by being wary of any adverse changes in your plant. Or you can use a magnifying glass to look out for the pests or their webs.
They appear as tiny reddish-brown creatures on the underside of leaves.
They also feature webs and honeydew, which indicate a pest attack. Infested plant parts have a sandy or sticky feeling: a giveaway that something has attached to the plant.
Another way of identifying the mites is shaking the leaves over white paper. You can then make out any moving reddish or brown particles on the paper as mites.
Mechanism of Spider Mites on a Monstera
Spider mites lay their eggs in winter, which hatch at the start of spring. In hot weather, they can produce quite fast and can adult in no time.
They feed on the plant tissues and fluids as they grow, thus weakening the plant.
Signs of Infestation of Spider Mites on a Monstera
A Monstera that has fallen victim to spider mites will exhibit signs such as:
- Leaf curling,
- Leaf discoloration,
- Tiny spots on the leaves,
- Leaf drop
If you do not stop these tiny mites, they can put an end to all the hard work you have put into the Monstera.
Treatment of Spider Mites on a Monstera
Can you stop the mites? The answer is yes! Possible solutions include:
- Increasing the humidity in the home,
- Reducing the temperatures in the house,
- Hosing down the plant,
- Wiping the affected plant parts with rubbing alcohol/ horticultural soap, or
- Investing in predatory mites that can feed on the spider mites.
While some people use neem oil, it can also kill the spider mites’ natural predators, thus encouraging the infestation.
Aphids on Your Monstera
These pests, while tiny, can have devastating effects on the Monstera. If not dealt with fast, they can result in delayed growth and leaf changes.
Identification of Aphids on a Monstera
Like most other Monstera pests, it’s hard to make out these pests with the naked eye. You can use a magnifying glass to check for any moving particles on the plant parts.
Aphids come in all sorts of hues – black, red, brown, green, and yellow. They feature antennae and cornicles to boot, with some having wings. And they have teardrop-shaped bodies that are soft to the touch.
Mechanism of Aphids on a Monstera
Aphids lay their eggs in the spring and these hatch in winter. The eggs develop into nymphs then adults, which feed on the plant parts with their needle-like mouths.
By sucking the plant juices out of the Monstera, they expose the plant to infections and slowly kill it. Oh, and the repeated egg-laying and hatching process finally results in a big population. So, the earlier you can stop the cycle, the better.
Signs of Infestation of Aphids on a Monstera
Infestation presents like most other pest infestations we have covered. It exhibits as:
- General wilting,
- Yellowing of the leaves,
- Slowed growth, and
- Curling of the leaves.
Has your Monstera suffered any of the above?
Treatment of Aphids on a Monstera
 Before using aphid treatments on your plant, you must first ascertain that the aphids are the reason behind the adverse changes. How? – By inspecting the plant. If you are sure aphids are attacking your plant, you can:
- Introduce natural predators like ladybugs and birds,
- Spray the plant with water,
- Knock the aphids into soapy water,
- Dust the plant with flour, or
- Use horticultural soap on the affected plant parts.
Thrips on Your Monstera
Once again, we are dealing with a tiny pest that can go unnoticed unless you inspect the Monstera closely. Thrips attack the plant and weaken it, paving the way for further infections.
Identification of Thrips on a Monstera
The adults, which are dark brown or black, can fly or move around, making it harder to notice them. However, the larvae exist in clusters, which aid their feeding mechanism. Thus, you can look for any white patches on the underside of the leaves.
Mechanism of Thrips on a Monstera
Both the adults and the larvae suck moisture from the Monstera and often attack the leaves.
It dries up the plant and injures its tissues. Moreover, thrips can spread viruses from one plant to the other.
Signs of Infestation of Thrips on a Monstera
A Monstera affected by thrips will often show:
- Delayed growth,
- Sunken streaks and patches,
- Premature wilting, and
- Tiny black spots on the leaves.
Do any of these signs ring a bell?
Treatment of Thrips on a Monstera
Given how fast thrips can spread to other plants in your home, you should deal with them by:
- Isolating the affected plants,
- Pruning the affected parts,
- Hosing down the plant, and
- Using horticultural soap on the affected parts.
And that brings us to the end of common pest issues you could face with the Monstera.
What are the Common Problems for a Monstera?
Wouldn’t it be nice if you could prepare for the common challenges faced with the Monstera? Well, let’s get into what you can expect and what you can do about it:
Yellowing Leaves on Your Monstera
These are often indicative of any of the following possible causes:
- Overwatering,
- A poor choice of potting mix,
- Inadequate or blocked pot drainage holes,
- Poor lighting,
- Pest infestation
Curling Leaves on Your Monstera
Your Monstera leaves could curl due to:
- Underwatering,
- Low humidity (under 40%),
- A poor choice of potting mix,
- High temperatures, and
- Root damage, e.g., fertilizer burn.
Root Rot on Your Monstera
What causes root rot in Monsteras? Culprits include:
- Poor drainage,
- Poor lighting
Drooping Leaves on Your Monstera
A change in leaf shape and position can be due to:
- Underwatering,
- A poor choice of potting mix,
- Pest infestation,
- Root damage,
- Extreme temperatures, and
- Transplant shock.
Blackening Leaves on Your Monstera
What can make your Monstera leaves turn black?
- Root rot,
- Continuous exposure to direct sunlight,
- Too much or too little fertilization, and
- Bacterial or fungal diseases.
Browning Monstera Leaves
Browning is quite common in most houseplants. But if it gives you cause for worry, you might want to consider causes such as:
- A poor watering schedule – overwatering or underwatering, and
- Lack of adequate humidity (<40%).
Lack of Fenestrations on Your Monstera
Most people plant the Monstera to enjoy its fenestrations. If the leaves do not split as expected, it can be due to:
- Lack of maturity – Monsteras start splitting at two to three years,
- Inadequate access to bright indirect light, and
- Lack of proper nutrition.
Pest Infestation on Your Monstera
 As we earlier discussed, your Monstera may show signs of infestation resulting from:
- Thrips,
- Aphids,
- Spider mites,
- Scales, and
- Fungal gnats.
Have you faced any of the above challenges? If yes, refer to the sections above to check what you could be doing wrong by assessing the optimal care conditions.
That’s all it takes! And you should have a healthy Monstera beautifying your space.
Final Thoughts
With this piece on your side, growing a thriving Monstera with glossy leaves filled with awe-inspiring fenestrations should be a breeze.
And remember, if your plant shows signs of distress, it’s crying out for help because there’s something it’s not getting. Happy Gardening!
