
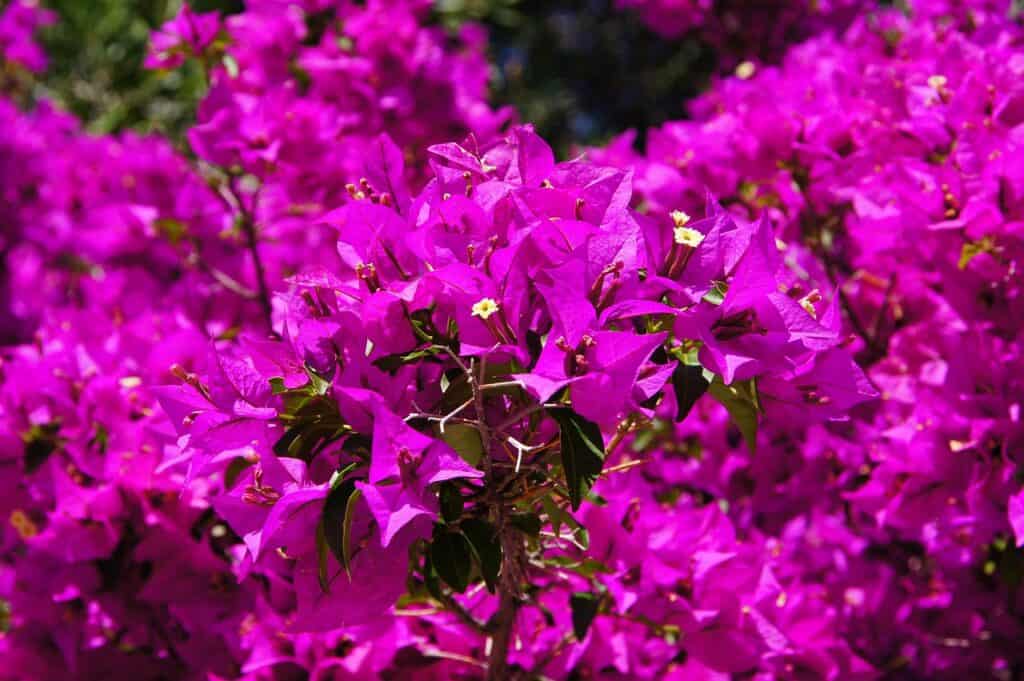
Learning how to transplant a bougainvillea plant doesn’t have to be intimidating.
With the right timing, soil preparation, and aftercare, you can move your bougainvillea successfully while minimizing transplant shock.
Follow this beginner-friendly guide to keep your plant healthy, blooming, and thriving in its new spot.
Why Transplanting Bougainvillea Can Be Tricky
Bougainvilleas are famous for their dazzling blooms and fast-growing vines, but they’re also notorious for hating root disturbance.
Unlike some plants that tolerate being shifted around, bougainvilleas have delicate root systems.
If handled roughly, they can sulk, drop their leaves, or even die back. That’s why understanding the process before you dig in is so important.
Signs Your Bougainvillea Needs Transplanting
Not sure if it’s time to move your plant? Here are common reasons gardeners transplant bougainvillea:
- Outgrowing its pot – roots circling or poking through drainage holes.
- Poor soil or drainage – struggling growth in heavy, compacted soil.
- Better sunlight – bougainvillea blooms best with 6–8 hours of direct sun.
- Landscape redesign – moving from container to ground, or shifting locations in the yard.
Essential Supplies for Transplanting Bougainvillea
Before you start, gather these items to make the process smoother:
| Tool/Supply | Purpose |
| Garden gloves | Protects from sharp thorns. |
| Sharp pruners | Trimming vines before and after transplant. |
| Spade or trowel | Digging around the rootball carefully. |
| Well-draining soil mix | Ensures healthy root establishment. |
| Watering can | For immediate aftercare. |
The Golden Rule: Handle Roots with Care
Think of bougainvillea roots like fine china, fragile and not meant for rough handling. When digging, aim for as much of the root ball as possible, keeping it intact. Disturbing roots is the fastest way to trigger transplant shock.
Pro Tip: If you’re moving from pot to ground, water the plant lightly the day before so the soil clings to roots without being soggy.
A Beginner’s Mindset
Don’t stress if you’ve never transplanted before. Bougainvillea is resilient when given the right start. By breaking down the steps (which we’ll cover in detail in later sections), you’ll see that even beginners can confidently relocate their plant.
When Is The Best Time To Transplant Bougainvillea
The best time to transplant bougainvillea is during the warm growing season, ideally in late spring or early summer.
Choosing the right timing helps reduce stress, encourages faster root establishment, and minimizes transplant shock so your bougainvillea can thrive in its new location.
Why Timing Matters
Bougainvillea roots are highly sensitive. Transplanting at the wrong time, such as during cold or overly wet periods, can stall growth or even kill the plant.
By aligning the move with its natural growing cycle, you give the roots the best chance to adapt quickly.
Best Season for Transplanting
- Late spring to early summer: The soil is warm, daylight is long, and the plant is actively growing. Roots establish faster under these conditions.
- Early fall in warm climates: If you live in zones that stay frost-free, transplanting before cooler weather arrives can also work.
- Avoid winter: Bougainvillea dislikes cold, and moving it when dormant or in chillier months slows root recovery.
Morning vs Evening Transplants
It’s not just about the season, even the time of day can make a difference:
- Morning: Cooler temperatures and lower sun stress make it easier for plants to adjust.
- Late afternoon/early evening: Another good window, since roots have the night to settle before facing daytime heat.
Pro Tip: Avoid transplanting in the blazing midday sun. The combination of root disturbance and heat stress can double the risk of transplant shock.
Regional Considerations
- Tropical/Florida-like climates: You can transplant nearly year-round, but it’s still safer during the dry season when soil is easier to work with.
- Desert/Southwest climates: Early spring is best before extreme summer heat.
- Cooler climates (zones 8 and lower): Stick to late spring when frost risk is past and soil is workable.
Timing Quick Guide
| Climate Zone | Best Time to Transplant | Avoid |
| Tropical (Zones 10–11) | Late spring–early fall | Mid-wet season (waterlogging) |
| Warm/Arid (Zones 9–10) | Spring or early summer | Mid-summer heat waves |
| Mild (Zones 7–8) | Late spring | Winter/frost periods |
Transplanting at the right time sets your bougainvillea up for success, minimizing the dreaded leaf drop and giving it the strongest possible start in its new spot.
Preparing The Site or Pot: Soil Mixes And Drainage for Transplanted Bougainvillea
Preparing the right soil mix and ensuring good drainage are key steps when transplanting bougainvillea.
These vibrant climbers thrive in light, well-draining soil and struggle in heavy, waterlogged conditions. Learn how to choose the best site or potting mix to keep your bougainvillea healthy and blooming.
Why Soil and Drainage Matter
Bougainvillea thrives in conditions that mimic its native environment, rocky hillsides and coastal areas with sandy, well-draining soil.
If the roots sit in soggy ground, they’ll quickly rot. On the other hand, soil that drains too fast without nutrients can stunt growth. The sweet spot is a balance of drainage and fertility.
Choosing the Right Planting Site
- Sunlight: Pick a spot that gets at least 6–8 hours of direct sunlight daily. Bougainvillea needs strong light to bloom abundantly.
- Airflow: Good circulation helps prevent fungal issues, especially after transplant shock.
- Drainage: Avoid low-lying areas where rainwater collects. Bougainvillea hates “wet feet.”
Best Soil Mix for Bougainvillea
A mix that’s light, slightly acidic (pH 5.5–6.5), and drains well works best. Here’s a recipe you can follow for container or in-ground planting:
| Ingredient | Purpose |
| 1 part potting soil | Base structure, light nutrients |
| 1 part coarse sand or perlite | Improves drainage, aeration |
| 1 part compost or peat moss | Retains slight moisture, adds organic matter |
Pro Tip: If planting in the ground, amend heavy clay soil with coarse sand, pumice, or perlite to lighten it. For sandy soils, mix in compost to hold enough nutrients and moisture.
Preparing Pots and Containers
Bougainvillea loves being slightly root-bound, so don’t go overboard with pot size. Choose a pot that’s just 2–3 inches wider than the current rootball, with plenty of drainage holes.
- Add a layer of gravel or broken pottery at the bottom to improve drainage.
- Use a lightweight trellis or stake for climbing support.
Drainage Checklist Before Transplanting
- Soil feels crumbly and not compacted.
- Water drains through within 30–60 seconds.
- No standing water in the planting hole or pot.
Preparing the right soil and drainage setup is like rolling out a red carpet for your bougainvillea. Get this step right, and your plant will reward you with faster recovery and brilliant, long-lasting color.
Step-by-Step Transplanting: Remove, Move And Set The Root Ball Without Damage
Learning how to transplant bougainvillea step by step helps protect its fragile roots.
By carefully removing, moving, and setting the root ball, you reduce transplant shock and give your bougainvillea the best chance to thrive in its new location with healthy growth and vibrant blooms.
Why the Root Ball Matters
The root ball is the lifeline of your bougainvillea. Since bougainvillea roots are shallow and delicate, damaging them during transplant is one of the biggest causes of failure.
The goal is to keep the root ball intact and secure through every stage of the move.
Step 1: Prepare the New Spot First
- Dig a hole or prepare a container twice as wide and just as deep as the root ball.
- Fill the base with a small mound of your prepared soil mix (from Section 3).
- Water the hole lightly so it’s moist but not soggy.
Step 2: Water the Plant Before Digging
Water your bougainvillea lightly the day before transplanting. This helps soil cling to the roots, making it easier to lift the root ball without breaking apart.
Step 3: Loosen the Root Ball
- For in-ground plants: Use a sharp spade to dig a wide circle around the base, gradually working inward until you can lift the root ball.
- For potted plants: Gently tap the sides of the pot or slide a knife around the edges to loosen the soil.
Pro Tip: Wear gloves and long sleeves, bougainvillea thorns can be surprisingly sharp.
Step 4: Lift with Care
Support the base of the root ball with both hands (or a shovel for larger plants). Try not to shake or crumble the soil. If moving a large bougainvillea, wrap the root ball in burlap to hold it together.
Step 5: Place the Plant in Its New Home
- Set the bougainvillea in the hole or pot so the top of the root ball is level with the surrounding soil.
- Backfill gently with your soil mix, pressing lightly to remove air pockets without compacting too hard.
Step 6: Initial Watering
Water thoroughly right after transplanting to help the soil settle around the roots. Allow excess water to drain out to avoid sogginess.
Quick Reference: Step-by-Step Checklist
| Step | Action | Key Tip |
| 1 | Prepare site/pot | Make hole before lifting plant |
| 2 | Pre-water | Moist, not soggy |
| 3 | Loosen root ball | Dig wide circle or tap pot |
| 4 | Lift carefully | Support entire base |
| 5 | Set in place | Root ball level with soil |
| 6 | Water in | Deep soak, then drain |
By following these careful steps, you’ll avoid damaging your bougainvillea’s roots and set it up for a smooth transition into its new environment.
How To Prune, Root-prune And Trim Safely When Transplanting
Pruning and root-pruning bougainvillea during transplant helps reduce stress and encourages healthy regrowth.
Learning how to trim safely keeps your plant manageable, prevents damage to fragile roots, and ensures your bougainvillea recovers faster and blooms beautifully in its new location.
Why Pruning Matters During Transplant
Bougainvillea can put all its energy into sustaining lush vines and flowers. When you disturb its roots during transplanting, the plant has fewer resources to support all that top growth.
Strategic pruning reduces the workload, balances root-to-shoot ratio, and helps the plant focus on root recovery.
When and How Much to Prune
- Before transplanting: Lightly prune back long, tangled vines that make handling difficult. Remove no more than one-third of the plant.
- After transplanting: Wait a few days to a week before doing additional shaping, so you don’t overload the plant with stress all at once.
Safe Pruning Techniques
- Use clean, sharp pruners to avoid jagged cuts or disease entry.
- Cut just above a leaf node at a 45-degree angle.
- Remove dead or weak stems first before shaping.
Pro Tip: Always wear thick gloves and long sleeves, bougainvillea thorns are notorious!
Root-Pruning Considerations
Root-pruning is different from vine pruning and should only be done when absolutely necessary (for example, when moving a root-bound potted bougainvillea).
- Use a sharp knife or spade to trim circling roots.
- Remove small portions only, never cut away more than 10–15% of the root system.
- Dust with a natural fungicide (like cinnamon powder) if roots look stressed.
Trimming for Shape and Growth
Bougainvillea responds well to trimming, and transplant time can double as a reset:
- Shorten leggy branches to encourage bushier growth.
- Shape the plant to fit its new space, whether you want it as a climber, hedge, or potted showpiece.
Quick Do’s and Don’ts of Pruning When Transplanting
| Do’s | Don’ts |
| Prune lightly before transplant | Over-prune (removes too much foliage) |
| Use sterilized, sharp tools | Leave jagged or torn stems |
| Trim for shape after plant settles | Root-prune unless absolutely needed |
| Wear protection against thorns | Handle bare roots without care |
Pruning is about balance, trimming enough to help your bougainvillea recover, but not so much that you strip away its energy. With the right cuts, your plant will bounce back stronger and fuller after the move.
Watering, Feeding And Aftercare to Avoid Transplant Shock
Proper watering, feeding, and aftercare are essential to help bougainvillea avoid transplant shock.
With the right routine, you can support root recovery, reduce stress, and encourage healthy growth so your bougainvillea adjusts quickly and continues to bloom beautifully in its new home.
Understanding Transplant Shock
When a bougainvillea is moved, its delicate roots experience stress. This can lead to symptoms like leaf drop, wilting, or stalled growth. The good news? With the right aftercare, your plant can recover quickly and thrive.
Watering Guidelines After Transplant
Bougainvillea is drought-tolerant but still needs consistent moisture during the first few weeks after transplanting.
- Immediately after transplanting: Water deeply to settle soil around the roots.
- First 2–3 weeks: Keep soil evenly moist but never soggy. Check with your finger—if the top 1–2 inches are dry, it’s time to water.
- Long-term: Transition to less frequent, deep watering. Bougainvillea actually blooms more when it experiences short dry spells.
Pro Tip: Overwatering is the #1 cause of failure after transplant. Always ensure drainage is excellent.
Feeding for Root Recovery
- Hold off on heavy fertilizing for the first 2–3 weeks. Bougainvillea roots are adjusting and too much fertilizer can burn them.
- After the adjustment period, apply a balanced, slow-release fertilizer (e.g., 10-10-10 or 5-5-5) every 4–6 weeks during the growing season.
- For extra blooms, switch to a fertilizer slightly higher in phosphorus (middle number) once the plant is stable.
Mulching and Soil Care
- Apply a 2-inch layer of organic mulch (like bark or wood chips) around the base, keeping it a few inches away from the trunk.
- Mulch helps retain moisture, regulate soil temperature, and protect fragile roots.
Monitoring for Stress
Keep an eye out for these transplant stress signs:
- Yellowing leaves → often due to overwatering.
- Leaf drop → normal if mild, but severe drop suggests shock.
- No new growth after 6–8 weeks → the plant may need extra feeding or better drainage.
Aftercare Quick Reference Table
| Care Step | Timing | Why It Matters |
| Deep watering | Day of transplant | Settles roots, removes air pockets |
| Light, regular watering | Weeks 1–3 | Supports root recovery |
| Reduce watering | After week 3 | Encourages drought tolerance & blooms |
| First feeding | 2–3 weeks later | Prevents fertilizer burn |
| Regular feeding | Every 4–6 weeks | Promotes growth & flowering |
Giving your bougainvillea attentive care during this stage makes all the difference. By balancing water, nutrients, and patience, you’ll help your plant bounce back quickly and reward you with show-stopping color.
Transplanting Mature Vs Young Bougainvillea: Special Tips And Risks
Transplanting mature vs young bougainvillea requires different approaches. Younger plants are easier to move, while older ones carry higher risks due to larger root systems.
Learn the best techniques, timing, and precautions to successfully transplant bougainvillea at any stage of growth.
Why Age Matters in Transplanting
Bougainvillea changes dramatically as it matures. Young plants have smaller, more flexible roots that adapt easily to new environments.
Mature bougainvillea, however, develop woody stems and extensive roots that resist disturbance, making them more prone to transplant shock.
Transplanting Young Bougainvillea
Young plants are the easiest candidates for moving because they’re still establishing themselves.
- Best age range: Under 2–3 years old.
- Root system: Shallow and limited, making it easier to lift the root ball intact.
- Handling tips: Be gentle, but you’ll likely see new growth within weeks if transplanted in the growing season.
Pro Tip: Young bougainvillea in pots can often be transplanted without pruning roots, just shift them into a slightly larger container with well-draining soil.
Transplanting Mature Bougainvillea
Older bougainvillea are prized for their size and vibrant displays, but moving them takes more effort.
- Best age range: 4+ years old.
- Root system: Extensive and woody; more likely to break during digging.
- Risks: Higher chance of transplant shock, leaf drop, or even dieback.
Tips for success:
- Prune back up to one-third of the canopy to reduce stress.
- Dig wide around the root system, keeping as much soil intact as possible.
- Wrap the root ball in burlap to hold it together during transport.
- Provide strong support stakes in the new location until roots re-establish.
Comparing Young vs Mature Transplants
| Feature | Young Bougainvillea | Mature Bougainvillea |
| Ease of transplant | Easy | Challenging |
| Root system | Shallow, flexible | Extensive, woody |
| Shock risk | Low–moderate | High |
| Pruning needed | Minimal | Essential |
| Time to recover | Weeks | Months |
Is It Worth Transplanting Mature Bougainvillea?
Yes, but only if it’s truly necessary (landscape redesign, poor site conditions, or container breaking). In many cases, gardeners find it easier to propagate cuttings from an old bougainvillea rather than risk moving a large established one.
Whether you’re moving a young starter or a mature showpiece, understanding the unique needs of each age group ensures you’ll make the right decisions and protect your bougainvillea’s long-term health.
Transplanting Bougainvillea In Pots: Pot Sizes, Anchoring And Winter Care
Transplanting bougainvillea in pots requires choosing the right pot size, providing anchoring support, and planning for winter care.
Potted bougainvillea thrive when slightly root-bound, so careful container selection and seasonal protection are key to keeping your plant healthy and blooming year-round.
Why Pot Transplanting is Different
Bougainvillea grown in containers behave a little differently than those planted in the ground. They thrive when slightly root-bound, so over-potting can actually slow their growth.
At the same time, container plants need extra care in watering, feeding, and seasonal protection.
Choosing the Right Pot Size
- Slightly larger than the root ball: Select a pot that’s just 2–3 inches wider than the plant’s current container. Oversized pots hold too much water, leading to root rot.
- Depth matters: Go for a deep pot to allow root expansion.
- Material choice: Terracotta pots are breathable but dry out faster; plastic or resin pots retain moisture longer and are lighter to move.
Anchoring and Stability
Bougainvillea is a natural climber, and when grown in pots it often needs support.
- Use a trellis, bamboo stake, or small arch directly in the pot for vines to climb.
- Heavy pots or weighted bases prevent tipping, especially for taller plants.
- For large bougainvillea, consider wheeled pot caddies for easier relocation.
Pro Tip: Tie stems loosely with soft garden ties, bougainvillea stems can bruise easily.
Soil and Drainage for Containers
Use the same light, well-draining mix discussed in Section 3. For pots:
- Add a layer of gravel or broken pottery over drainage holes.
- Ensure at least 3–4 holes for adequate outflow.
- Refresh the top 2 inches of soil annually to keep nutrients balanced.
Winter Care for Potted Bougainvillea
Bougainvillea is frost-sensitive, so potted plants may need to be relocated indoors or to a sheltered spot in colder regions.
- Before first frost: Move pots into a bright, frost-free location such as a greenhouse, sunroom, or bright indoor window.
- Cut back watering: Let soil dry slightly between waterings, since growth slows in winter.
- Optional dormancy: Bougainvillea can drop leaves indoors in cooler months; don’t panic, it usually regrows in spring.
Quick Pot Transplant Guide
| Step | Action | Key Tip |
| 1 | Choose right pot | Only 2–3″ wider, not oversized |
| 2 | Add support | Trellis or stake early |
| 3 | Use light mix | Ensure free drainage |
| 4 | Anchor pot | Heavy base or wheeled caddy |
| 5 | Winter care | Bring indoors before frost |
Container-grown bougainvillea gives you flexibility, moving it around your garden, patio, or even indoors for winter. With the right pot, anchoring, and seasonal adjustments, your bougainvillea will remain a dazzling showpiece year after year.
Tools, Safety And Thorn Management When Moving Bougainvillea
Moving a bougainvillea requires the right tools and protective gear to handle its thorny branches safely.
Using gloves, pruners, and proper lifting techniques not only protects you but also helps the plant transition smoothly during transplanting.
Why Safety Matters with Bougainvillea
Bougainvillea plants are stunning, but they come with sharp thorns that can scratch skin easily. These injuries may cause irritation or even infection if not handled carefully.
Preparing with the right tools and gear makes transplanting much safer and less stressful for both gardener and plant.
Essential Tools for Transplanting
- Sharp pruning shears: For trimming back branches before and after transplanting.
- Loppers or hedge shears: Useful for cutting thicker or tangled stems.
- Spade or shovel: To dig around the root ball carefully.
- Garden fork: Helps loosen soil without slicing too many roots.
- Hand trowel: Handy for smaller potted bougainvillea.
- Wheelbarrow or plant dolly: Makes transporting large bougainvillea easier.
Protective Gear
- Thick gardening gloves: Leather gloves are best to prevent thorn punctures.
- Long sleeves and pants: Protect arms and legs during handling.
- Safety glasses: Optional but helpful when cutting back overhead branches.
Pro Tip: Wrap the plant loosely in an old blanket, sheet, or burlap before moving. This contains the thorns and keeps branches from snapping.
Handling Bougainvillea Thorns
- Always grip branches by thicker, woody stems when possible.
- Avoid rushing, thorns snag easily on clothing and skin.
- Trim back overly long or wild stems before moving to make handling manageable.
Safe Lifting and Transport
- For ground plants: dig wide around the root ball, then gently lift from underneath.
- For pots: tilt the container slightly and roll or lift with a dolly.
- Never lift large bougainvillea by the trunk or branches, this risks breakage.
Quick Safety Checklist
| Task | Tool/Gear Needed | Safety Tip |
| Pruning | Shears/loppers | Cut back top growth first |
| Digging | Spade/fork | Work wide to protect roots |
| Lifting | Dolly/wheelbarrow | Avoid straining your back |
| Handling | Gloves, long sleeves | Wrap plant in cloth for easier grip |
Transplanting bougainvillea doesn’t have to be risky, with the right preparation, you’ll avoid thorny surprises and ensure your plant arrives safely in its new home.
Final Thoughts: How To Transplant A Bougainvillea Plant
Transplanting a bougainvillea is absolutely doable, but it rewards patience and preparation.
The single most important ideas to walk away with are: pick the right time (warm, active growth season for most climates), protect the root ball, and give careful aftercare (water correctly and avoid overfertilizing).
These steps dramatically reduce the risk of transplant shock and speed recovery.
If your plant is large and established, accept that the move will be more work and carry higher risk; for big specimens, prune, dig wide to keep as much root and soil intact as possible, and consider wrapping the root ball for transport.
For smaller or younger plants, a gentle lift and replant in the prepared, well-draining mix usually results in quick rebound and new growth.
Both approaches are commonly recommended by experienced gardeners and extension-style guides.
When it comes to aftercare, err on the side of moist but never soggy.
Deep water to settle the soil, then keep a light, consistent moisture level for the first 2–3 weeks while roots re-establish; only resume regular feeding after the plant shows signs of recovery.
Overwatering and heavy feeding too soon are two of the most frequent causes of post-transplant failure.
Finally, be patient and observant. Mild leaf drop or temporary wilting is normal; many bougainvilleas rebound within weeks with proper care.
If recovery stalls (no new shoots after 6–8 weeks, or persistent yellowing), revaluate drainage, light, and root health, and consider propagation from healthy cuttings if the original plant doesn’t recover.
Community and extension resources frequently recommend propagating as a lower-risk alternative to moving very large, established plants.
Quick Actionable Checklist
| Task | Action |
| Timing | Transplant in late spring/early summer (or when the plant is active). |
| Prep the site | Prepare well-draining soil and the planting hole before you dig the plant up. |
| Protect roots | Keep the root ball intact; wrap in burlap for large plants. |
| Watering | Water deeply after planting; keep soil moist but not waterlogged for 2–3 weeks. |
| Pruning | Lightly prune top growth if needed; avoid heavy pruning until recovery. |
| Monitor | Watch for new growth, and delay heavy fertilizer until the plant is settled. |