
Discover how to care for a Norfolk pine tree properly with expert tips on watering, light, temperature, and humidity to create a healthy, vibrant indoor tropical accent.
Caring for a Norfolk pine tree (Araucaria heterophylla) combines a bit of science, a dash of patience, and a touch of TLC.
This tropical conifer thrives indoors when given the right conditions, bright, indirect light, consistent moisture, humidity, and steady warmth.
As a beginner-friendly houseplant, it’s forgiving yet rewards attentive care with graceful, feathery foliage that brightens any space.
Optimal Light Conditions
Ensure your Norfolk pine thrives with the right lighting:
- Bright, indirect light: Ideally near a south-, east-, or west-facing window but shielded from harsh direct sun.
- Rotate regularly: Turn the pot every 2–4 weeks to maintain symmetrical growth.
- Supplement with grow light if needed: Especially in low-light homes.
Watering Essentials
Balancing soil moisture is crucial:
| Soil Condition | Action |
| Top 1″ dry | Water thoroughly until excess drains |
| Constantly moist | Allow drying; risk of root rot if left soggy |
| Winter (low growth) | Reduce frequency slightly, but never let fully dry out |
- Letting the top inch of soil dry before watering stops overwatering, one of the most common issues.
- In colder months, water every 1–2 weeks; indoors prefer room-temperature water.
Maintaining Humidity
Norfolk pines are tropical natives and thrive with moisture in the air:
- Ideal indoor humidity: 40–60% or more.
- Boost methods:
- Pebble tray with water beneath pot
- Humidifier nearby
- Misting branches (though less effective alone).
Temperature Preferences
Maintain a consistently warm environment:
- Optimal range: 65–75 °F (18–24 °C); acceptable up to 85 °F.
- Avoid:
- Cold drafts and near vents
- Temperatures below 60 °F, which can stress the plant.
How to Water a Norfolk Pine Tree Without Causing Root Rot
Learn how to water a Norfolk pine tree safely, perfect your watering routine to keep soil moist but never soggy, preventing root rot and promoting lush, healthy growth.
Why Watering Matters
Watering is truly the “make or break” step in caring for a Norfolk pine tree. These lush evergreens thrive in moist, but not waterlogged, soil.
Neglect or overwatering leads to dry, brown needles or deadly root rot. Striking the perfect balance nourishes the plant while ensuring optimal growth.
This guide distills top expert advice, hands‑on experience, and plant pathology insight into practical, beginner‑friendly tips to help you become a confident gardener.
Root Rot Explained
Root rot is the hidden enemy of overwatered Norfolk pines. When soil stays soggy, roots suffocate and become breeding grounds for fungi like Phytophthora or Pythium.
Symptoms include:
- Yellowing or drooping needles
- Mushy, brown roots on inspection
- Musty soil odor
Early detection lets you act fast: remove mushy roots, repot in fresh soil, and reset your watering habits.
Watering Basics: The Soil Test
Finger-Check Rule
- Insert your finger 1 inch into the topsoil.
- If dry, water thoroughly until it drains through the pot’s bottom holes.
- If still moist, wait 2–3 days and test again.
Frequency Guidelines
- Spring/Summer (active growth): Water once every 7–14 days, adjust for your home’s humidity, light, and season.
- Fall/Winter (growth slows): Space watering every 2–3 weeks to prevent soil from staying saturated.
Deep vs. Light Watering
- Deep soak method: Water consistently around the base until it drains out, encouraging strong root systems.
- Avoid:
- Frequent shallow misting, it doesn’t hydrate roots deeply enough.
- Letting the tree sit in drainage water, this invites root rot .
Water Quality & Pot Choice
Water Temperature
- Always use room‑temperature, dechlorinated water. Cold water shocks roots; hot water dries them out.
Pot & Soil Matter
- Using a pot with sturdy drainage holes, terracotta or well-ventilating material is ideal.
- Choose a fast‑draining mix: combine potting soil with perlite, coarse sand, or pumice to enhance breathability.
Staying Alert: Signs You’re Overwatering or Underwatering
Overwatering Signs
- Mushy, brown roots
- Wilting from the base upwards
- Musty soil smell
What to do:
- Halt watering for a week
- Inspect roots; prune off unhealthy parts
- Repot into fresh, airy soil
Underwatering Signals
- Crispy, brown needles
- Branches that droop visibly
Remedies:
- Deep water until it flows through drainage
- Then resume the normal schedule after soil dries 1–2”.
Pro Tips & Advanced Tricks
- Bottom watering method: Let the plant soak in a saucer for 15–30 minutes, then discard excess water, great for even hydration.
- Use moisture meter or yarn: Stick gauge devices can help if finger testing feels unreliable.
- Track watering in a log: Note when and how much you water, along with visible plant responses, this builds habits and prevents errors.
Quick Watering Strategy: Summary Table
| Task | Action |
| Check soil moisture | Insert finger 1″ deep |
| Watering | Deep until drainage |
| Let dry | Wait until top 1″ is dry |
| Test again before watering | 2–3 days later |
| Inspect roots if needed | Monthly or if plant declines |
| Adjust frequency | Based on seasons & indoor environment |
Implementing these steps establishes a confident watering routine that supports a robust Norfolk pine tree.
With well‑timed water and proper soil, you’ll avoid root rot and give your plant the foundation to thrive beautifully.
Best Light Conditions for Norfolk Island Pine
Discover the best light conditions for Norfolk Island Pine, bright, indirect light, strategic rotation, and smart grow light solutions to keep your tree vibrant and evenly shaped.
Why Light is Crucial
Light fuels photosynthesis, the process that gives your Norfolk pine its lush green color and steady growth.
Without sufficient light, needle density thins, growth slows, and your plant may lean or drop branches. Getting the right light balance ensures a healthy tree, natural shape, and overall vitality.
What the Experts Say
- Bright, filtered light is ideal: East- or west-facing windows are great; south-facing works with sheer curtains to soften harsh rays.
- Avoid direct sunlight: Intense, midday sun can scorch delicate needles, especially in summer.
- Consider LED grow lights: When natural light is limited, especially in winter or small apartments, a full spectrum grow light for 8–12 hours daily fill the gap.
Assessing Your Home’s Light Levels
DIY Light Meter
- Light up a smartphone app that measures foot-candles or lux.
- Norfolk pines aim for 1,000–2,000 lux, around 100–200 fc. Below that, growth may become leggy or sparse.
Low Light Symptoms
- Sparse, droopy branches
- New growth is pale or absent
- Leaning toward a light source
If you notice any of these, consider relocating or supplementing light sources.
Placement Guide
- East/West windows: Ideal morning or late afternoon light, bright enough, yet gentle.
- South windows: Best when filtered. Place 1–2 ft away behind a sheer curtain to prevent scorching.
- Low-light rooms: Use LED grow lights for 12 hours/day at 6–12 inches above the canopy.
Rotation Habit
Regularly rotating your plant (2–4 weeks) ensures even light exposure, preventing tilt and uneven growth .
Seasonal Light Adjustments
- Summer: Pull the plant away from the strong midday sun and rotate.
- Winter: Move closer to windows, even a few extra inches, to maximize low natural light hours.
- Cloudy days: Supplement with grow lights positioned for 6–8 hours of quality lighting.
Smart Grow Light Tips
- Choose full-spectrum LEDs: Mimic natural sunlight, both blue and red-light wavelengths.
- Maintain 12-hour light cycle: Ensures balanced growth and avoids stress.
- Proper positioning: Keep fixture 6–12 inches above top branches; watch for leaf burn.
Quick Light Readiness Checklist
- Bright, indirect light
- No direct midday sun
- Rotate plant every 2–4 weeks
- Use grows light if below 1,000 lux
- Seasonal adjustments in place
Creating the right lighting environment ensures your Norfolk pine remains dense, upright, and beautifully vibrant, keeping both beginner and experienced gardeners smiling.
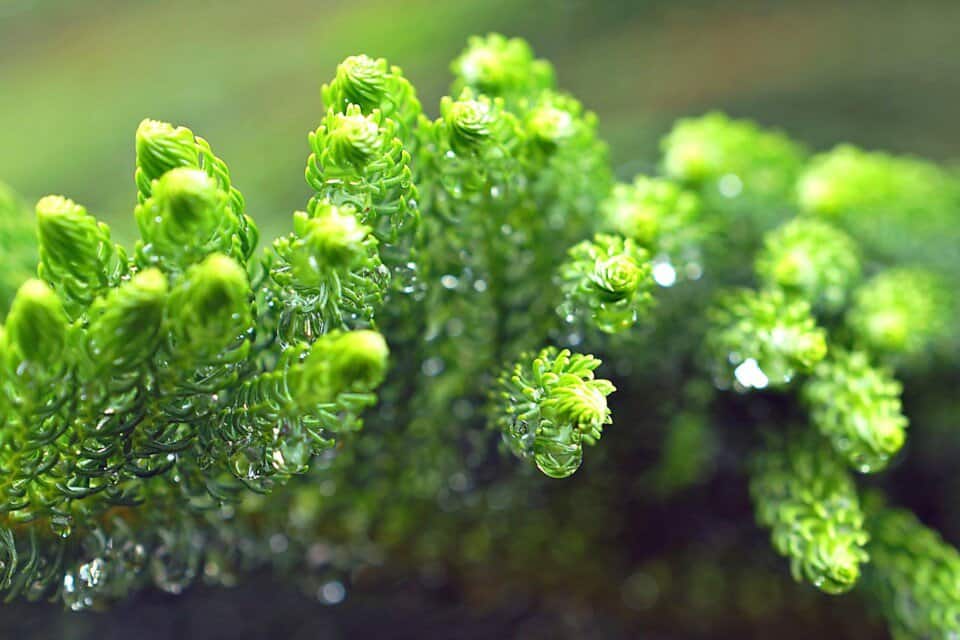
Boosting Humidity: Tips for Norfolk Pine Needle Health
Boosting humidity for Norfolk pine needle health prevents brown tips and crisp foliage, discovering easy methods like pebble trays, humidifiers, and plant grouping for a lush, vibrant tree.
Why Humidity Matters
Norfolk Island Pines are tropical natives, so they thrive in moist air. In dry indoor environments, especially during the heating season, low humidity leads to brown needle tips, crispy foliage, and stunted new growth.
Maintaining humidity between 50–60% helps your pine flourish with vibrant, healthy needles.
Ideal Humidity Range
- Aim for 50–60% relative humidity, this mimics their natural tropical habitat and prevents needle browning .
- Use a hygrometer to monitor levels, as moisture needs can fluctuate with indoor heating and seasonal changes.
Effective Humidity Solutions
1. Humidifier
- A room humidifier offers consistent, even humidification, ideal for winter months .
- Place it 3–6 feet from the plant, avoiding direct mist on foliage to prevent fungal issues.
2. Pebble or Water Tray
- Use a shallow tray filled with water and pebbles, sit the pot on top (not in the water).
- As the water evaporates, it creates a mini humid environment around the tree.
- Keep the tray topped up, but do not let the pot sit directly in water.
3. Plant Grouping
- Cluster humidity-loving houseplants together.
- As they transpire, they naturally elevate moisture levels, benefiting each other.
Tips to Avoid Mistakes
Misting Isn’t Enough
- Occasional misting may look nice, but it doesn’t sustain humidity and can encourage mildew or fungal issues.
- Use it sparingly as a supplement, not a primary humidity solution.
Watch for Signs of Too Much Moisture
- Overly damp conditions can lead to mold or mildew. Ensure proper air circulation in the room and under the plant.
- Use a fan or open window to keep air moving while maintaining recommended humidity levels.
Troubleshooting Humidity Stress
| Problem | Likely Cause | Solution |
| Brown or crispy tips | Low humidity | Pebble tray + humidifier |
| Yellowing or dropping needles | Fungal/Mildew from over-misting | Improve airflow, reduce misting |
| Crunchy foliage after move | Dry shock + low humidity | Use tray & humidifier; lighten watering |
Best Practices
- Check humidity with a hygrometer weekly.
- Refill the pebble tray every few days.
- Run a humidifier daily in dry months.
- Group plants seasonally for mini-habitats.
- Keep air circulating to prevent fungal issues.
By mastering humidity techniques, from pebble trays to smart humidifier use, you’ll safeguard your Norfolk pine from needle browning and dryness, fostering lush, green growth that delights beginners and seasoned plant lovers alike.
Ideal Temperature Range for Indoor Norfolk Pine
Learn the ideal temperature range for indoor Norfolk pine, maintain 65–75 °F (18–24 °C), protect from cold drafts, and nurture lush growth all year round.
Why Temperature Matters
Temperature affects Norfolk pine’s metabolic processes, resilience, and needle health. Too cold, and growth slows, needles may yellow, and stress invites pests.
Too warm, and you risk dehydration and fungal issues. Maintaining the right range ensures a lively, robust tree.
Preferred Temperature Range
- Daytime: 65–75 °F (18–24 °C) comfortable for most homes and perfect for photosynthesis.
- Nighttime: Above 60 °F (16 °C) avoid sharp drops that cause leaf stress and shedding.
- These conditions mimic the tree’s subtropical homeland and ensure steady growth and needle retention.
- Avoid exceeding 85 °F (29 °C) help the plant by increasing humidity and water frequency when it gets warmer.
Protecting from Temperature Extremes
Guard Against Cold Drafts
- Keep your pine away from drafty windows, exterior doors, and AC vents.
- A gap of 2–3 feet from these areas prevents sudden drops in temperature that shock roots and needles.
Avoid Heat Spots
- Don’t place near direct heat sources like radiators or space heaters.
- If indoors gets warm, boost humidity or move slightly away from heated fixtures.
Seasonal Temperature Tips
Winter Stability
- Maintain steady temps between 65–75 °F. Keep the plant away from chilly window sills unless there’s a sealed storm window.
- Consider using a room thermometer to track overnight temperatures.
Summer Comfort
- As indoor temps rise, ensure your plant isn’t next to heating or AC vents. Keep above 60 °F even on cooler summer nights.
- Warmer days may call for 5–10% more humidity with a tray or humidifier.
Signs Your Pine is Too Cold or Hot
| Symptom | Too Cold | Too Hot |
| Needle color | Yellowing, starting at trunk | Dry, brown tips |
| Needle drop | Significant shedding | Light shedding due to heat stress |
| Growth | Very slow or halted | Slower, possibly brittle shoots |
| Branch behavior | Drooping, brittle branches | Wilting, limp needles |
- Too Cold? Move to a warmer spot, away from windows/doors.
- Too Hot? Raise humidity and/or increase air circulation around the plant.
Maintaining Ideal Temps: Quick Tricks
- Use a digital thermometer with min/max tracking to log daily fluctuations.
- Aim for gradual variations, sudden swings over 10 °F can shock the plant.
- Consider thermal curtains in winter to buffer against cold windows.
- For homes with significant temperature variations, place your Norfolk pine in a consistently regulated room, like living or dining areas, not just bedrooms.
Why This Section Matters
Temperature regulation forms the silent backbone of Norfolk pine care.
While light, water, and humidity are obvious, consistent temperature keeps metabolic functions smooth, leading to strong growth, healthy needles, and resistance to pests and diseases.
Beginners often overlook this aspect, but mastering it elevates their plant care to expert level.
Choosing the Right Soil and Potting Mix for Norfolk Pines
Choose the right soil and potting mix for Norfolk pine tree: a well-draining, slightly acidic blend of peat, sand, perlite, or coir helps maintain proper moisture and healthy root growth.
Why Soil Mix Counts
The right potting mix supports root health, drainage, and nutrient access, essential for the indoor success of your Norfolk pine tree.
A mix that’s too dense can trap water and give rise to root rot; too loose, and it won’t hold enough moisture. A carefully balanced, slightly acidic blend is key to optimal growth and vigor.
Expert-Recommended Components
Top gardening sources advise combining these elements:
- Peat moss / coconut coir: Provides moisture retention and mildly acidic pH
- Sand, perlite, pumice, or orchid bark: Ensures excellent drainage and root aeration
- Optional bone meal: Supports root health when repotting
Simple DIY Mix
Follow this beginner-friendly recipe:
- 1 part sterilized potting soil or loam
- 1 part peat moss or coco coir
- 1 part coarse sand, perlite, or pumice
- Optional: 1 tsp bone meal per gallon to boost root development.
This mix is slightly acidic, well-draining, and moisture-retentive, ideal for indoor Norfolk pines.
How to Choose Pre-made Mixes
If buying ready-to-use:
- Look for cactus or orchid potting mixes (fast-draining, airy)
- Or opt for a high-quality indoor potting mix and enhance it with added peat and sand
Pot Selection & Preparation
- Use a pot just 2” larger than current root ball to prevent excess moisture retention
- Choose containers with ample drainage holes (terracotta or fabric pots promote air flow)
- For extra drainage, add screening or pebble layer at the bottom
Repotting Best Practices
- Repot only when root-bound or roots emerge from drainage holes, usually every 2–3 years
- Always repot in spring to support active growth
- Never bury the trunk, keep soil level about 1″ below pot rim
- Gently prune dead or mushy roots during repotting to prevent disease
Quick Comparison Table
| Component | Purpose | Amount |
| Potting soil/loam | Core structure & nutrients | 1 part |
| Peat/coir | Water retention, acidity | 1 part |
| Sand/perlite/pumice | Drainage & aeration | 1 part |
| Bone meal (optional) | Root health, phosphorus | 1 tsp per gallon of mix |
Why It Matters
Selecting the right soil mix reduces risks of root rot, ensures consistent hydration, and enables your Norfolk pine tree to grow strong and healthy.
With a balanced, airy blend, your plant gets everything it needs, support, moisture, and oxygen to thrive.
When and How to Fertilize Your Norfolk Pine Tree
Learn when and how to fertilize your Norfolk pine tree: feed with a balanced liquid or slow‑release fertilizer in spring and summer, taper off in winter, and watch your tree thrive.
Why Fertilization Matters
Fertilizing helps replenish nutrients that deplete over time in container soil.
Especially during its active growing phase, your Norfolk pine needs proper nutrition to maintain lush needles, healthy root systems, and resistance against stressors like pests and temperature fluctuations.
Without regular, balanced feeding, even perfect light or water conditions won’t yield the vibrant health you’re aiming for.
Best Fertilizer Types
Balanced Liquid Fertilizer
- A 20‑20‑20 NPK or similar balanced houseplant fertilizer works well ([turn0search2])
- Apply it every 4–6 weeks during the growing season (spring to fall) while watering
Slow‑Release Granular or Organic Options
- Granular formulas (e.g. fish-based fertilizer 5‑1‑1) can be added every 6 weeks to seasonally feed your pine ([turn0search6])
- Consumers on gardening forums often report success with organic boosters like compost tea or diluted coffee grounds during summer.
- A 12‑8‑8 NPK ratio is also recommended as an alternate balanced feed, applied every two weeks during growth periods.
When to Fertilize
- Spring–Summer (Active Growth): Feed every 2–6 weeks, depending on the fertilizer type.
- Winter (Dormant Period): Stop or reduce feeding significantly to allow natural rest
- Signs to fertilize: new spring growth, vigorous green foliage
- Hold off if growth stalls, pigment fades, or plant enters dormancy
How to Apply Fertilizer
Liquid Feed
- Mix according to package instructions in room-temperature water.
- Water the soil until drains, then discard excess.
- Avoid contact with foliage to prevent burning.
Granular or Organic Feed
- Gently sprinkle around the soil surface (not on foliage).
- Lightly work into topsoil and then water to activate nutrients.
Signs of Over- or Under-Fertilizing
| Symptom | Under-Fertilizing | Over-Fertilizing |
| Leaf color | Pale, yellowing needles | White crust on soil, leaf burn |
| Growth pattern | Stunted, slow growth | Leaf spotting, wilting, root damage |
| Root condition | Weak roots, poor anchoring | Burnt roots, brown or mushy root tips |
Action Steps:
- Test soil pH or nutrients before adjusting fertilizer levels
- Flush soil with water if signs of over-fertilization appear
- Adjust schedule or reduce strength after each growing season
Pro Tips for Smart Feeding
- Use a soil nutrient test or visual cues (yellow needles, slow growth) to guide feeding
- Alternate fertilizer types between liquid and granular for a well-rounded nutrient boost
- Pause feeding in winter, plant thrives best with a break
- Record feeding dates and formulations to track what works best for your tree
Fertilizing your Norfolk pine tree with the right type, timing, and method supports healthy foliage, stronger roots, and overall vitality.
This intentional routine helps beginners create a thriving, tax-free tropical tree indoors that looks and feels vibrantly alive.
Repotting Your Norfolk Island Pine: Timing and Technique
Repot your Norfolk pine correctly, best in spring every 2–4 years, using a pot just 2″ larger, fresh well-draining mix, gentle root care, and proper aftercare to minimize transplant shock.
Why Repotting Matters
Your Norfolk pine thrives best when slightly root-bound, but as it grows, it eventually needs more space.
Repotting refreshes its soil, improves drainage, supports root health, and gives your plant renewed energy, essential steps to maintain lush foliage and stability in the long term.
When to Repot
- Frequency: Every 2–4 years, or when roots emerge from drainage holes.
- Timing: Early spring, during new growth; avoid winter and dormancy periods .
- Urgent Cases: If root rot or pest issues appear, repot immediately, even outside the ideal season.
Choosing a Pot & Soil
- Pot size: Select one only 2 inches wider/deeper than the current pot to avoid excessive sogginess.
- Material & drainage: Opt for a sturdy pot (terracotta, ceramic, or thick plastic) with ample drainage holes.
- Soil: Use a fast-draining mix similar to your DIY formula: potting soil + peat/coir + perlite/sand.
Step-by-Step Repotting Process
- Prep: Water your pine the day before repotting to loosen soil.
- Remove gently: Lay the pot on its side; tap and ease the root ball out carefully. Wear gloves to avoid the spiky trunk.
- Inspect roots: Trim any rotten or mushy roots; tease out circling roots lightly.
- Position in new pot: Add fresh soil to the bottom, place the tree so the crown is ~0.5–2″ below the rim depending on size.
- Backfill: Fill with new mix around the roots, firm lightly to avoid air pockets. Ensure roots aren’t J-rooted or buried too deeply.
- Water in: Water deeply until drainage flows, then let drain freely, no standing water.
Aftercare & Troubleshooting
- Placement: Return to bright, indirect light; allow mild transplant shock (minor needle drop is normal).
- Watering: Resume normal watering once top-inch dries; avoid overwatering during recovery.
- No fertilizer: Hold off feeding for 4–6 weeks to reduce stress.
- Monitor: Watch for new growth and root stabilization; slight drooping or needle loss is typical but should rebound in weeks.
Signs You Repotted Too Early or Wrong
| Issue | Cause | Fix |
| Sudden wilting or yellowing | Pot too large, poor drainage | Reassess pot size, improve soil mix, let dry before rewatering |
| Continued root rot | Infected roots left behind | Repot again or prune further, discard old mix, ensure dryness |
| Plant tilting or instability | Roots not anchored, soil settled unevenly | Stake temporarily, top up soil, firm gently |
Pro Tips for Success
- Use a pot that’s heavy or place weight in the base to prevent tipping.
- Loosen the root ball moderately, avoid tearing.
- Use gloves to protect from spines.
- Repot during active growth so roots can recover quickly.
- Keep a repotting journal with dates and notes, for optimal timing and pattern tracking.
Why This Section Matters
Repotting isn’t just about bigger pots; it’s about refreshing your Norfolk pine’s foundation. Done properly, it promotes healthy roots, balanced moisture, and long-term resilience.
This critical step, often overlooked by beginners, keeps your indoor tree thriving year after year.
Outdoor vs Indoor Care: Moving Norfolk Pines Seasonally
Expert tips on outdoor vs indoor care for Norfolk pine tree, learn when to transition, how to acclimate correctly, and keep your tree thriving both inside and out.
Why Seasonal Moves Matter
Norfolk pines can live both indoors and outdoors, but dramatic changes in light, temperature, or humidity can shock them.
Seasonal transitioning can infuse your plant with fresh energy and vigor, if timed and managed correctly. Proper acclimation ensures healthy growth and vibrant foliage.
Identifying Ideal Climate Zones
- Outdoors, Norfolk pines thrive in USDA hardiness zones 10–11, where temperatures don’t drop below ~ 30 °F (−1 °C).
- In cooler zones (below 10), they’re best kept indoors year-round and moved outdoors only during warm seasons.
When to Move Outdoors
- Best timing: After last frost, with consistent temps above 60 °F (16 °C) and nighttime stays above 50 °F, usually late spring to early summer.
- Transition period: Start with 1–2 hours outside in shady, sheltered spots, gradually increasing over one week before full-time outdoor placement.
Outdoor Placement Tips
- Bright, indirect light: Positioned near a covered porch or under trees, some shade mirror indoor conditions
- Protection from full sun: Avoid scorching by steering clear of direct midday rays
- Wind and rain buffer: Place plants near a building or fence to reduce exposure to wind and heavy weather.
Bringing Indoors Safely
- Ideal timing: Move your plant indoors before night temps consistently fall below 55 °F, usually early fall.
- Acclimation: Reverse the outdoor routine, start indoors in a sheltered spot for a few hours daily, increasing over a week
- Pest check: Inspect foliage and soil; treat pests before indoor placement to avoid spreading indoors
- Clean pot and surroundings: Remove debris and leaves from the pot and surface to deter mold or pests.
Indoor vs Outdoor Differences
| Factor | Outdoor | Indoor |
| Light level | Bright, filtered sunlight | Bright, indirect (east/west window) |
| Humidity | Naturally higher | Use pebble tray/humidifier |
| Watering | More frequent due to drainage | Regular indoor schedule |
| Temperature range | 60–80 °F evenings/days | 65–75 °F stable |
| Pest exposure | Greater risk (aphids, mites) | Lower once indoors |
Pest & Disease Watch
- Outdoors, be alert for common pests like spider mites, aphids, and scale insects
- Use insecticidal soap, rinse foliage, or apply neem oil if pests appear, before bringing indoors
Why Seasonal Care Matters
Alternating between outdoor and indoor environments gives your Norfolk pine natural light and gentle weather rhythms that boost photosynthesis and refresh growth.
When done thoughtfully, it enhances the tree’s health and vigor, while minimizing stress and pest issues.
Troubleshooting Common Norfolk Pine Problems
Troubleshoot your Norfolk pine tree: identify causes like brown needles, pests, root rot, and provide expert fixes to keep your tree healthy and thriving indoors.
Why Troubleshooting Matters
Even with ideal care, Norfolk pines can face issues, from minor needle browning to serious pest invasions.
Spotting and resolving problems early protects your tree, boosts its resilience, and ensures it remains a stunning addition to your home.
This section draws on expert advice, plant pathology insights, and real gardener experiences to empower beginners with effective diagnosis and solutions.
Common Symptoms & Solutions
1. Brown or Crispy Needles
- Cause: Frequently low humidity, underwatering, or sudden light/temperature changes.
- Fix:
- Increase humidity with pebble trays or a humidifier.
- Deep-soak soil when it’s dry below the surface.
- Adjust to stable light and temperature gradually.
2. Yellowing or Dropping Needles
- Cause: Overwatering leading to root rot, low light, nutrient deficiencies, or pest pressure
- Fix:
- Check soil moisture: let top 1–2″ dry before watering.
- Adjust light and begin balanced feeding.
- Inspect soil and roots; repot if rotten roots are found.
3. Root Rot
- Cause: Stormy soil conditions, poor drainage, persistent wet soil
- Fix:
- Remove the plant, trim mushy roots, and repot in a well-draining mix.
- Use pots with drainage holes and water less frequently.
4. Pest Infestations
- Spider Mites: Yellow stippling with fine webbing
- Treat by rinsing foliage or using insecticidal soap or neem oil.
- Scale Insects: Small bumps and sticky honeydew on stems or needles
- Remove manually with alcohol and apply horticultural oil.
- Mealybugs/Aphids: White fluff or clusters on new growth; sticky residue
- Treat with rubbing alcohol, neem oil, and increase humidity.
Pro Tip: Keep humidity above ~50% and inspect foliage weekly, especially undersides, to catch infestations early.
5. Sun or Heat Stress
- Cause: Sudden exposure to direct sun or extreme temperatures, whether hot or cold.
- Fix:
- Gradually acclimate to new light, avoiding midday sun.
- Maintain temperature between 60–75°F; shield from drafts and heat sources.
6. Fungal Diseases
- Anthracnose or Needle Blight: Wet needles and dark spots caused by fungi
- Avoid overhead watering; remove affected foliage.
- Ensure airflow and treat with a fungicide when needed.
Troubleshooting Flowchart
| Symptom | Check First | Action to Fix |
| Brown tips | Humidity & watering | Increase humidity, deep-soak, remove dead tips |
| Yellow needles | Watering, light, pests | Adjust water/light, check & treat pests |
| Drooping branches | Root health | Inspect roots, repot if necessary |
| Webbing or bumps on stems | Pests (mites, scale) | Rinse, apply alcohol or neem oil |
| Dark spots on needles | Fungal infection | Improve airflow, treat with appropriate fungicide |
Why This Section Matters
Even experienced plant lovers encounter Norfolk pine challenges, but with clear diagnosis steps, smart fixes, and pro tips, beginners can overcome common issues confidently.
This troubleshooting guide ensures your plant stays resilient, shows fewer setbacks, and continues to grow beautifully over the years.
Final Thoughts: Mastering Care for Norfolk Pine Tree
Caring for your Norfolk pine tree is a rewarding journey grounded in consistency, observation, and gentle adjustments.
These majestic houseplants thrive when provided with bright, filtered light, steady moisture without soggy soil, warm, stable temperatures, and moderate to high humidity.
A well-draining, slightly acidic potting mix and thoughtful feeding during the growing season further support their lush growth.
Although not true pines, Norfolk Island pine needs regular care, especially indoors where conditions fluctuate more than in its native tropical habitat.
Minor issues like brown needle tips or light pest infestations often signal environmental imbalances, and early intervention with improved humidity, watering routines, and airflow typically resolves them.
For those in cooler climates, seasonal outdoor placement in summer offers beneficial diffused light and natural breezes, just be sure to acclimate the tree gradually and return it indoors before temperatures dip .
Lastly, Norfolk pines reward patience. Repot sparingly every 2–4 years using fresh, airy soil; feed them with moderate, balanced fertilizer during spring and summer; and prune only when necessary to preserve their graceful form.
With attentive, seasonal care, your Norfolk pine will brighten your space and delight your green thumb for years to come.