
Holes in anthurium leaves are caused most often by insect pests, specifically thrips, mealybugs, aphids, scale, and spider mites, which damage leaf tissue as they feed.
Less commonly, holes result from fungal lesions that dry and fall out, physical damage from cold draughts or frost, or caterpillar feeding in outdoor plants.
The single most important diagnostic step is to inspect the undersides of leaves and leaf junctions before treating anything: most pests on Anthurium hide where they are least visible.
Catching an infestation early produces significantly better outcomes than treating a plant that has been declining for weeks.
Anthurium is one of the most dramatic houseplants you can grow: those long-lasting, glossy spathes in red, pink, white, and coral sit above deep green foliage for months at a time with minimal fuss.
When holes appear in the leaves, it is genuinely alarming, partly because the leaves are so large and glossy that damage is impossible to miss, and partly because many owners have no idea which pest to look for or where to find it.
I have grown anthuriums for several years and the first time I found holes in my Anthurium andraeanum, I spent an hour inspecting the top surfaces of every leaf before someone reminded me to flip them over.
Every pest was right there on the undersides. That lesson, look underneath first, is the starting point for this guide.
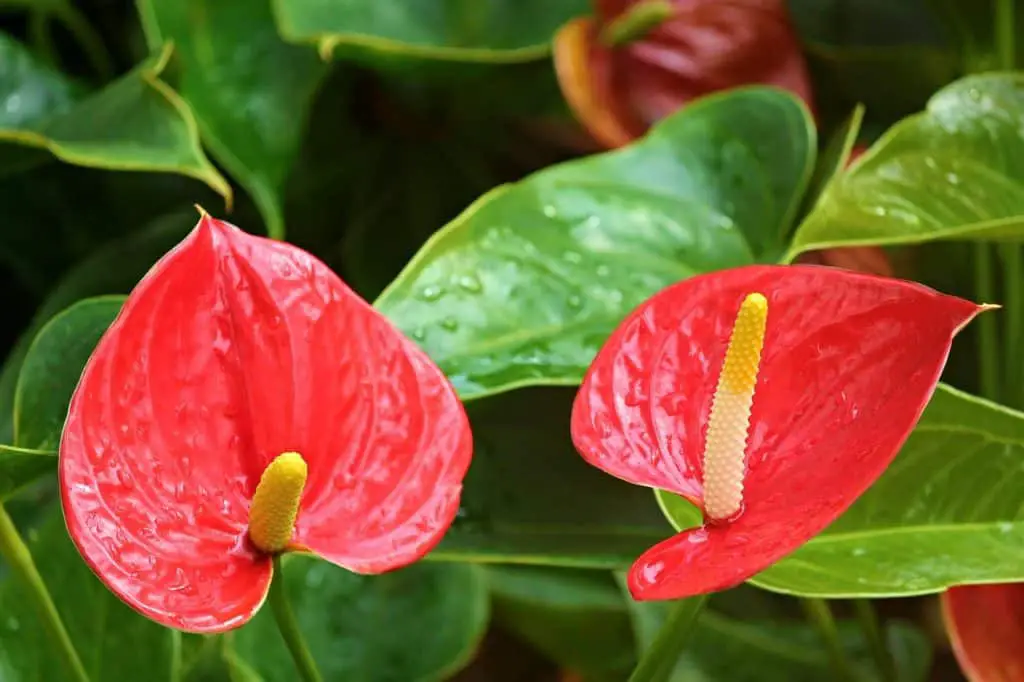
| A quick note on anthurium anatomy: The bright red, pink, or white waxy structure most people call the flower is actually the spathe, a modified leaf. The true flowers are the tiny structures packed along the finger-like spadix that protrudes from the spathe. This distinction matters for diagnosis: pests and diseases affect the spathe, the spadix, and the true foliage leaves in different ways and at different stages of infestation, so knowing which part is damaged helps narrow down the cause. |
Quick Diagnosis: Read the Damage Before You Treat Anything
Not all holes in anthurium leaves have the same cause, and treating for the wrong pest wastes time and can harm a plant already under stress.
The shape, location, and accompanying signs of the holes are the diagnostic tools. Spend two minutes examining the plant thoroughly before reaching for any treatment.
| Hole or Damage Type | Location on Leaf | Accompanying Signs | Most Likely Cause |
| Irregular ragged holes; edges look chewed | Leaf body; often on younger, softer leaves | No webbing; no cottony deposits; may see frass (dark droppings) near holes | Caterpillar or slug feeding; primarily an outdoor problem; check soil surface and pot base at night |
| Tiny pinprick holes progressing to larger irregular damage; silvery or bronze streaking | New growth and spathe surfaces first | Silver-white streaking or scarring on leaf and spathe surfaces; tiny dark specks of frass; deformed new leaves | Thrips; the most common cause of genuine holes in anthurium leaves |
| Stippled, pale dots across leaf surface; not holes initially but tissue dies and falls out | Across the leaf face, particularly toward center | Fine webbing on leaf undersides; bronze or yellowish discoloration; low humidity environment | Spider mites; tissue death from repeated cell puncturing creates hole-like damage as affected areas dry and fall |
| Yellowing around holes; water-soaked margins that dry and fall | Leaf edges first; progressing inward | V-shaped dead zones at leaf margins; yellowing border around lesions | Bacterial blight (Xanthomonas); the dead tissue dries, shrinks, and can fall out creating irregular holes or notches |
| Clean-edged brown or tan spots that dry, shrink, and drop out | Scattered across leaf face | Yellow halo around spots; humid conditions; similar spots on nearby plants | Fungal leaf spot (Cercospora or similar); the classic shothole pattern from dried lesions dropping out |
| Ragged tears or collapse of leaf sections rather than clean holes | Any part of leaf | History of cold temperatures; proximity to AC vent or cold window; dark water-soaked patches before drying | Cold or frost damage; affected tissue collapses, darkens, and falls away |
| The white paper test for thrips and mites: Hold a sheet of white paper under a suspect leaf and tap the leaf sharply several times. Thrips will appear as tiny brownish or black lines moving on the paper. Spider mites appear as barely visible moving dots. I use this method every time I am unsure whether I am looking at a pest problem or mechanical damage, and it has identified infestations I would have missed by leaf inspection alone. If the paper shows movement, you have confirmed the pest and can begin targeted treatment immediately. |
Why Anthuriums Get Pests: Understanding the Plant’s Vulnerability
Anthurium is native to the tropical rainforests of Central and South America, where it grows in warm, humid, filtered-light conditions.
Indoor cultivation replicates some but not all of these conditions, and the gaps create vulnerability. Two factors are particularly relevant to pest susceptibility.
First, anthuriums under stress, from incorrect watering, too little light, or incorrect humidity, are significantly more vulnerable to pest establishment than healthy plants.
Gardening Know How notes that anthuriums in poor conditions can be decimated by pests they would otherwise resist.
A stressed plant produces weaker cell walls that are easier for piercing insects to penetrate, and reduced metabolic activity means the plant cannot mount as strong a chemical defense against infestation.
Keeping cultural conditions correct is the most effective pest prevention strategy available.
Second, anthurium leaves are large, smooth, and have deep undersides with sheltered areas where leaves meet stems.
These structural features create ideal hiding zones for mealybugs, scale, and thrips, all of which preferentially colonize concealed, sheltered areas.
Regular inspection of these specific areas, rather than just the visible top surfaces, is what catches infestations before they establish.
| Anthurium pests are primarily piercing insects, not chewing insects: The thick, waxy leaves of anthurium deter most chewing insects. The pests that affect this plant are almost exclusively piercing-sucking insects: mealybugs, aphids, thrips, scale, and spider mites. They insert fine mouthparts into the leaf tissue to extract sap rather than biting through the leaf surface. This means that genuine ragged holes with chewed edges point toward an outdoor pest (caterpillar or slug) or physical damage rather than the typical houseplant pests. This distinction is missed in most guides covering this topic. |
Pest 1: Thrips
Thrips are the pest most consistently associated with genuine holes and surface damage in anthurium leaves.
They are tiny (less than 1 mm), slender, and difficult to spot on the leaf surface because they shelter along leaf veins and in the protected areas where the spathe meets the spadix.
In my experience, thrips damage is often misidentified as mechanical injury or even fertilizer burn for weeks before the infestation is recognized, by which time it has established throughout the plant.
How to Identify Thrips on Anthurium
- Silver-white streaking or silvery scarring on leaf surfaces and spathe faces; this is the most characteristic early sign
- Small dark specks of frass (excrement) scattered on leaf surfaces, particularly visible against the pale spathe
- Deformed, curled, or stunted new leaves and new spathes that emerge with damage already present
- In heavy infestations, new growth may fail to open correctly or may open already scarred
- Confirmation by white paper test: tap a leaf over white paper and look for tiny dark lines moving on the surface
Treating Thrips
Thrips are one of the more challenging pests to eradicate completely because females lay eggs inside leaf tissue where topical treatments cannot reach.
The developmental cycle from egg to adult is approximately 27 days, which means treatments must be repeated over a minimum of 4 to 6 weeks to interrupt the cycle and kill emerging adults before they can lay new eggs.
- Isolate the plant from all other plants in your collection immediately; thrips spread rapidly to neighbouring plants
- Remove and bag all heavily damaged leaves and any spathes showing significant scarring; dispose of them in the trash, not the compost
- Spray all leaf surfaces, including thorough coverage of undersides and the area where leaves meet stems, with insecticidal soap or neem oil diluted to label instructions
- Repeat the treatment every 5 to 7 days for a minimum of 4 to 6 weeks; the egg-to-adult cycle means a single treatment will not eliminate the infestation
- For severe infestations, spinosad-based insecticides are effective against thrips and can be rotated with neem oil to reduce the risk of resistance developing
- After 6 weeks of treatment with no new damage appearing on new growth, maintain the plant in quarantine for a further 2 weeks before returning it to your collection
| Thrips can spread to other aroids quickly: In my collection I once had thrips transfer from an anthurium to a nearby monstera within a week of the infestation appearing. Isolation is not optional: move the affected plant to a separate room, away from any other houseplants, as the first action before beginning any treatment. Thrips are mobile insects and will move between plants if given the opportunity. |
Pest 2: Spider Mites
Spider mites are arachnids rather than true insects: they have eight legs rather than six.
Adults are reddish-brown to pale yellow and measure approximately 0.5 mm, making them difficult to spot with the naked eye but visible under a hand lens.
They feed by puncturing individual leaf cells and extracting the contents, leaving the empty cells to dry and collapse.
This cell-by-cell damage produces the characteristic stippled, bronze, or silvery appearance of a mite-damaged leaf. In severe cases the dried dead tissue falls away, creating hole-like damage.
How to Identify Spider Mites on Anthurium
- Fine, silk-like webbing on leaf undersides or bridging between leaves and stems; visible webbing indicates an established, significant infestation
- Pale stippling, yellow dots, or a bronze, dusty appearance across leaf surfaces
- Confirmation by white paper test: tiny moving dots on the paper confirm mites
- Spider mites thrive in dry, warm conditions; infestations are most common in winter when central heating reduces indoor humidity significantly
Treating Spider Mites
Spider mites thrive in low humidity; increasing humidity is both a treatment aid and a prevention strategy.
I have found that moving a mite-affected anthurium to a bathroom or kitchen where humidity is naturally higher, while simultaneously treating, produces noticeably faster results than treating in the dry conditions that allowed the infestation to establish.
- Increase room humidity immediately around the affected plant; place on a pebble tray filled with water or move to a naturally humid room
- Spray down all leaf surfaces with plain water using a strong stream to dislodge mites and break up webbing; do this outdoors or in a shower if possible
- Apply insecticidal soap or neem oil to all surfaces, focusing particularly on undersides; ensure coverage of every leaf
- Repeat every 5 to 7 days for 4 to 6 weeks; mite eggs are not killed by most topical treatments so repeat applications are essential
- Miticide products (containing abamectin or bifenazate) are effective for severe infestations and can be rotated with neem oil
Pest 3: Mealybugs
Mealybugs are among the most visually distinctive pests because they produce a characteristic white cottony or waxy protective covering that makes them easy to spot once you know what to look for.
They prefer sheltered locations: the junctions where leaves meet stems, the axils where new leaves emerge, and the undersides of leaves close to the midrib.
A light infestation may go unnoticed for weeks in these hidden areas, producing only subtle leaf yellowing and very minor damage.
By the time the white cottony masses become obvious, the population has typically been feeding for some time.
How to Identify Mealybugs on Anthurium
- White cottony or waxy deposits at leaf junctions, stem bases, and where new growth emerges
- Sticky, shiny honeydew residue on leaves and surfaces below the plant
- Black sooty mold growing on the honeydew deposits; this secondary fungal infection is a reliable indicator that sap-sucking pests have been feeding for some time
- Yellowing, curling, or wilting of leaves in the areas closest to the infestation
Treating Mealybugs
The alcohol treatment is the most immediately effective intervention for mealybugs and one I rely on as a first step before applying any spray treatment.
The alcohol penetrates and dissolves the waxy protective coating that makes mealybugs resistant to water-based sprays.
- Dip a cotton swab in 70% isopropyl alcohol and press it directly onto each visible mealybug; the alcohol kills them on contact by dissolving their protective coating
- Work systematically through the plant, checking every leaf junction, stem base, and new growth point; the alcohol treatment kills adults but not eggs
- Follow with a spray application of neem oil or insecticidal soap to all surfaces, including areas you may have missed manually
- Repeat the full process every 5 to 7 days for 4 to 6 weeks; mealybug eggs hatch over an extended period and the population will re-establish without repeated treatment
- Check the root zone if foliar treatment does not resolve the problem within 3 to 4 weeks: root mealybugs colonize the root system and are invisible until the plant is removed from its pot
| Use 70% isopropyl, not higher concentrations: I made the mistake early on of using 99% isopropyl alcohol to treat mealybugs, assuming a higher concentration would be more effective. It caused visible burning on the leaf surface where I applied it. The 70% concentration is the correct strength: it kills the insects through dehydration without damaging the leaf tissue. Keep a small bottle and a pack of cotton swabs specifically for this purpose near your plant collection. |
Pest 4: Aphids
Anthurium aphids come in multiple colors including green, black, brown, and white.
They cluster on new growth, the undersides of young leaves, and along the spathe edges, feeding in groups by inserting mouthparts into the plant tissue and extracting sap.
Unlike some pests that are difficult to see, aphid colonies are usually visible to the naked eye once the infestation has established.
The danger with aphids is speed: a small colony can multiply dramatically within days in warm conditions, and they can transmit plant viruses as they move between plants.
How to Identify Aphids on Anthurium
- Clusters of small soft-bodied insects on new growth, spathe edges, and leaf undersides; color varies from green to black to white
- Sticky honeydew residue on leaf surfaces below the feeding sites
- Black sooty mold developing on honeydew deposits
- Distorted, curled, or puckered new leaves where aphids have been feeding as the tissue developed
- Ants climbing on or around the plant; ants actively farm aphids for their honeydew and their presence often indicates an aphid infestation
Treating Aphids
Aphids are the easiest of the common anthurium pests to treat because they are soft-bodied, exposed, and vulnerable to several low-toxicity interventions.
A strong water spray dislodges and kills a significant proportion of the colony immediately and is a useful first step before applying any chemical treatment.
- Take the plant to a sink, shower, or outdoors and spray all surfaces with a strong stream of water; focus on new growth and undersides where aphids cluster
- Apply insecticidal soap or neem oil to all surfaces immediately after the water treatment, before aphids can return to their feeding positions
- Repeat every 3 to 4 days for 2 to 3 weeks; aphids reproduce very quickly and the population will re-establish rapidly without repeated treatment
- For severe infestations, pyrethrin-based insecticides are highly effective against aphids and can be used as a stronger intervention
Pest 5: Scale Insects
Scale insects are one of the most commonly overlooked anthurium pests because they do not look like insects at all.
They appear as small, immobile brown, tan, or grey bumps attached to stems and leaf undersides.
Owners frequently mistake them for natural features of the plant, dried sap deposits, or debris.
The bump is the protective shell (the scale) covering the feeding insect beneath. Scale insects feed continuously by extracting sap through a piercing mouthpart inserted into the plant tissue.
They are listed as a significant anthurium pest by Plant lovers, Gardening Know How, Greenspaces, and multiple university extension services.
In my experience, scale is the pest most likely to be present for months before an owner realizes what they are looking at.
How to Identify Scale on Anthurium
- Small dome-shaped or flat bumps on stems, leaf undersides, and along the midrib and main veins; brown, grey, or tan in color
- Bumps are firmly attached and do not wipe away easily, unlike mealybug deposits which are soft and cottony
- Sticky honeydew residue and sooty mold on leaves and surfaces below
- General plant decline, yellowing, and reduced vigor that seems to have no obvious cause
Treating Scale
Scale insects are more difficult to treat than soft-bodied pests because their hard shell protects the insect from spray treatments.
Manual removal combined with systemic or penetrating treatments is more effective than spray alone.
- Scrape off the visible scale with a soft toothbrush or the edge of a credit card; this removes the physical protection and reduces the population immediately
- Apply 70% isopropyl alcohol with a cotton swab directly to each remaining bump and the areas of stem where scale was removed; the alcohol penetrates the remaining scale and kills the insects beneath
- Follow with a neem oil spray to all surfaces; neem oil contains azadirachtin, which acts as a growth disruptor for crawlers (the mobile juvenile stage that spreads the infestation)
- Repeat the manual removal and neem oil treatment weekly for 6 to 8 weeks; scale infestations are persistent and require extended treatment schedules
- For severe or persistent infestations, a systemic insecticide containing imidacloprid applied as a soil drench is effective; the plant absorbs the insecticide and the scale insects ingest it as they feed
Pest 6: Fungus Gnats
Fungus gnats are small flies whose larvae live in moist potting mix and feed on organic matter and, in larger populations, on fine root hairs.
Adult fungus gnats are a nuisance but do not directly damage leaves. Larval feeding on roots weakens the plant and can produce yellowing and drooping that is sometimes attributed to other causes.
They are included here because the combination of root damage and stressed plant often makes an anthurium more vulnerable to the piercing pests that do cause leaf holes.
The presence of fungus gnats is a reliable indicator that the potting mix is staying too moist for too long.
Correcting the watering routine, allowing the top 2 inches of potting mix to dry between waterings, eliminates the breeding environment and resolves most fungus gnat infestations without any chemical intervention.
Non-Pest Causes of Holes
Several non-pest causes produce hole-like damage in anthurium leaves, and misidentifying them as pest damage leads to unnecessary chemical treatments on a plant already under stress.
Bacterial Blight (Xanthomonas axonopodis)
Bacterial blight caused by Xanthomonas axonopodis pv. dieffenbachiae is one of the most serious diseases of anthuriums and one of the most commonly misdiagnosed.
The University of Florida IFAS Anthurium Disease guide describes the characteristic presentation: yellowed, water-soaked lesions forming along the leaf margins that develop into dead V-shaped necrotic zones.
As the dead tissue dries and contracts, it can fall away and create the appearance of holes or notches at the leaf edges.
The bacteria enter through natural pores (hydathodes) at the leaf margins or through pruning wounds.
Critical point that most guides miss: the University of Florida IFAS research identifies high humidity and wet foliage as the primary conditions that allow this bacterium to spread.
Keep humidity in the 50 to 60% range and avoid misting directly onto the foliage. Water the soil only, not the leaves.
| Bacterial blight has no cure once systemic: If bacterial blight becomes systemic, meaning it has spread throughout the vascular tissue of the plant, the plant cannot be saved. Remove and destroy any plant confirmed to have systemic blight immediately to protect the rest of your collection. The bacterium can spread to other aroids including Dieffenbachia, Aglaonema, and Spathiphyllum, so isolation of a suspected blight plant is urgent. Sterilize any tools used near the affected plant with 70% isopropyl alcohol before using them on any other plant. |
Bacterial Wilt (Ralstonia solanacearum)
Bacterial wilt caused by Ralstonia solanacearum affects the vascular system of the plant.
Early signs include wilting even when soil moisture is adequate, because the bacteria clog the vascular tissue and prevent water uptake.
The bacteria can persist in soil and on tools for years without a host plant. It is frequently mistaken for a watering problem in early stages.
As infection advances, cutting into a stem reveals brown discoloration of the vascular tissue and may show a brown bacterial ooze.
There is no treatment; affected plants should be removed and destroyed immediately.
Fungal Leaf Spot
Fungal leaf spot diseases caused by Cercospora and Colletotrichum produce small brown spots on anthurium leaves, often with a yellow halo around them.
As the spots mature and dry, the dead tissue can shrink and fall out, creating a shothole appearance that resembles pest-caused holes.
This pattern (holes with yellow halos in a scattered rather than edge-concentrated distribution) is diagnostic for fungal leaf spot rather than bacterial or pest damage.
Treat by removing affected leaves, improving air circulation around the plant, and applying a copper-based fungicide. Avoid overwatering and overhead watering that keeps foliage wet.
Physical and Environmental Damage
| Cause | Damage Pattern | Notes |
| Cold draught from AC vent or window | Water-soaked patches that turn dark, dry, and may fall away; damage concentrated on the side facing the cold air source | Move at least 3 to 4 feet from any vent or cold window; anthurium is frost-intolerant; even brief exposure to temperatures below 50 degrees F damages leaf tissue |
| Direct harsh sunlight | Bleached, tan, or papery patches on the sun-facing leaf surface that can dry and fall out | Anthurium needs bright indirect light; direct afternoon sun from south or west windows causes scorch damage that eventually creates hole-like lesions |
| Mechanical damage | Irregular tears or holes with clean or slightly torn edges; no associated yellowing, stippling, or pest signs | Cats, accidental contact during watering or moving, or abrasion from a nearby surface; inspect for pets chewing the plant, which also raises a mild toxicity concern |
| Is anthurium toxic to pets? All parts of anthurium contain insoluble calcium oxalate crystals. Chewing on the leaves causes immediate oral pain, drooling, and pawing at the mouth in cats and dogs, which typically deters further ingestion. While less dangerous than soluble oxalate plants like Oxalis, ingestion can cause vomiting and swelling of the mouth and throat. Keep anthurium out of reach of cats and dogs. The ASPCA classifies anthurium as toxic to cats, dogs, and horses. |
Treatment Methods: Choosing the Right Approach
| Treatment Method | Best For | Effectiveness | Notes |
| Strong water spray | Aphids; early mite infestations; dislodging mobile insects | Good as a first step; removes significant population immediately; does not kill eggs | Use in a shower, sink, or outdoors; direct stream at all leaf surfaces including undersides; repeat every 3 to 4 days |
| 70% isopropyl alcohol (cotton swab) | Mealybugs; scale insects; spot treatment of visible insects | Excellent for individual visible pests; kills on contact by dissolving protective coatings | Use 70% concentration only; higher concentrations burn leaf tissue; effective and immediate for mealybugs and scale |
| Insecticidal soap spray | Aphids; mites; soft-bodied insects; mealybugs | Good; kills on contact; no residual protection; requires thorough coverage | Coat all surfaces including undersides; repeat every 5 to 7 days; avoid applying in direct sun or heat which increases leaf damage risk |
| Neem oil spray | All common pests; also has some antifungal properties | Good; disrupts pest reproduction as well as killing on contact; provides some residual protection | Strong smell; dilute per label instructions; apply in the evening to reduce leaf stress; test on one leaf first if unsure |
| Spinosad | Thrips; caterpillars; difficult to control pests | Excellent for thrips specifically; works on contact and through ingestion | Derived from naturally occurring bacteria; very effective against thrips; rotate with neem oil to prevent resistance |
| Copper fungicide | Bacterial blight; fungal leaf spot | Preventive and early-stage; cannot reverse advanced bacterial infection | Apply per label instructions; do not use as a pest treatment; specific to bacterial and fungal disease management |
| Systemic insecticide (imidacloprid soil drench) | Scale; severe mealybug infestations; pests resistant to topical treatments | Excellent for persistent infestations; plant absorbs the insecticide and pests ingest it while feeding | Not suitable for flowering plants if pollinators may access blooms; effective against hidden pests including root mealybugs |
| Rotate treatments to prevent resistance: After growing anthuriums for a few seasons I learned this the hard way: using the same insecticidal soap spray for every treatment cycle with thrips produced a noticeably less effective result by the fourth or fifth application cycle. Rotating between neem oil, insecticidal soap, and spinosad every two applications keeps the pest population from developing tolerance to any single active ingredient. I now rotate automatically and have not had a recurrence of the resistance issue since. |
Step-by-Step Treatment Plan for an Affected Plant
- Isolate the plant immediately. Move it away from all other houseplants before doing anything else. Do not wait to confirm the pest or disease; isolation is always the correct first response to any suspected pest or disease problem
- Identify the cause using the diagnostic table at the start of this guide. Spend at least two minutes examining leaf undersides, stem bases, leaf junctions, and the area where leaves meet the soil. Use the white paper test if the pest is too small to see directly
- Remove severely affected leaves by cutting at the petiole base with sterilised scissors. Bag and dispose of them in the trash. Do not compost affected plant material
- Apply the appropriate primary treatment for the identified pest or disease. For piercing insects, start with a manual intervention (water spray or alcohol swab) before applying a spray product
- Treat all leaf surfaces thoroughly, not just the areas where damage is visible. Pests are mobile and will be distributed across the plant even if concentrated in specific areas initially
- Sterilize your hands and any tools used before handling any other plant in your collection
- Repeat the treatment at the appropriate interval for the identified pest (every 3 to 4 days for aphids; every 5 to 7 days for thrips, mites, mealybugs, and scale) for a minimum of 4 to 6 weeks
- Monitor new growth specifically. New leaves emerging without damage is the clearest sign that the treatment is working. Continued damage to new growth after 3 weeks of treatment indicates the infestation has not been eliminated and treatment needs to be escalated
- Maintain the plant in isolation for at least 2 weeks after the last sign of infestation before returning it to your collection
What You Need: Diagnostic and Treatment Supplies
| Item | Purpose | Notes |
| White paper or card | White paper test for thrips and spider mites | The fastest and most reliable way to confirm a mite or thrips infestation; keep a sheet near your plant inspection area |
| Hand lens or loupe (10x) | Identifying small pests that are difficult to see with the naked eye | A 10x loupe is sufficient for identifying spider mites, thrips, and scale; available inexpensively online; one of the most useful tools in a plant collection |
| 70% isopropyl alcohol and cotton swabs | Manual treatment for mealybugs and scale | Use 70% concentration only; higher concentrations burn leaf tissue; buy in bulk and keep near your plants |
| Insecticidal soap spray | Spray treatment for soft-bodied insects | Ready-to-use formulations are convenient; concentrated formulations are more economical for larger collections; reapply every 5 to 7 days |
| Neem oil concentrate | Broad-spectrum pest and disease treatment | Dilute per label; apply in the evening; strong smell fades within hours; provides residual protection that insecticidal soap does not |
| Spinosad concentrate | Thrips treatment; difficult infestations | Specifically effective against thrips; rotate with neem oil to prevent resistance development |
| Copper fungicide | Bacterial blight and fungal disease management | Prevention and early treatment only; cannot reverse advanced infection; important for bacterial blight management |
| Sterilised scissors or pruning shears | Removing damaged leaves and tissue | Wipe with 70% isopropyl alcohol before and after use on every plant to prevent disease transfer |
| Pebble tray and water | Maintaining humidity at the correct level without wetting foliage | Fill a tray with pebbles and water; place pot on top; evaporation increases local humidity without water contacting the leaves directly |
Prevention: Why Good Cultural Care Is Your Best Defense
The most effective pest prevention strategy for anthurium is maintaining correct cultural conditions.
Gardening Know How states directly that anthuriums in poor conditions can be decimated by pests they would otherwise resist.
Every care element that keeps the plant healthy also increases its resistance to pest establishment.
| Care Element | Correct Practice | Why It Prevents Pests and Disease |
| Watering | Water when the top 2 inches of potting mix are dry; water the soil, never the foliage; ensure thorough drainage | Avoiding overwatering prevents fungus gnats; keeping foliage dry prevents bacterial blight from spreading; healthy roots produce a plant with stronger pest resistance |
| Humidity | 50 to 60% relative humidity; use a pebble tray rather than misting directly onto leaves | Correct humidity reduces spider mite risk (mites thrive below 40%); avoiding wet foliage reduces bacterial blight risk; |
| Light | Bright indirect light; no direct harsh sun | A plant receiving adequate light maintains stronger cell walls and metabolic function, producing better natural resistance to piercing insects; light-stressed plants show measurably greater pest vulnerability |
| Fertilizing | Half-strength balanced liquid fertilizer every 3 to 4 weeks in spring and summer only | Correct fertilizing produces firm, appropriately nutritious tissue; over-fertilizing with high nitrogen produces soft, lush growth that is more attractive to sap-sucking pests |
| Air circulation | Gentle air movement around the plant; avoid crowding plants closely together | Good air circulation reduces the humidity in the microclimate around the plant that favors fungal and bacterial disease; it also makes the environment less hospitable for spider mites |
| Quarantine | All new plants kept away from the existing collection for 2 to 4 weeks | The majority of houseplant pest infestations arrive on new acquisitions; this single practice prevents most pest introductions to an established collection; I quarantine every single plant I bring home, regardless of how healthy it looks |
| Weekly inspection is the most valuable prevention habit: A quick 2-minute inspection of your anthurium once a week, focusing on leaf undersides and stem junctions, catches most infestations at the stage where they are easiest to treat. I keep a hand lens and a sheet of white paper near my plant shelf and make it a habit every Sunday morning. In several seasons of growing anthuriums I have never had a pest infestation reach the severe stage since adopting this routine, because I catch problems when they are still a handful of insects rather than an established colony. |
Troubleshooting: Four Most Common Scenarios
Scenario 1: Silver Streaking and Tiny Dark Specks on New Leaves and Spathe
This is the classic thrips presentation. The silver-white scarring on new growth and the dark frass specks are highly characteristic.
Use the white paper test to confirm. Isolate immediately and begin the thrips treatment protocol: remove damaged leaves, spray all surfaces with insecticidal soap or neem oil, and repeat every 5 to 7 days for a minimum of 6 weeks.
New growth emerging without scarring after 3 weeks of treatment indicates the treatment is working.
Scenario 2: White Fluffy Deposits at Stem Junctions; Sticky Residue on Leaves
This is a mealybug infestation. Work through the plant systematically with a cotton swab dipped in 70% isopropyl alcohol, pressing it onto every visible mealybug deposit.
Follow with a neem oil spray to all surfaces. Repeat weekly for 4 to 6 weeks.
If the plant continues to decline despite thorough topical treatment, remove from the pot and inspect the root zone for root mealybugs, which will appear as white powdery deposits on the roots and at the base of the stem.
Scenario 3: V-Shaped Dead Zones at Leaf Edges; Yellow Margins Around the Dead Areas
This presentation, V-shaped necrotic lesions at the leaf margins with a yellow halo, is the characteristic sign of bacterial blight rather than pest damage.
Do not treat with insecticide: the cause is bacterial, not insect. Isolate immediately. Remove all affected leaves.
Sterilize tools with 70% isopropyl alcohol. Apply a copper-based fungicide as a preventive measure on remaining leaves.
Check adjacent aroids (Dieffenbachia, Spathiphyllum, Aglaonema) for the same symptoms.
If the infection appears to have spread into the main stem, the plant is unlikely to recover and should be destroyed to protect the rest of the collection.
Scenario 4: Brown Bumps on Stems and Leaf Undersides; Gradual Decline
Immovable dome-shaped brown bumps on the stems and leaf undersides that do not wipe away easily are scale insects.
Because they do not move and do not look like insects, they are often present for months before being identified.
Scrape off the bumps manually with a soft toothbrush, apply 70% isopropyl alcohol with a cotton swab to the treated areas, follow with neem oil spray, and repeat weekly for 6 to 8 weeks.
For severe infestations, a soil drench with imidacloprid systemic insecticide is the most effective intervention.
| Problem | Most Likely Cause | Immediate Action | Repeat Treatment |
| Silver streaking and dark specks on new growth | Thrips | Isolate; remove damaged leaves; spray with insecticidal soap | Every 5 to 7 days for 6 weeks; rotate with spinosad |
| White cottony deposits at stem junctions | Mealybugs | 70% alcohol swab on each deposit; follow with neem oil spray | Weekly for 4 to 6 weeks; check roots if no improvement |
| Fine webbing; bronze stippling on leaf face | Spider mites | Increase humidity; strong water spray; insecticidal soap | Every 5 to 7 days for 4 to 6 weeks; move to more humid position |
| Clustered soft insects on new growth; honeydew | Aphids | Strong water spray; insecticidal soap immediately after | Every 3 to 4 days for 2 to 3 weeks |
| Hard immovable brown bumps on stems | Scale insects | Manual removal; 70% alcohol; neem oil spray | Weekly for 6 to 8 weeks; systemic drench for severe cases |
| V-shaped necrotic lesions at leaf margins | Bacterial blight | Isolate; remove affected leaves; copper fungicide; sterilize tools | Not a pest: do not use insecticide; remove plant if systemic |
| Scattered holes with yellow halos; not edge-concentrated | Fungal leaf spot | Remove affected leaves; improve air circulation; copper fungicide | Address overwatering; avoid wet foliage; repeat fungicide per label |
Frequently Asked Questions
Why does my anthurium have holes but I cannot see any bugs?
Several pests that damage anthurium leaves are nearly invisible to the naked eye without magnification.
Spider mites measure approximately 0.5 mm; thrips less than 1 mm. Neither is easily visible without a hand lens.
Use the white paper test: hold a sheet of white paper under a leaf and tap it sharply several times. Moving dots indicate spider mites; tiny dark lines indicate thrips.
Also check the plant at night with a flashlight for scale, which can be overlooked in normal light because it resembles natural plant features rather than insects.
Can anthurium leaves recover after holes appear?
Existing holes and damaged areas in anthurium leaves will not heal or fill in. Plant tissue, once dead, does not regenerate.
What can be restored is the health and appearance of the overall plant: new leaves produced after a successful pest treatment will emerge undamaged, and these new leaves gradually replace the damaged older ones.
Remove heavily damaged leaves once the infestation is under control to improve the plant’s appearance and allow you to monitor new growth accurately.
A plant that was previously producing one new leaf every 4 to 6 weeks can take several months to look fully healthy again after a significant infestation.
What is the most common pest on anthurium?
Thrips and spider mites are the two pests most consistently associated with leaf damage on anthurium in indoor conditions.
Thrips are particularly associated with the scarring and hole-like damage described by most owners, and they are one of the more challenging indoor pests to eliminate completely because females lay eggs inside leaf tissue where topical treatments cannot reach.
Spider mites are most common during winter when central heating reduces indoor humidity, creating the dry conditions mites prefer.
Is the red part of an anthurium a flower or a leaf?
The red (or pink, white, orange, or coral) glossy structure is the spathe, a modified leaf that serves as a bract surrounding the true flowers.
The actual flowers are the tiny structures packed along the finger-shaped spadix that protrudes from the center of the spathe.
This distinction matters for diagnosis: pest and disease damage affects the spathe and the true foliage leaves differently.
Thrips, for example, commonly scar the spathe surface early in an infestation, which can be the first visible sign of a problem.
Why is my anthurium getting holes even though I cannot see any pests?
If thorough inspection including the white paper test produces no evidence of insects, and the damage is concentrated at leaf edges rather than across the leaf face, consider bacterial blight as the cause.
The characteristic V-shaped necrotic lesions of Xanthomonas bacterial blight can cause the dead tissue to dry, shrink, and fall away, creating an appearance similar to pest damage but concentrated at the leaf margins rather than distributed across the leaf surface.
The presence of a yellow halo around the damaged area is the most reliable diagnostic indicator of bacterial rather than pest damage.
How often should I check my anthurium for pests?
A thorough inspection once a week is the most effective frequency for catching pest problems early.
The inspection should take approximately two minutes: examine the undersides of all leaves, check stem junctions and leaf axils, and look for honeydew or sooty mold on surfaces below the plant.
Early detection, when a pest population is still small, means a much simpler and faster treatment process.
In my experience, infestations found at 10 to 20 insects are resolved in two to three treatment cycles; infestations that have been developing for weeks take 6 to 8 weeks of consistent treatment to fully eliminate.
Can I use neem oil on anthurium?
Yes. Neem oil is safe for anthurium and is one of the most versatile treatments available for this plant, providing action against spider mites, aphids, mealybugs, scale crawlers, thrips, and some fungal diseases.
Dilute per the label instructions, which typically means 1 to 2 tablespoons of neem oil concentrate per gallon of water with a few drops of dish soap as an emulsifier.
Apply in the evening rather than in direct light or heat, which increases the risk of leaf burn. The smell is strong but fades within a day.
Test on one leaf and wait 24 hours before treating the whole plant if using for the first time on a particular specimen.
Key Success Factors: Summary Checklist
- Inspect leaf undersides, stem junctions, and leaf axils first; this is where every common anthurium pest hides, not on the visible top surfaces
- Use the white paper test to confirm thrips and spider mites before treating; it takes 30 seconds and eliminates guesswork
- Isolate any plant showing pest or disease signs immediately, before beginning treatment, to prevent spread to the rest of your collection
- Match the treatment to the identified pest; insecticide is not appropriate for bacterial blight; alcohol swabs are not appropriate for bacterial wilt
- Repeat all treatments at the correct interval for a minimum of 4 to 6 weeks; single applications rarely eliminate an infestation because eggs are unaffected by most topical treatments
- Rotate between treatment products (neem oil, insecticidal soap, spinosad for thrips) to reduce the risk of resistance developing
- Keep foliage dry; water the soil only, never mist directly onto anthurium leaves; wet foliage promotes bacterial blight spread
- Maintain humidity at 50 to 60% rather than the higher figures sometimes recommended; very high humidity combined with wet foliage is a bacterial blight risk factor
- Quarantine all new plants for 2 to 4 weeks before placing them near your existing collection; this single practice prevents the majority of pest introductions
- Keep anthurium out of reach of cats and dogs; all parts of the plant contain calcium oxalate crystals and are classified as toxic to pets by the ASPCA
Final Thoughts
Anthurium is a rewarding plant to grow and a genuinely resilient one when conditions are right.
Holes in the leaves are alarming, particularly because the large, glossy foliage makes every imperfection obvious, but the cause is almost always identifiable and the plant almost always recoverable if the problem is caught before it becomes systemic.
The most important shift in approach is diagnostic: look before treating.
The white paper test, the leaf underside inspection, and the distinction between edge-concentrated damage (bacterial) and distributed damage (pest) are the tools that make treatment efficient.
Treating for the wrong cause wastes time and applies unnecessary chemical stress to an already struggling plant.
The prevention message from this guide is equally simple: a healthy, correctly cared-for anthurium in the right light, watered correctly, at the right humidity, is significantly more resistant to pest establishment than a stressed plant.
Most severe infestations I have seen or treated were on plants that were already weakened by incorrect care.
Correct the care conditions and the pest problem becomes both less likely and easier to resolve.
| What’s next: Once the infestation is resolved and new undamaged leaves are emerging, the next step is establishing the weekly inspection habit permanently. Two minutes once a week, focusing on leaf undersides and stem junctions, is the difference between catching a problem at 20 insects and discovering it at 2,000. It is also worth reviewing the humidity and watering routine at this stage: if pests established once, the conditions that allowed them to establish may still be present. |
Hi, I'm Matt,
An amateur gardener with a houseplant habit that got slightly out of hand.
I started Bean Growing to share what I've learned from a few years of trial, error, and the occasional dead plant.
I grow a mix of houseplants and outdoor shrubs in the UK but try to expand my knowledge to the US. I try to write about what actually works