
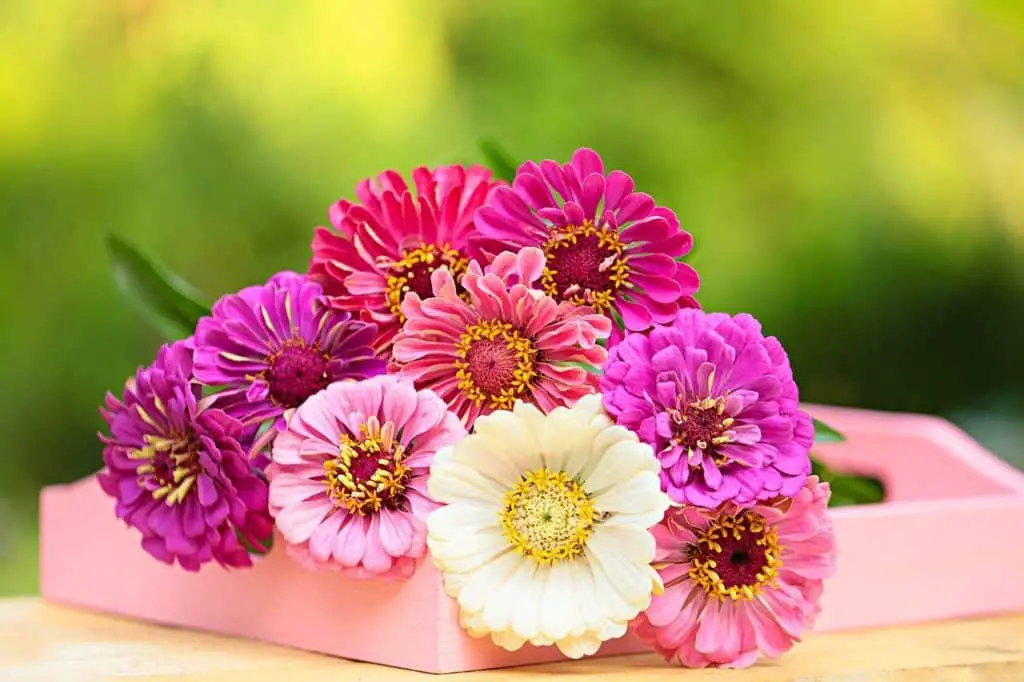
Gerbera daisies are among the most rewarding flowers you can grow, whether in a pot on a windowsill, in a border, or as cut flowers in a vase.
When they are thriving, the blooms are bold, vivid, and long-lasting.
When something goes wrong, though, they communicate the problem clearly through wilting stems, drooping heads, browning leaves, or curling foliage that quickly tells you the plant is under stress.
The good news is that most of the problems gerberas experience come down to a small number of causes, and once you understand what the plant is telling you, fixing it is usually straightforward.
In this guide I will take you through everything you need to know about why your gerbera daisy might be wilting, why its leaves are turning brown or curling, and how to get it back into the best possible health.
What Is a Gerbera Daisy?
Before getting into the problems, it helps to understand what kind of plant you are dealing with, because the gerbera’s origins explain most of its care requirements.
Gerbera jamesonii is a perennial herb native to the grasslands of Mpumalanga and Limpopo provinces in South Africa, a region historically known as the Transvaal.
This is why it is also commonly called the Transvaal daisy, the Barberton daisy, or the African daisy, with all three names pointing back to its South African home range.
The plant was first collected near the gold mining town of Barberton in 1884 by a Scotsman named Robert Jameson, who noticed the striking flowers growing near his mining operation and began cultivating them around his home in Durban.
Plants were eventually sent to Cambridge and then to Kew Gardens in London, where taxonomist J.D. Hooker formally described the species in 1889 and named it Gerbera jamesonii in Jameson’s honour.
The genus name Gerbera commemorates Traugott Gerber, an 18th-century German botanist and friend of the famous Swedish botanist Carl Linnaeus.
Early hybridisation work in Cambridge, where G. jamesonii was crossed with a related species called G. viridifolia, produced the first florist’s gerberas and laid the foundation for the enormous range of cultivated hybrids available today.
The hybrid gerbera now comes in virtually every colour including white, yellow, orange, salmon, pink, deep red, scarlet, and bicolours, with flower heads ranging from around 7 to 12 centimetres across.
Some specialist cultivars have been bred to produce flowers up to 18 centimetres in diameter.
Today the gerbera ranks as the fifth most popular cut flower in the world, behind roses, carnations, chrysanthemums, and tulips.
In its natural South African habitat the gerbera grows in well-drained, sandy grassland soils under warm, sunny conditions with a distinct dry season.
It is not naturally adapted to wet, cold, or waterlogged environments, and understanding this goes a long way toward explaining why improper watering is the single most common cause of problems in cultivated gerberas.
Why Is My Gerbera Daisy Wilting?
Wilting is the gerbera’s primary distress signal, and the frustrating truth is that it can be caused by opposite problems.
Both too much water and too little water will cause a gerbera to droop, which means your first job is always to check the soil and diagnose which one you are dealing with before taking action.
Overwatering
Overwatering is the most common reason a gerbera wilts, particularly for pot-grown plants.
When the compost stays constantly wet, the air spaces between soil particles fill with water instead of oxygen.
The roots, deprived of oxygen, cannot function normally and begin to suffocate.
As root function declines, the plant is unable to absorb water and nutrients even though the soil is sodden, which is why an overwatered gerbera will wilt even when the compost feels wet to the touch.
If the situation continues, the waterlogged roots begin to rot.
Root rot is a condition where roots turn dark brown or black, become soft and mushy, and develop an unpleasant foul smell.
At this stage the roots can no longer support the plant at all, and wilting becomes severe.
Left untreated, root rot will kill the plant.
The signs that overwatering is your problem include wilting leaves despite wet soil, yellowing leaves starting from the lower parts of the plant, stems that feel soft or mushy near the soil line, a sour or unpleasant smell from the compost, and visible mould on the soil surface.
To address overwatering in a potted plant, stop watering immediately and move the plant somewhere with good air circulation.
If the problem has been going on for some time, remove the plant from its pot and inspect the roots.
Healthy roots are firm and white or cream-coloured.
Rotten roots are dark, soft, and smell bad.
Trim away any rotten sections with clean scissors or pruners, allow the remaining roots to air for an hour, and then repot the plant into fresh, well-draining compost.
Water sparingly for the following few weeks while the root system recovers.
Never let a potted gerbera sit in a saucer of standing water. The roots will absorb the excess moisture and the compost will remain constantly wet. Always empty saucers and drip trays after watering.
Underwatering
Underwatering causes a different pattern of symptoms.
An underwatered gerbera will wilt with dry, crispy leaf edges rather than soft, yellow foliage.
The compost will feel bone dry when you press your finger into the top 2.5 centimetres, and in severe cases it may pull away from the edges of the pot.
The plant is wilting because it genuinely does not have enough water to maintain the pressure inside its cells that keeps leaves and stems rigid.
The fix is to water thoroughly, allowing water to drain freely from the base of the pot, and then to establish a more consistent watering routine going forward.
An underwatered gerbera that has not developed root damage will usually recover within a few hours of being watered properly.
How to Water a Gerbera Correctly
The correct watering approach for gerbera daisies is to water deeply and then allow the top 2.5 centimetres of compost to dry out before watering again.
This mimics the natural cycle of the South African grassland, which involves thorough rainfall followed by a drying-out period, and it keeps the roots in the well-aerated but not waterlogged conditions they need.
Watering in the morning is better than watering in the evening.
Morning watering gives any moisture that reaches the crown or leaves a chance to evaporate during the day, reducing the risk of fungal problems.
Evening watering leaves the plant damp overnight, which is exactly the condition that powdery mildew and other fungal diseases thrive in.
For potted gerberas, watering from below by placing the pot in a shallow tray of water for 20 to 30 minutes and then removing it is a very effective technique.
It encourages roots to grow downward toward moisture rather than sitting near the wet surface, and it keeps the crown of the plant dry, which significantly reduces the risk of crown rot.
Never pour water directly onto the crown of the plant, which is the central point where the leaves emerge from the root system.
In the ground, gerberas typically need around 2.5 centimetres of water per week during the growing season.
Established plants are more drought-tolerant than newly planted ones, but they will still wilt if the soil dries out completely for extended periods.
Other Causes of Wilting
Watering is the most common culprit, but there are other reasons a gerbera can wilt that are worth ruling out if adjusting your watering routine does not resolve the problem.
High Temperatures
Gerbera daisies perform best in temperatures between roughly 18°C and 24°C (65°F to 75°F).
When temperatures rise significantly above this range, the plant loses water through its leaves faster than the roots can replace it, leading to wilting even when the soil is adequately moist.
This kind of heat stress wilting is usually temporary and the plant recovers as temperatures drop in the evening.
If your gerbera is in a pot, move it to a spot that receives morning sun and afternoon shade during the hottest months.
For in-ground plants, a layer of mulch around the base of the plant helps keep the soil cooler and reduces moisture loss during hot spells.
Nutrient Deficiency
A gerbera that is short of key nutrients, particularly nitrogen, potassium, or magnesium, may produce drooping leaves alongside other symptoms such as pale or yellowing foliage, poor flowering, and generally weak growth.
Potted plants are more vulnerable to nutrient deficiency than those in the ground because regular watering gradually leaches nutrients from the compost over time.
Feeding with a balanced liquid fertiliser every two to four weeks during the growing season keeps nutrient levels consistent.
Gerberas can also be susceptible to iron and manganese deficiencies, particularly in alkaline soils or composts, which causes yellowing between the leaf veins while the veins themselves stay green.
A fertiliser that includes these micronutrients, or an occasional application of sequestered iron, addresses this specific problem.
Competition from Other Plants
Gerberas do not perform well when they are crowded.
If planted too close to neighbouring plants, they will compete for both water and nutrients in the root zone, and the gerbera is not a particularly aggressive competitor.
The result is a plant that is always slightly undernourished and prone to wilting under conditions that a more isolated plant would handle comfortably.
In beds and borders, leave adequate spacing around each plant to allow air to circulate freely and to ensure the roots have access to the nutrients they need without competition.
Insufficient Light for Pot Plants
A gerbera kept indoors that is not receiving enough light will produce weak, elongated stems that are more prone to drooping under the weight of the flower heads.
Gerberas need at least six hours of bright indirect light or morning sun to grow strongly enough to support themselves upright.
If your pot plant is wilting and the soil moisture seems fine, consider moving it to a brighter position, ideally an east-facing windowsill where it will receive direct morning sun without the intensity of afternoon sun in summer.
Why Are My Gerbera Daisy Leaves Turning Brown?
Brown leaves on a gerbera daisy can take several different forms, and each form points to a different underlying cause.
Taking a moment to look closely at where and how the browning appears tells you a great deal about what is going wrong.
Brown Leaf Edges and Tips
Brown, crispy leaf tips and margins are almost always a sign of either underwatering or low humidity, or a combination of both.
When the plant does not have enough moisture, the edges of the leaves, which are the furthest points from the central vein and the water supply, show stress first by drying out and going brown.
The same pattern can appear when the air is very dry, as happens in centrally heated homes during winter, even if the soil moisture is adequate.
Adjusting your watering routine and, if the plant is indoors, taking steps to increase local humidity will usually resolve this.
A pebble tray filled with water beneath the pot, or grouping the plant with others, raises humidity around the foliage without the risk of waterlogging the roots.
Brown Spots Caused by Wet Leaves
One of the most reliably damaging mistakes you can make when caring for a gerbera is wetting the leaves when you water.
Gerbera leaves have small, fine hairs on their surface, and water that sits on the foliage encourages the growth of bacteria and fungi that cause brown spots and patches.
This is one reason why the watering-from-below technique described above is so effective for potted gerberas.
If you are watering from above using a watering can or hose, direct the water at the base of the plant rather than onto the foliage.
Avoid using sprinkler systems or overhead irrigation for gerberas for the same reason.
Brown Spots Caused by Fungal Disease
Leaf spot diseases, which cause brown or black spots often surrounded by a yellow halo, are caused by various fungal pathogens that establish themselves when leaves stay wet for extended periods.
The spores of these fungi are present in most soils and in the air around us, but they can only cause infection when the conditions are right, specifically when the leaf surface is wet and temperatures are mild.
Removing affected leaves promptly and disposing of them away from the garden, rather than composting them, prevents the spores from spreading to healthy foliage.
Improving air circulation around the plant by giving it more space and avoiding crowded planting also reduces the risk of fungal leaf diseases establishing themselves.
Overwatering and Root Rot
As described in the wilting section above, overwatering eventually leads to root rot, and brown discolouration of the lower leaves and stems near the soil line is one of the earlier visible signs.
If you notice browning at the base of the plant combined with soft, mushy stems, root rot is the likely cause and the plant needs to be inspected and repotted immediately.
Why Are My Gerbera Daisy Leaves Curling?
Curling leaves are a different problem from browning or wilting, and the most likely cause is pest damage, though disease and environmental stress can also be responsible.
Aphids
Aphids are small, soft-bodied insects that cluster on the undersides of young leaves and on new growth, where they use piercing mouthparts to extract sap from the plant.
As they feed, they inject a toxin into the leaf tissue that causes the affected leaves to curl, distort, and eventually turn yellow.
Aphids reproduce very quickly, particularly in warm weather, and a small infestation can become a significant problem within days if left untreated.
Inspect the undersides of new leaves regularly, particularly in spring and early summer when aphid populations peak.
A small infestation can often be dealt with by spraying the plant thoroughly with a solution of water and insecticidal soap, making sure to cover the undersides of the leaves where the aphids are congregating.
Neem oil, diluted according to the instructions and applied in the early evening to avoid harming pollinators, is also effective.
Avoid applying insecticidal soap or neem oil in direct sun or when temperatures are above 32°C, as this can cause leaf scorch.
Ladybirds and their larvae are natural predators of aphids and an excellent reason to encourage beneficial insects into the garden.
Thrips
Thrips are tiny, narrow-bodied insects that are considerably harder to see than aphids, often barely visible to the naked eye.
They feed by rasping the leaf surface and sucking up the released cell contents, which produces a characteristic silvery or bronze streaking on the foliage alongside curling and distortion.
Heavy thrips infestations also damage flower petals, causing streaking and discolouration that reduces the ornamental value of the blooms.
Treatment is the same as for aphids, using insecticidal soap or neem oil applied thoroughly and repeatedly, as thrips can be more persistent and harder to eliminate completely than aphids.
Whiteflies
Whiteflies are small, white-winged insects that cloud upward in a visible flutter when a plant is disturbed.
Like aphids, they feed on the undersides of leaves by sucking sap, and their feeding causes yellowing, weakening, and eventual curling of the affected foliage.
They also excrete a sticky substance called honeydew, which can develop a sooty black mould on the leaf surface.
Yellow sticky traps placed near the plant catch adult whiteflies and help monitor population levels.
Insecticidal soap and neem oil, applied as described above, treat the immature stages on the leaf undersides.
Powdery Mildew
Powdery mildew is a fungal disease caused by the fungus Golovinomyces cichoracearum and produces the characteristic white, powdery coating on leaf surfaces that gives the disease its name.
The fungal spores thrive in conditions of moderate temperatures, high humidity, and poor air circulation, which is why the disease is particularly common in the UK during mild, overcast spells in late spring and early autumn.
Affected leaves first develop small, circular white patches that expand and merge until the whole leaf surface is covered.
As the mildew progresses, the leaves begin to curl, yellow, and eventually wither.
Unlike most other fungal diseases, powdery mildew actually prefers dry leaf surfaces and high humidity in the surrounding air, rather than wet foliage.
This makes overhead watering less of a contributing factor than it is for leaf spot diseases, though good air circulation is still the most effective preventative measure.
Removing affected leaves promptly and disposing of them away from the garden is the first step.
Improving air circulation around the plant by increasing spacing between plants is important for preventing the disease from taking hold.
Fungicides containing sulphur or potassium bicarbonate are effective treatments for active infections, and there are also several biological controls based on beneficial bacteria that can help manage powdery mildew organically.
If one plant in a group develops powdery mildew, isolate it from the others immediately, as the spores spread readily through the air to neighbouring plants.
Do not wipe gerbera leaves with damp cloths. The fine hairs on the leaf surface are easily damaged by rubbing, and removing them leaves the leaf more vulnerable to environmental stress and disease. Remove affected leaves entirely rather than trying to clean them.
How to Prevent Gerbera Daisy Problems: Full Care Guide
Understanding what caused the problems is only half of the solution.
Getting the core care right from the outset prevents most of these issues from occurring in the first place.
Light
Gerbera daisies need a minimum of six hours of bright light each day to grow strongly and flower well.
In the UK, the best position is one that receives direct morning sun, ideally facing east, which provides the intensity of light the plant needs without the heat stress that intense afternoon sun can cause during warm spells.
A south-facing position works well from autumn through spring when sun intensity is lower, but may need some afternoon shading in the height of summer.
For indoor plants, an east-facing windowsill is ideal.
If the only available window faces south or west, a sheer curtain that filters the most intense midday light will prevent leaf scorch while still providing adequate brightness.
Gerberas kept in positions that are too dark will produce weak, drooping stems, poor flowering, and will be more vulnerable to disease.
Soil and Compost
Gerberas are native to well-drained, sandy soils, and replicating this in cultivation is important for preventing the root rot and crown rot that are so common in poorly drained conditions.
For potted plants, use a high-quality, peat-free multipurpose compost with a generous addition of perlite or sharp horticultural grit to improve drainage and aeration.
A ratio of roughly three parts compost to one part perlite works well.
The ideal soil pH for gerberas is slightly acidic, between 5.5 and 6.5.
Alkaline soils and composts can trigger deficiencies of iron and manganese, visible as yellowing between the leaf veins.
If you are growing in the ground and your soil is neutral to alkaline, working in some ericaceous compost or applying a sulphur-based acidifier before planting will help.
For in-ground planting, choose a position with naturally free-draining soil or raise the bed to improve drainage.
Sandy and loamy soils suit gerberas well.
Heavy clay soils need significant amendment with grit or sharp sand before gerberas will perform reliably in them.
Feeding
Gerberas are moderately hungry plants, particularly when grown in pots where nutrients leach out with regular watering.
Feed potted plants every two to three weeks during the growing season with a balanced liquid fertiliser.
For in-ground plants, feeding every three to four weeks is usually sufficient.
When the plant is actively producing flowers, switching to a fertiliser with a slightly higher potassium content, similar to a tomato feed, encourages continued flowering and strengthens the stems.
Avoid high-nitrogen feeds during the flowering period, as these promote lush leafy growth at the expense of blooms.
Do not feed at all during autumn and winter when the plant is resting.
Temperature and Overwintering
Gerbera jamesonii and its hybrids are not fully hardy in the UK.
They are typically rated as half-hardy perennials, meaning they can survive mild winters in sheltered positions in the south of England, but cannot be relied upon to survive hard frosts.
In most parts of the UK, gerberas grown outdoors should be treated as tender perennials.
Lift pot-grown plants before the first frost and bring them indoors to a cool but frost-free position, such as an unheated greenhouse, conservatory, or cool spare room.
During this dormant period, water only very sparingly, just enough to prevent the compost from drying out completely.
Do not feed during this period.
New growth will resume in spring as temperatures rise and day length increases.
In-ground gerberas in mild areas can sometimes be overwintered in situ if protected with a thick layer of dry mulch over the root zone and, in very cold spells, a layer of horticultural fleece over the foliage.
However, success is not guaranteed in colder parts of the UK, and treating them as annuals and replacing them each spring is a reliable alternative if overwintering proves difficult.
Deadheading and General Maintenance
Removing spent flower heads as soon as they fade is one of the most effective things you can do to encourage continued flowering.
When a plant is allowed to set seed, it diverts energy away from producing new flowers.
Cutting the entire flower stem back to the base of the plant, rather than just removing the head, is the correct technique, as leaving the bare stem in place wastes energy and can be an entry point for disease.
Removing dead and damaged leaves as they appear keeps the plant tidy and reduces the risk of fungal disease establishing itself in decaying plant material.
Old leaves left lying around the base of the plant in particular can harbour fungal spores and should be cleared away promptly.
How to Grow Gerbera Daisies from Seed, Cuttings, and Division
Growing from Seed
Growing gerberas from seed is the most economical method and gives you access to the widest range of varieties.
Seeds are widely available from garden centres and online, and packets are generally good value.
The important thing to know about gerbera seeds is that they lose viability quickly once the packet has been opened.
Use them as soon as possible after purchase, and certainly within the season, as germination rates drop noticeably even after a few months of storage.
Sow seeds on the surface of moist, well-draining seed compost and press them gently in without covering them deeply, as gerbera seeds need light to germinate.
A temperature of around 21°C to 24°C encourages the best germination rates, which typically occur within two to three weeks.
A heated propagator or a warm windowsill is ideal for germination.
Prick out the seedlings once they are large enough to handle and grow on in small individual pots before planting out after the last frost in late spring.
Expect the first flowers in the same year from spring sowings.
Growing from Seedlings
Buying seedlings or young plants from a garden centre is the simplest approach and gives you a known variety from the start.
Young plants purchased in spring will typically flower within their first season.
Handle the roots carefully during planting and do not plant too deeply, as the crown of the plant should sit at or just above soil level and burying the crown is a reliable way to encourage crown rot.
Propagation by Division
Established clumps of gerbera can be divided in spring, which both propagates the plant and reinvigorates older clumps that may have become congested and less floriferous over time.
Lift the clump carefully, tease the root system apart by hand or with two forks placed back to back, and replant the divisions immediately into prepared soil or fresh compost.
Divisions from the outside of the clump tend to establish better than older, central sections.
Propagating Side Shoots
Established plants produce side shoots around their base, which can be separated from the main plant and potted up individually.
Pull back the leaves to expose the base of the plant, identify the side shoot and where it connects to the main crown, and separate it carefully with a clean, sharp knife.
Pot the shoot into moist compost and keep it in a warm, bright position until new growth confirms that it has rooted successfully.
How to Care for Gerbera Daisies as Cut Flowers
Gerbera daisies have an exceptionally long vase life compared to most cut flowers, which is one of the reasons they rank so highly in the global cut flower trade.
With the right preparation, stems can remain fresh and attractive for up to two weeks.
Before placing cut stems in a vase, recut the base of each stem at a 45-degree angle using a clean, sharp pair of scissors or secateurs.
The angled cut increases the surface area available for water uptake and prevents the flat end of the stem from sitting flush against the base of the vase, which would reduce water absorption.
Commercial cut flower food, widely available from garden centres in small sachets, is well worth using.
Dissolve the contents in one litre of tepid water, as the manufacturers specify, before placing the stems in the solution.
Cut flower food contains a combination of sugar to fuel the flower, acidifier to help the stems absorb water efficiently, and biocide to prevent bacterial growth in the water.
After conditioning the stems, place the vase somewhere cool overnight, ideally between 0°C and 2°C if you have a cool garage or porch, before moving it to the display position.
This initial cool period significantly extends vase life by slowing the natural ageing process of the flowers.
Keep the vase out of direct sunlight and away from heat sources such as radiators, which accelerate wilting in cut flowers of all kinds.
Change the water every two to three days and recut the stems each time to maintain good water uptake.
Gerbera Daisy Problems: Quick Diagnostic Guide
| Symptom | Most Likely Cause | Action |
|---|---|---|
| Wilting with wet soil | Overwatering or root rot | Reduce watering, inspect roots, repot if necessary |
| Wilting with dry soil | Underwatering | Water thoroughly and establish a regular schedule |
| Wilting in afternoon heat | Temperature stress | Move to morning sun and afternoon shade position |
| Yellow leaves with wet soil | Overwatering or root rot | Reduce watering, inspect and trim roots, repot |
| Brown, crispy leaf edges | Underwatering or low humidity | Increase watering frequency and raise local humidity |
| Brown spots on leaves | Wet foliage or fungal leaf spot | Water at the base only and remove affected leaves |
| White powder on leaves | Powdery mildew | Improve airflow, remove affected leaves, treat with fungicide |
| Curling leaves with sticky residue | Aphids | Treat with insecticidal soap or neem oil |
| Silvery or bronze streaking on leaves | Thrips | Treat with insecticidal soap or neem oil |
| Yellowing between veins | Iron or manganese deficiency | Apply a fertiliser containing micronutrients or sequestered iron |
| Weak, drooping stems and few flowers | Insufficient light | Move to a brighter position |
| Poor flowering despite healthy growth | Needs deadheading or higher potassium feed | Remove spent heads and switch to a tomato-type fertiliser |
Frequently Asked Questions
Why does my gerbera daisy keep dying?
The most common reason is overwatering leading to root rot, which is often combined with a compost or soil that does not drain freely enough.
Review your watering frequency, ensure the pot has adequate drainage holes, and consider whether the compost mix needs more grit or perlite to improve drainage.
If the plant is in the ground in heavy clay soil, improving drainage through raised beds or soil amendment will make a significant difference.
Why are my gerbera daisy flowers drooping and not standing upright?
This can be a watering issue, as both overwatered and underwatered plants lose the internal cell pressure that keeps stems firm.
It can also indicate insufficient light, which causes plants to produce thinner, weaker stems that cannot support the weight of the flower heads.
Check both the soil moisture and the light levels before taking action.
For cut gerberas in a vase, ensure the water level is not too deep, as only the bottom inch or two of stem needs to be submerged.
Can gerbera daisies survive winter in the UK?
In mild areas of southern England and in sheltered, south-facing positions with well-drained soil, established in-ground gerberas can sometimes survive a typical UK winter with a protective mulch.
In most of the UK, however, they are not reliably winter-hardy and are best overwintered in a frost-free but cool indoor position.
Pot-grown plants should always be brought indoors before the first frost.
How do I get my gerbera to flower again?
Deadhead spent flowers consistently by cutting the entire stem back to the base.
Ensure the plant is receiving adequate light, at least six hours per day, and feed regularly with a balanced fertiliser that includes potassium to support flowering.
If the plant has finished a heavy flush of bloom, give it two to three weeks of good care and new buds will typically appear.
Are gerbera daisies toxic to pets?
Gerbera jamesonii is generally considered to have low toxicity to cats and dogs.
It does not contain the calcium oxalate crystals found in plants like peace lilies or pothos that cause serious irritation.
However, ingesting any plant material can cause mild stomach upset in pets, so it is still sensible to keep plants out of reach of animals that are inclined to chew.
How long do gerbera daisies live?
As perennials, gerbera daisies can live for several years with proper care.
Indoors as houseplants, a well-maintained plant typically has a lifespan of two to three years.
Outdoors in the ground in a suitable climate, established clumps can persist for many years and can be divided periodically to reinvigorate the plants and create new ones.
UK Gardener’s Note
Gerbera daisies are available from virtually every UK garden centre from spring onwards, and the range of colours available in the UK has expanded considerably over the past decade.
The hybrid varieties sold as pot plants in supermarkets and florists are often bred specifically for extended flower longevity indoors and can be a good starting point if you want to try the plant before investing in more specialist outdoor cultivars.
The most important practical consideration for UK growers is the combination of relatively low summer light levels compared to South Africa and the wet, mild winters that encourage root rot in poorly drained conditions.
Getting the drainage right, either through choosing a pot with excellent drainage or amending in-ground soil thoroughly, and maintaining a sunny position, is the single biggest factor in long-term success with gerberas in a British garden.
Final Thoughts
A wilting, browning, or struggling gerbera daisy is almost always fixable once you understand what the plant is telling you.
Start with the watering and drainage, as this resolves the majority of problems.
Then work through light, feeding, temperature, and pests in turn, and most gerberas respond quickly to the right attention.
Get the basics right and you have one of the most spectacularly floriferous plants available for UK gardens, with flowers that bloom from late spring through to the first frosts and a vase life that few other cut flowers can match.
Before you go, you might also enjoy:
- Why Are My Bougainvillea Flowers Dying?
- 5 Great Planting Combinations With Your Agapanthus
- Why Does My Hydrangea Have Small Flowers?
Hi, I'm Matt,
An amateur gardener with a houseplant habit that got slightly out of hand.
I started Bean Growing to share what I've learned from a few years of trial, error, and the occasional dead plant.
I grow a mix of houseplants and outdoor shrubs in the UK but try to expand my knowledge to the US. I try to write about what actually works