
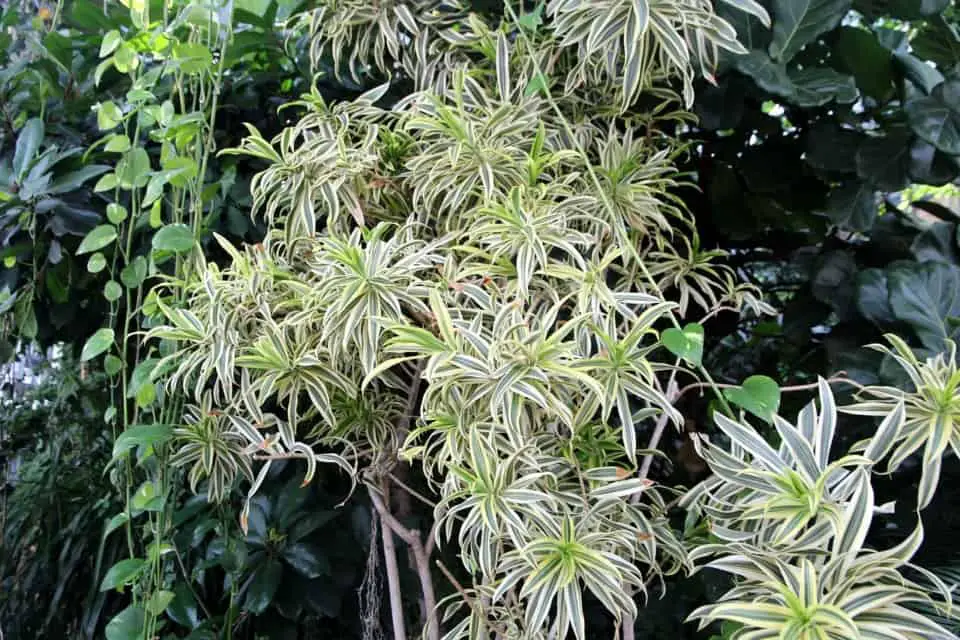
Spider plants (Chlorophytum comosum) typically grow 1 to 2 inches per month during the active growing season, which runs from spring through early fall.
Under ideal conditions, a young plant can reach full size, roughly 12 to 24 inches wide, within one to two years.
Growth rate depends heavily on light exposure, watering consistency, pot size, and temperature.
The single most critical requirement is bright, indirect light; without adequate light, spider plants stall, lose their variegation, and produce few or no offshoots.
If you have ever brought home a small spider plant from the nursery and wondered when it would finally fill out and start producing those satisfying cascading babies, you are not alone.
Spider plants are one of the most popular houseplants in America for good reason: they are forgiving, adaptable, and rewarding.
But understanding how fast they grow, and what you can do to push that growth rate up, makes the difference between a plant that limps along and one that truly thrives.
I have grown spider plants in everything from dark apartment kitchens to bright sunny porches, and the variation in growth rate is remarkable.
This guide walks you through everything that influences spider plant growth so you can get the most out of your plant.
What Is a Spider Plant and How Does It Grow?
Spider plants are herbaceous perennials native to tropical and southern Africa.
In the United States they are grown primarily as houseplants, although in USDA zones 9 through 11 they can survive outdoors year-round.
The scientific name is Chlorophytum comosum, and the most common varieties you will find in American garden centers are ‘Vittatum‘ (white stripe down the center) and ‘Variegatum‘ (white edges with a green center).
Growth in a spider plant happens in two phases. First, the plant builds its rosette of long, arching leaves from a central crown.
Second, once the plant reaches maturity, it sends out long stolons, which are thin stems that dangle from the main plant and produce miniature plantlets at their tips.
These plantlets are commonly called spiderettes, pups, or babies, and they are what give the plant its iconic look.
The root system is equally notable. Spider plants grow fleshy, tuberous roots that store water and nutrients.
These roots expand quickly and are one of the main reasons the plant is so drought-tolerant.
However, those same tuberous roots are also why spider plants become root-bound faster than most houseplants, and a root-bound spider plant slows its leaf growth considerably.
| Did You Know? Spider plants are among the few common houseplants proven by NASA research to reduce indoor air pollutants including formaldehyde and carbon monoxide. Healthier, faster-growing plants are more effective air purifiers, giving you a practical reason to optimize their growth conditions. |
How Fast Do Spider Plants Grow? Growth Rate Overview
In my experience, the most honest answer is that growth rate varies significantly depending on where you live, how your home is set up, and how closely you follow best practices.
That said, here are the general benchmarks based on typical indoor conditions across most of the United States.
| Growth Phase | Expected Rate | Key Driver |
| Spring (March to May) | 1.5 to 2 inches per month | Increasing light hours, warming temperatures |
| Summer (June to August) | Up to 2 inches per month, with spiderettes | Peak photosynthesis, warmth, and humidity |
| Fall (September to November) | 0.5 to 1 inch per month | Declining light, cooling temperatures |
| Winter (December to February) | Minimal or dormant | Low light and cool indoor conditions |
| First year from spiderette | Slow, root establishment priority | Energy directed to root system first |
| Second year onward | Rapid leaf and stolon production | Established root system supports fast growth |
It is worth noting that a spider plant grown in a south-facing window in Texas will outpace the same variety grown in a north-facing apartment in Minnesota during winter by a significant margin.
Region, season, and microclimate all play roles that most growers underestimate.
Factors That Affect How Fast Spider Plants Grow
Understanding what drives growth, and what slows it, puts you in control. There is no single magic fix.
Spider plant growth is the product of several interacting variables, and improving any one of them will nudge growth upward.
Light: The Single Biggest Growth Driver
Light is the primary engine behind spider plant growth. These plants photosynthesize most efficiently in bright, indirect light, roughly 1,000 to 2,000 foot-candles.
Direct afternoon sun, especially through unfiltered south- or west-facing windows, can scorch the leaf tips. North-facing windows typically provide too little light to sustain active growth.
I have found that placing a spider plant about 3 to 5 feet back from a bright south-facing window, or directly in an east-facing window, gives the best year-round results indoors.
A sheer curtain over a west-facing window also works well to diffuse the harsh afternoon sun.
| Grower’s Tip If your spider plant’s leaves are pale green, narrow, or the variegated stripes are fading, the plant is not getting enough light. Move it closer to your brightest window and you should see a noticeable improvement within 3 to 4 weeks. |
Temperature and Seasonal Dormancy
Spider plants grow best between 65 and 80 degrees Fahrenheit. Below 50 degrees, growth nearly stops, and below 35 degrees, cellular damage can occur.
Most American homes stay within the acceptable range year-round, but placement near drafty windows, exterior doors, or air conditioning vents can create cold pockets that suppress growth even in summer.
The plant naturally slows during winter not just because of cold, but because of reduced daylight hours.
This is not a problem; it is normal. Trying to force growth in winter with heavy fertilizing actually does more harm than good.
| Warning Spider plants are sensitive to fluoride toxicity, which shows as brown leaf tips. Many municipal water supplies in the US contain enough fluoride to cause this symptom over time. Use filtered water or let tap water sit overnight in an open container to allow some of the fluoride to off-gas before watering. |
Watering: Consistency Over Quantity
Spider plants are often marketed as drought-tolerant, which is true but somewhat misleading.
They can survive drought thanks to their tuberous roots, but surviving and thriving are different things.
Consistent, moderate watering during the growing season produces much faster growth than the feast-or-famine approach.
Allow the top inch of soil to dry out between waterings in spring and summer. In fall and winter, let the soil dry out more thoroughly, roughly the top 2 inches, before watering again.
Overwatering is one of the most common spider plant mistakes and can lead to root rot, which dramatically stunts or kills the plant.
Soil and Drainage
Spider plants prefer a well-draining, slightly acidic to neutral potting mix with a pH between 6.0 and 7.0.
A standard indoor potting mix works well, but I always add about 20 percent perlite to mine to improve drainage.
The fleshy tuberous roots hold moisture naturally, so soil that retains too much water quickly becomes anaerobic around the root zone.
Pot Size and Root Binding
This is one of the most overlooked factors in spider plant growth. Spider plants grow rapidly into their pots, and once root-bound they shift energy away from leaf production.
A plant that is severely root-bound may stop putting out new leaves almost entirely and instead put all its resources into survival.
On the other hand, planting a spider plant in a pot that is too large can lead to overwatering problems since excess soil retains moisture the roots have not used.
The ideal approach is to repot every 1 to 2 years, moving up one pot size, typically 2 inches larger in diameter, each time.
| Grower’s Tip If you can see roots poking out of the drainage holes or circling visibly around the inside of the pot, it is time to repot. Repotting in early spring, just before the growing season kicks in, gives your plant the maximum runway to grow into its new container. |
Humidity
Spider plants tolerate low humidity better than many tropical houseplants, but they grow fastest in 40 to 60 percent relative humidity.
In dry indoor environments, especially in winter when heating systems drop indoor humidity to 20 to 30 percent, leaf tips brown more readily and growth slows.
A small humidifier nearby or a pebble tray with water under the pot can make a noticeable difference.
Fertilizing
Fertilizing during the growing season accelerates growth.
A balanced, water-soluble fertilizer with an NPK ratio of 3-1-2 or similar, applied at half strength every two to four weeks from March through September, gives spider plants the nutrients they need without the risk of fertilizer burn.
I have had great results with a liquid seaweed fertilizer in spring and then switching to a balanced 20-20-20 fertilizer mid-summer.
| Warning Never fertilize a spider plant in winter. The plant is not actively growing and cannot use the nutrients. Excess fertilizer salts accumulate in the soil and damage the roots, causing brown tips and stunted growth the following spring. |
What You Need to Maximize Spider Plant Growth
The following table outlines the supplies and tools that make the biggest difference for growing spider plants quickly and successfully.
| Item | Why It Matters |
| Bright, indirect light source or grow light | Drives photosynthesis; the primary engine of growth |
| Well-draining potting mix (plus perlite) | Prevents root rot while keeping roots moist enough to grow |
| Pot with drainage holes, 1 to 2 sizes up | Prevents waterlogging and allows root expansion |
| Balanced liquid fertilizer (NPK 3-1-2 or 20-20-20) | Provides nitrogen for leaf growth, potassium for root health |
| Moisture meter or finger-test habit | Takes the guesswork out of watering timing |
| Filtered or distilled water (or overnight tap water) | Reduces fluoride and chlorine buildup that browns leaf tips |
| Small humidifier or pebble tray | Boosts humidity to the 40-60% sweet spot for faster growth |
| Thermometer/hygrometer combo | Helps you monitor the growing environment precisely |
| Sharp, clean scissors or pruning shears | For removing brown tips and harvesting spiderettes cleanly |
Growing Methods Compared: Which Approach Grows Spider Plants Fastest?
Spider plants can be grown in soil, in water (hydroponics), or semi-hydroponically. Each has trade-offs in terms of growth rate, maintenance, and long-term plant health.
| Method | Growth Rate | Best For |
| Traditional soil growing | Moderate to fast with proper care | Long-term growing; best overall plant health |
| Water propagation (spiderettes only) | Slow initial root growth, then fast once potted | Starting new plants from spiderettes |
| Hydroponic/LECA growing | Fast with proper nutrient solution | Advanced growers who want maximum control |
| Outdoor container growing (zones 9-11) | Very fast, often double the indoor rate | Warm-climate growers with outdoor space |
| Outdoor in-ground (zones 9-11) | Fastest possible; can become invasive | Large, naturalized displays in mild climates |
For most American growers indoors, traditional soil growing in a well-lit spot remains the most reliable path to fast, healthy growth.
Hydroponic setups can accelerate growth but require more attention to nutrient levels and pH.
Step-by-Step Guide to Growing Spider Plants as Fast as Possible
Step 1: Choose the Right Starting Point
Start with a healthy plant or a rooted spiderette. A plant with firm, green leaves, no yellowing, and no visible pests will establish itself much faster than a stressed plant.
If buying from a nursery, gently tip the plant out of its pot to check that the roots are white or cream-colored, not brown and mushy, before purchasing.
| Grower’s Tip Spiderettes root faster when they already have small nubbin roots visible at their base before you cut them from the stolon. If you see those little white bumps forming, wait until they are at least a quarter-inch long before detaching the pup. |
Step 2: Select the Right Pot and Soil
Choose a pot with drainage holes that is 2 to 4 inches wider than the root ball of your plant.
Fill it with a mix of two parts standard potting soil and one part perlite.
This ratio retains enough moisture to keep the roots hydrated between waterings while draining quickly enough to prevent waterlogging.
Step 3: Place in Optimal Light
Position your spider plant in bright, indirect light. East-facing windows are ideal for most of the United States because they receive gentle morning sun without the harsh afternoon exposure.
If natural light is limited, a full-spectrum LED grow light set to 12 to 14 hours per day is an effective substitute.
| Grower’s Tip Rotate your spider plant a quarter-turn every week or two. This prevents the plant from leaning heavily toward the light source and ensures all sides grow evenly, producing a fuller, more attractive plant. |
Step 4: Water Correctly from the Start
Water your spider plant thoroughly until water drains freely from the bottom of the pot. Empty the saucer after 30 minutes to prevent the roots from sitting in standing water.
Then allow the top inch of soil to dry out before watering again. In summer, this typically means watering every 7 to 10 days. In winter, every 14 to 21 days is usually sufficient.
| Warning Never let a spider plant sit in standing water in a saucer or decorative pot. Even a few days of waterlogged roots can initiate root rot, which is difficult to reverse. If you use a decorative cache pot, always empty it after watering. |
Step 5: Begin a Fertilizing Routine in Spring
As soon as you see new growth emerging in early spring, begin fertilizing every two to four weeks with a balanced liquid fertilizer diluted to half the label strength.
Continuing through the end of summer and then stopping when temperatures drop and growth slows in fall.
Step 6: Repot When Root-Bound
Check your plant annually. If roots are circling the inside of the pot, escaping through drainage holes, or the plant dries out within a day or two of watering, it is time to move up one pot size.
Spring is the best time to repot, giving the plant an entire growing season to expand into the new container.
Step 7: Manage Spiderettes Strategically
Once your plant matures, it will produce spiderettes on long stolons.
Leaving a moderate number of spiderettes on the plant is fine and attractive, but allowing dozens of them to grow simultaneously can redirect energy away from the main plant.
I usually let four to six spiderettes develop per plant and then harvest the rest to propagate or share.
| Grower’s Tip If you want your spider plant to grow larger and faster rather than produce babies, cut the stolons off as soon as they appear. The plant will redirect that energy back into leaf and root growth, often noticeably accelerating the rate at which new leaves emerge. |
Spider Plant Growth Timeline: What to Expect
The table below outlines a realistic growth timeline for a spider plant started from a rooted spiderette under good indoor conditions in most of the United States.
| Timeframe | What to Expect | Key Milestone | Action Required |
| Weeks 1 to 4 | Minimal visible leaf growth; root establishment happening underground | First new root tips visible if in water propagation | Keep soil slightly moist; do not fertilize yet |
| Months 1 to 3 | One to two new leaves per month; plant settling in | First new leaf from crown confirms establishment | Begin fertilizing at month 2 if showing new growth |
| Months 3 to 6 | Accelerated leaf growth; rosette filling out | Plant doubles in visible size | Ensure pot is not root-bound; adjust watering |
| Months 6 to 12 | Full rosette established; first stolons may appear | First spiderette production in favorable conditions | Consider repotting if roots are visible at drainage holes |
| Year 1 to 2 | Mature plant producing multiple stolons and spiderettes | Cascading, full presentation typical of healthy spider plants | Repot if needed; maintain fertilizing schedule |
| Year 2 and beyond | Ongoing growth; division possible to create new plants | Plant may need division if outgrowing space | Divide and propagate; continue seasonal care routine |
| Real-World Note In my experience, a spiderette started in March under a grow light in my home office in a well-draining mix was producing its first stolon by the following October. That is about 7 months from rooted cutting to stolon production, which aligns with the faster end of the spectrum described above. |
Spider Plant Varieties and Their Growth Differences
Not all spider plants grow at the same rate.
The variety you choose has a meaningful impact on both growth speed and visual result. Here are the most common varieties available in the United States and what to expect from each.
| Variety | Appearance | Growth Rate Notes |
| Chlorophytum comosum ‘Vittatum’ | Green leaves with a central white stripe | Most common; vigorous grower; excellent for beginners |
| Chlorophytum comosum ‘Variegatum’ | White leaf edges with a green center | Slightly slower than Vittatum; striking appearance |
| Chlorophytum comosum ‘Bonnie’ | Curly, twisted variegated leaves | Compact; slower overall growth; ideal for small spaces |
| Chlorophytum comosum ‘Ocean’ | Narrow leaves, cream and green | Moderate grower; handles lower light slightly better |
| Chlorophytum laxum (Zebra spider plant) | Narrow leaves with yellow-white edges | Fast grower but less commonly available in US garden centers |
| All-green (non-variegated) forms | Solid green leaves | Fastest growers among spider plants; more chlorophyll available for photosynthesis |
All-green spider plants grow noticeably faster than variegated varieties because their leaves contain more chlorophyll per square inch.
This is a trade-off: if visual appeal matters most, the variegated forms are worth the slightly slower pace.
Troubleshooting Slow Spider Plant Growth
If your spider plant is not growing at the rates described above, one of the following issues is almost certainly the cause.
I have run into all of these at some point in my own growing, and in each case, identifying the root cause and addressing it directly turned the plant around.
Problem 1: Brown Leaf Tips
Brown tips are the most reported spider plant issue in the United States. They are rarely a sign of a dying plant but they do indicate stress that, if left unresolved, slows growth.
The most common causes are fluoridated or chlorinated tap water, low humidity, over-fertilizing, or salt buildup in the soil.
Switch to filtered or distilled water, flush the soil with clean water every three to four months to remove salt accumulation, and boost ambient humidity if possible.
Problem 2: No Spiderettes Producing
A spider plant that is not producing babies is typically one of three things: too young, getting too much nitrogen, or not root-bound enough to trigger reproductive growth.
Spider plants often produce more spiderettes when they are slightly pot-bound. If your plant is in a large pot with plenty of root room, it may focus on vegetative growth rather than reproduction.
Allow it to become mildly root-bound, and you will often see stolon production begin within a season.
| Grower’s Tip Reducing nitrogen in late summer and switching to a fertilizer higher in phosphorus, such as a bloom booster, can encourage a spider plant to shift from leaf production into reproductive mode and start throwing out more stolons. |
Problem 3: Yellow Leaves
Yellow leaves on a spider plant almost always point to overwatering or root rot. The fleshy roots are susceptible to anaerobic conditions when the soil stays wet too long.
Remove the plant from its pot, trim any brown or mushy roots with sterile scissors, allow the roots to air dry for an hour, and repot in fresh, well-draining mix.
| Warning Do not confuse normal lower leaf yellowing, which happens as older leaves age and die, with systemic yellowing that affects new growth as well. If new leaves emerging from the crown are yellow, this is a sign of overwatering, nutrient deficiency, or root damage that requires immediate attention. |
Problem 4: Leggy or Floppy Growth
When a spider plant produces long, narrow leaves that flop over rather than arching gracefully, it is almost always reaching for more light.
Move the plant to a brighter location. Under sufficient light, new growth will be shorter, firmer, and more upright, giving the plant a denser, more attractive shape.
Quick Reference Troubleshooting Table:
| Problem | Likely Cause | Solution | Timeframe to See Improvement |
| Brown leaf tips | Fluoride in tap water, low humidity, or salt buildup | Switch to filtered water; flush soil; add humidity | 4 to 6 weeks |
| No spiderettes | Plant too young, too much nitrogen, or too much pot space | Allow mild root binding; reduce nitrogen; try bloom fertilizer | One full growing season |
| Yellow leaves | Overwatering or root rot | Reduce watering; repot with fresh soil; trim damaged roots | 2 to 4 weeks after intervention |
| Leggy, floppy growth | Insufficient light | Move to brighter location or add grow light | 4 to 8 weeks for firmer new growth |
| No growth at all | Root-bound, winter dormancy, or root rot | Check roots; repot if bound; wait for spring if dormant | Weeks to months depending on cause |
| Pale or washed-out leaves | Too much direct sun or low nutrients | Move away from direct sun; begin fertilizing schedule | 3 to 4 weeks |
Advanced Growing Methods to Accelerate Spider Plant Growth
Using Grow Lights
For growers in northern states or apartments with limited natural light, a full-spectrum LED grow light is one of the most reliable ways to maintain fast growth year-round.
Set the light timer to 14 hours per day, position the light 12 to 18 inches above the plant, and you will often see growth rates in winter that rival summer outdoor conditions.
| Grower’s Tip LED grow lights that emit in the 3000K to 4000K color temperature range provide a good balance of blue and red spectrum light that supports both compact leaf growth and stolon production. Look for full-spectrum panels marketed for vegetative growth rather than flowering. |
Growing Spider Plants Outdoors in Summer
In most of the continental United States, spider plants can be moved outdoors during the warmer months (once nighttime temperatures reliably stay above 50 degrees Fahrenheit).
Outdoor growth rates in partial shade are dramatically faster than indoor rates because of the increased ambient light, natural humidity, and air circulation.
I have moved spider plants outdoors to my covered porch every May for the past several years.
By the time they come back inside in September, they have often tripled in size and are covered in spiderettes.
The transition back indoors requires a gradual acclimatization period of about two weeks to avoid leaf stress.
Hydroponics and Semi-Hydroponics
Spider plants adapt well to growing in water or LECA (lightweight expanded clay aggregate).
In a hydroponic setup, the roots have constant access to nutrients and oxygen, which can accelerate growth significantly compared to soil.
However, you must monitor the nutrient solution’s pH (ideally 5.5 to 6.5) and replace it every one to two weeks to prevent algae and salt buildup.
Division for Propagation and Rejuvenation
Very mature spider plants, those that have been in the same pot for three or more years, can benefit from division.
This involves carefully separating the root mass into two or more sections and repotting each in fresh soil.
Division both creates new plants and rejuvenates the original by reducing competition for resources at the root level.
Spider Plant Toxicity: Is It Safe for Pets and Children?
This is a topic the majority of search results cover only briefly, so it deserves a dedicated section given how many American households have both spider plants and pets or young children.
| Safety Information Spider plants are classified as non-toxic to humans by the American Society for the Prevention of Cruelty to Animals (ASPCA). However, spider plants are listed as mildly toxic to cats and dogs. Ingesting the leaves can cause vomiting, diarrhea, and mild hallucinations in cats due to compounds that are chemically similar to opioids. The effect is mild and not life-threatening, but it is sufficient to make cats obsessively attracted to and prone to chewing on spider plants. |
| Pet Safety Warning If you have cats, hang your spider plant in a location that is completely inaccessible to them, not just out of reach. Cats are persistent and will jump or climb to reach a plant they are attracted to. The repeated chewing and vomiting cycle, while not dangerous, is unpleasant for both the cat and the owner, and the plant will suffer significant damage. |
For households with young children, spider plants pose no significant risk from incidental contact or small amounts of ingestion.
That said, keeping plants out of reach of toddlers is always a sensible precaution to prevent the plant from being pulled down or damaged.
Frequently Asked Questions About Spider Plant Growth
How long does it take for a spider plant to produce babies?
A spider plant typically begins producing stolons and spiderettes once it reaches maturity, which usually takes one to two years from a rooted cutting under good conditions.
The timing is influenced by how root-bound the plant is, the amount of light it receives, and the time of year.
Plants that are slightly root-bound and grown in bright indirect light tend to produce babies earliest.
Cutting back on nitrogen fertilizer in late summer can also encourage the plant to shift from vegetative growth into reproductive mode.
How big do spider plants get?
Mature spider plants typically reach 12 to 24 inches in height and spread 12 to 24 inches wide when grown in containers.
The cascading stolons can extend another 12 to 18 inches below the pot, making them ideal for hanging baskets.
Spider plants grown outdoors in-ground in warm climates can become considerably larger, with spreads of up to 3 feet or more.
The variety also matters: ‘Bonnie‘ is compact and stays smaller, while ‘Vittatum’ tends to be the largest of the commonly available types.
Can a spider plant grow in water permanently?
Yes, spider plants can survive indefinitely in water, a practice sometimes called hydroponic growing.
The key requirements are clean, non-chlorinated water refreshed every one to two weeks, a container that keeps the crown of the plant above the waterline while the roots are submerged, and a diluted hydroponic nutrient solution added at one-quarter strength.
Without nutrients, a plant in plain water will grow slowly and eventually become nutrient-deficient.
Water-grown spider plants tend to have white, translucent roots rather than the thick, fleshy tuberous roots seen in soil-grown plants.
Why is my spider plant not growing even though it looks healthy?
The most common causes of a healthy-looking but non-growing spider plant are winter dormancy, a severely root-bound pot where the roots have run out of space to expand, or insufficient light.
Check the roots first: if the root ball is a solid mass with little visible soil, repotting into a slightly larger container will often trigger rapid new growth within a few weeks.
If the plant is in an adequate pot size, evaluate light levels and consider supplementing with a grow light during fall and winter months.
Do spider plants grow faster in summer or winter?
Spider plants grow significantly faster in summer. The combination of longer daylight hours, warmer temperatures, and higher ambient humidity during summer creates near-ideal growing conditions.
In winter, most spider plants enter a period of reduced activity or semi-dormancy, particularly in northern states where daylight hours drop below 10 hours per day.
Growers who use grow lights and maintain consistent warmth can maintain moderate growth through winter, but it will rarely match the pace seen in summer.
How do I make my spider plant grow faster?
The four highest-impact actions are: move the plant to the brightest indirect light available, repot it if it is root-bound, begin a consistent fertilizing schedule from spring through late summer, and switch to filtered water if you are using tap water.
Any one of these changes can produce noticeable improvement within a growing season. Combining all four creates the conditions for the fastest possible growth.
Additionally, moving the plant outdoors during summer in most of the continental United States will produce growth rates well above what is achievable indoors.
Is it normal for spider plant leaves to turn brown at the tips?
Yes, brown leaf tips are extremely common and are not an indication that the plant is dying. The most frequent cause in American homes is fluoride in municipal tap water.
Spider plants are among the most fluoride-sensitive common houseplants, and even moderate levels of fluoride accumulate in the leaf tissue and cause tip browning over time.
Switching to filtered, distilled, or rainwater usually resolves the issue within a few watering cycles. Low humidity, overfertilizing, and salt buildup in the soil are other common contributors.
How often should I repot a spider plant?
Most spider plants need repotting every one to two years, though fast growers in small pots may need attention annually.
The clearest signs that repotting is needed are roots escaping through drainage holes, a root ball that is completely solid with little visible soil, or the plant drying out unusually quickly between waterings.
Always move up just one pot size at a time, typically 2 inches larger in diameter, to avoid the overwatering problems that come with excess soil volume around the roots.
Spring is the ideal time to repot, setting the plant up for maximum growth through the season ahead.
Key Success Checklist for Fast Spider Plant Growth
Use this checklist to ensure you have addressed all the major factors that influence how fast your spider plant grows.
- Place your spider plant in bright, indirect light, ideally an east-facing window or 3 to 5 feet from a bright south-facing window.
- Water consistently: thoroughly when the top inch of soil is dry in spring and summer, less frequently in fall and winter.
- Use filtered, distilled, or overnight tap water to minimize fluoride and chlorine exposure.
- Fertilize every two to four weeks from March through September with a balanced liquid fertilizer at half strength. Stop completely in winter.
- Repot every one to two years, moving up one pot size in spring when you see roots escaping the drainage holes.
- Add perlite to your potting mix at about 20 percent by volume to ensure good drainage.
- Maintain temperatures between 65 and 80 degrees Fahrenheit and keep the plant away from cold drafts.
- If growing in low light, supplement with a full-spectrum LED grow light set to 14 hours per day.
- Move the plant outdoors to partial shade during summer if nighttime temperatures are reliably above 50 degrees Fahrenheit.
- Manage spiderettes: leave a moderate number for aesthetics but remove excess ones to redirect energy back to the main plant.
- Check for pests monthly. Spider mites and mealybugs are the most common threats and should be treated promptly to prevent growth setbacks.
- Flush the soil with clean water every three to four months to remove accumulated fertilizer salts.
Final Thoughts
Spider plants are genuinely one of the most satisfying houseplants to grow once you understand what drives their growth.
They are forgiving, they are beautiful, and when conditions are right they grow fast enough to reward even impatient growers.
The most common reason spider plants disappoint is not neglect but misinformation: too little light, water from a fluoridated tap, a pot they outgrew two years ago, and a fertilizer routine that extends through winter.
Address the fundamentals and your spider plant will respond.
In my experience, even plants that have been struggling for years will turn around within a single growing season once they are moved to better light and repotted into a fresh mix.
There is a real satisfaction in watching a plant you have given the right conditions start producing stolon after stolon, each tipped with a tiny plantlet that you can root and give to friends.
It is the kind of plant that starts a collection.
| What’s Next Now that you understand what drives spider plant growth, your next step is to propagate your own plants from spiderettes. Once your spider plant starts producing babies, rooting them in water or soil is straightforward and rewarding. From there, you can explore growing a full hanging basket display, experiment with growing your spider plants outdoors in summer, or try your hand at dividing a mature plant to create multiple specimens. Each of these steps builds on the foundation you have established here. |
Mariel is a plant enthusiast and writer based in the UK with a passion for houseplants and indoor growing.
She has spent the last few years building an ever-growing collection of indoor plants and learning the hard way which ones will survive her busy schedule.
At Bean Growing she writes about houseplant care, common plant problems, and outdoor gardening.